This product has been discontinued by the manufacturer. It's been replaced by the Garmin Forerunner 945, you may want to check out that review instead.
Major Update: June 25th, 2009(I’ve completely revamped and updated this review (my most popular) to add in a ton of information about accessories, updated software and additional thoughts about the device itself now that I’ve had it nearly two years. After such a long time, it’s still my primary training device)
It’s no secret that I love my 305. I originally wrote up this ‘review’ back in May 2007 a few weeks after I first got the Garmin Forerunner 305 – but never published it outside a small circle of friends. I published the original version online in the Fall of 2007, and after using the device for nearly two years now as my primary training device, I’ve now updated this review with a ton of information.
Since buying it I’ve used it a ‘couple’ of times. As of June 2009 that’d officially be for 363 runs, 112 outdoor bike rides (in Aug 2008 I started using the Edge 705 for cycling primarily), 24 open water swims, and a few dozen airplane rides, hikes and other random things. Of course, while I don’t know everything there is about it – I have a pretty solid grasp of pretty much everything it can do. So based on that, I’ve put together this review – as well as all the answers in the comments section (closing in on almost 200 of them!). As for the level of detail…well, that’s just my DC Rainmaker way of doing things. Plus, if you think this is detailed…you should check out my Forerunner 310XT review…
That said, I feel pretty confident I know the watch pretty well. So with that…onwards!
The box:
Inside the box there are a number of components, but of course, the major item is the watch itself and the cradle to sync/charge with.
In addition to the watch, you’ll find a secondary wrist strap for those with smaller wrists (and a tool to change it), as well as a power charger (wall), and a USB charger. And of course a bunch of paperwork and software. One neat feature is the USB charger plugs into the wall charger, which means that you can also use that wall charger for charging basically any USB device (like your iPod). Just a minor little benefit.
Here’s the wall charger unit, and the USB charger unit:
One advantage to note with the 305 charger unit over that of the 405 unit is that the 305 charger sounds ‘clicks’ into place, whereas the 405 tends to fall out a bit easier of jostled. A minor nit, but something worthwhile mentioning.
The cradle uses a small mini-USB connector on the ‘dock’, which connects to your computer via standard USB. The nice part is the cable is your standard digital camera USB cable – so you don’t have to carry multiple cables on trips. Your computers connects to this small dock (pictured below), which the device clicks into. Way easier and faster than the IR connect with the Polar devices IR connector. I was concerned about having to tote another cable around in my bag, so having it be the same is awesome.
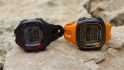
Many folks look at the device itself and wonder ‘is it too big?’. And at first glance, you might think it is. But for every friend who’s picked one up, all of them have found that the feeling of a large thing on your wrist goes away after about 30 seconds of running. To compare different device, here’s a picture of the Forerunner 305 next to the Forerunner 405, next to my standard Nike wristwatch. As you can see, the 405 is a bit smaller, though it lacks some of the features of the 305. Read my full write-up on the 405 for all the deets there.
With that, let’s get going on using the device. After all – that’s what we got it for!
Getting Started
Prior to the 305, I used a Polar 625X for a month (before I returned it). In comparison to the Polar and calibration, the setup of the 305 is a breeze. Basically you turn it on (after a short 3 hour charge) and it asks three questions Monty Python style:
1) What is your quest (US or Metric)?
2) Do you have a separate food pod (Y/N)?
3) Do you have a cadence sensor (Y/N)
After that, you’re done. At this point, you’re ready to start. No further calibration or dinking with is required.
I immediately went outside and went for a short half mile walk to check it out. Before I even got down three flights of stairs it had already picked up the satellites (inside) and was more than ready to go by time I got to my front door. The buttons are a little more clear in comparison to the 625X. Basically the two you actually care about are on the front (Lap, Start/Stop). The right hand side buttons are dedicated to changing the view or data displayed. The left hand buttons control a backlight (also On/Off), as well as the Mode button for navigating the menu system.
Of course, the real action is when you’re out and about exercising. So let’s jump into it by sport.
Using it while on the run….
Like most running watches (GPS or foot pod), it will give you pace as you go along. If you’re in ‘run’ mode, it will show it to you in minutes per mile (or KM per mile), if you’re in bike mode it will show it to you in MPH. These are all changeable and switchable to metric. When in operation, the watch gets divided in up to four quadrants to display information (depending on how you configure it). I typically run with pace, heart rate (HR), distance and lap time.
The pace is generally pretty accurate, though you’ll see slight variations as you run along – no worries though, it all evens out in the software. I generally don’t have any issues in normal trees and shorter buildings, though sometimes if I run right alongside taller buildings it will temporarily drop the connection. But if it does temporarily ‘lose you’, it will recalculate your pace/distance based on last known location. Meaning if you’re traveling in a straight line (like a street) and you lose signal – it figures out where you most likely went and interpolates. You generally don’t notice this on the watch itself unless your constantly looking at it – and again the software later on simply does math between the two points.
One other feature to call out is the ability to race against at ‘little man’ at a given pace (called Virtual Partner). This is a software feature on the watch that shows you how far ahead/behind you are compared to the little man (like racing a real person) Though I don’t use it much (as I train mostly based on heart rate), it is a neat way to motivate yourself if you’re training solo.
While this applies to cycling as well as running, you can also program workouts into your watch. This allows you to for example say “Keep a 8:00/mile pace for 2 miles, then switch to a 7:30/mile pace for the next two miles”, etc… You can also do it based on HR or HR zones. I use this all the time on the bike during races. It will beep at you when you fall out of the prescribed workouts. I put together a detailed ‘How to’ guide on this back a bit ago, which can be found here.
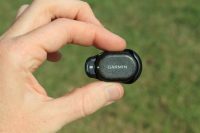
One accessory you can get for the 305 that’s applicable to running is the Garmin footpod. This footpod allows you to run indoors on a treadmill and still give accurate pace and distance data to the Garmin (any Garmin device, 305/310XT/405/410, etc..). This is also great outside though for looking at your running turnover as it records that as well. Below is a picture of it, it simply laces up inside your shoe laces. Note that they have significantly updated the Footpod around the time the 310XT was released to be much much smaller, and you can pick the new version up instead and it’s compatible with the 305. I have a ton of pictures of it in my 310XT review.
And here’s what some turnover data looks like in an interval set I was doing:
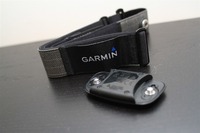
The last running accessory I’ll mention is the heart rate strap. This is of course applicable to many sports/activities, but since running is first – I’ll mention it here. Heart rate monitors help many athletes (including myself) to train based on particular zones, ensuring we aren’t training too hard (which happens a lot) or not training hard enough (also possible). The strap has a rubber portion that goes on your front side, and a fabric band that wraps around you. It’s easy to wash the fabric portion and the whole thing transmits wirelessly to the 305. The battery in it has thus far lasted me two years, so it’s pretty long lasting. Though, it’s easy to swap out if you have to.
On the bike….
One of the major differences between a typical bike computer and something like the Garmin is that at the end of the ride a typical bike computer will only tell you that you went X number of miles. Whereas the Garmin will tell you exactly WHERE you went, and tons of other useful info – like hills, pace changes, HR history, etc…
Of course, out of all of these, perhaps the most fun item is to simply see where you went on a ride. Here’s one I did in Seattle some time back:
Though, from a training perspective one of the most valuable features is being able to analyze the ride afterwards. To start with, being able to easily split up my ride based on different parts of the ‘course’. For example – the first few miles of many of my long rides are getting out of the city streets and onto established trails – these first few miles are usually considerably slower due to stoplights. Being able to break my ride into ‘warm-up’ and ‘workout’ is fairly helpful when evaluating my pacing over time (months). Another important factor is considering altitude changes into a ride, you may not realize for example that you’re on a false flat – and after a number of miles you’ve gained significant altitude, thus slowing your pace without making it obvious to you.
It’s pretty amazing to look at total ascent/decent, which includes the tons of times you go up and down small hills. Beware though that it’s best to use some of the altitude correction features available in software such as Sports Tracks as the native altitude sensors within the device are a bit ‘liberal’ due to using GPS elevation instead of a barometric altimeter. So sometimes it’s a bit off.
With the 305 you have two basic options for mounting it to your bike. The first option is to simply affix the watch using the wrist strap to the bike itself. This is fine for most uses, but the rubber strap is kinda hard formed plastic and thus it might loosely spin around a bit on the handlebar. The better option is to use the fabric wrist strap that’s part of the quick release kit or just simply use the bike mount, which is very cheap compared to most other accessories.
The bike mount is pictured below, and the detachable fabric strap is pictured below that:
Finally, you can also purchase a Cadence Sensor for the back of the bike. This actually has two features – the first is to help you monitor your cadence and the second is to monitor your speed in case you go into a tunnel or if you’re just simply indoors on a trainer. The cadence meter has three parts, one is a typical spoke magnet – just like any old bike computer. The second is a crank magnet – again, just like any old bike computer. And the third is the thing that sits between the two to read the passes from both of them. This then wirelessly transmits it to the Garmin 305 (or any other Garmin device you may have).
Summary of accessories:
Here’s a quick table of all the accessories offered (or that work with) the Garmin 305:
In short, you can actually use the GPS features during open water swims – I wrote up a long post on all the details about it – so go here. But essentially you place the 305 into your swim cap (usually in a tiny Ziploc plastic baggie) and it’ll track your progress. However, the HR strap won’t generally work (at least consistently). The Garmin 305 specifies a underwater rating to allow it 30 minutes of time submerged at 1 meter – which is more than enough depth for your average open water swim (unless you plan to dive with it). By using a waterproof Ziploc, you in effect extend the time to cover longer swims.
The new Garmin Forerunner 310XT now had a much longer waterproofing time built into it, and can go down to 50m. But the same principal applies – it still must be placed in your swim cap should you want it to track your route. This is because while on the arm it will produce sporadic results. The key benefit the 310XT offers is it doesn’t require a plastic baggie and is better designed for the water – minimizing some situations where 305’s have been killed through extended water submersion.
In the woods hiking…and other random things
I was up hiking in the Shenandoah National Park (instead of cycling for once) and did a very short (1.4mile) trail hike. It was basically through wooded terrain down a ravine following a waterfall. The Garmin stayed on track and was dead on with the measurements compared to what the National Park Service said the length would be. I also never lost signal in the woods. Granted, these were wimpy East Coast woods without tall pine trees like the West Coast – but a good sign nonetheless. It gave us the same distance going up as when we went down. That’s good. However, I have found that running (or even worse – mountain biking) with tons of switchbacks tends to cause device confusion in heavily wooded areas. You can increase the frequency of position updating – but at a serious hit to your battery. Given how rare I use it in deep trees, I’m not worried.
Of course, hiking is just the tip of the spear with all the fun you can have with it. How about turning it on and tracking a flight to the other side of the world?
Yup, I’ve done that a few times. And even though the battery only lasts 10 hours, you can easily extend that to well over 24-36 hours with this cheap little $15 device that I wrote about.
I’ve also used it to Geotag photos that I’ve taken while being a tourist. I simply download the GPX file(s) afterwards, spit it through some software and I’m good to go, all my photos are quickly tagged with their exact location. Lots of fun stuff you can do with it.
The major difference between a watch like the 305/310 and some of the other models like the 405/410 is multisport mode. This means that you can switch between sports seamlessly in a triathlon. Instead of having to change in the menu’s that you’re going from bike to run and to somehow include a transition time, it will automatically do it for you with a simple touch of the lap button.
I wrote up a big ole How To on using the Forerunner 305 in triathlons that you can read through here.
Software Options:
The first edition of this review focused heavily on the software side, and I’ve kept all of that below and have updated it quite a bit to reflect all the changes in the past two years. I think it’s the software and what you can do with it more than the device itself that makes the 305 (and most Garmin devices) special. In many ways, most of the GPS based devices all dump to GPX files and all do ‘basically’ the same thing: They track where you went and the exact point in time you went there. From that – you can do a million different analytical things with that simple raw data. It’s how you utilize the software and the data that really determines if it will be a useful tool in your training or racing.
Ok, like the Polar – the native software is the weak spot. However, unlike the Polar, 3rd parties have created tons loads of software for GPS based devices (based on the GPX standard, as well as the Google standards of KML/KMS). Sure, many of these same software suites also allow importing from Polar devices (including the GPS enabled ones), but unless you have GPS data – most of what you can upload is sorta blah an unexciting.
Included Software: Garmin Training Center
I would actually say that the Polar’s native desktop software stuff is slightly better than Garmin’s default Training Center Software. Below is a screen shot of the default Garmin Training software. This was an example of my run. You’ll note it has the usual split information at the top. I did manual splits at my mile markers (plus some other points). You can also set it to auto-split on the mile. The top line gives you the average. The part I hate about the software is the left pane. You can’t customize anything – in particular, the names of your runs. Sorta annoying. The only thing you can do is create new folders to stick stuff in. It does map as well, but it isn’t worth the 100K JPEG image for the map screen shot since it uses a 17th century map of Virginia, no satellite imagery or anything else. The graph mapping is just so-so, pictured below. You can’t change the scales, so when it makes a random mistake (such as that sky-high blue line showing me doing a 35 minute pace for 1 second), you can’t correct for it. You also can’t manually modify data points (corrections) in this software. In general you won’t use this software for much of anything, and Garmin’s noted that it’s basically end of life and replaced with Garmin Connect (which I’ll talk about in a minute).
I use this software exclusively now – because it rocks and it’s 100% free. It shows me my route, as well as the usual HR/Pace/cadence/splits. It’s also got the ability to name runs and group things however I choose. Lastly, it can easily export to .gpx and .kml – unlike the GTC (Garmin Training Center). As noted in the clicked drop-down, you can easily change map types. Because screen shots are so much cooler than words – I shall simply include a few screen shots below.
(A general view of a run, each of the panes next to the map has different interchangeable views) (A view of one of the many pre-canned reports – showing total mileage for each week, you can also create your own reports)
Web Based Software: MotionBased.com (Free, although more advanced features are offered for a fee)
While I mention MotionBased, you should know that as of July 2009 it’s basically going away – though it’s replaced by Garmin Connect (more on that below).
This is an online (and far more advanced) variant of the inbox Garmin Training Center stuff. You have two options to get data onto the site – the first option is install a small application (they call it ‘agent’) that grabs it off the Garmin and pushes it to the web site. The second option is manual upload. Agent is painless and easy. Takes a few seconds to set up and it automatically uploads any workouts not already uploaded. I’m using the purely free version.
The cool thing about the MotionBased software is the ability to share out a ‘public’ section of the site. This is useful if you go for a run/ride/whatever with friends and want to show them the route afterwards – or if you just want to share a route in general. One really advantageous thing with MotionBased is using the site to find runs/rides in areas you aren’t familiar with. Below is a quick screen shot of one of the pages, along the left hand side you can select other view panes.
Given that MotionBased is all but retired now, for the most part you’ll want to focus on Garmin Connect instead…which is below:
Garmin Connect is Garmin’s answer to MotionBased…after they bought MotionBased. Not really fully operational with all devices until mid-2009, it’s been a long work in progress. But Garmin Connect is without a doubt Garmin’s direction moving forward as far as how and where Garmin device users should manage their athletic data.
Garmin Connect utilizes a small web agent that is installed on your computer to upload data (PC or Mac) from your Garmin devices to a website that you can then poke and prod at your run/bike/activity. You’ll see many of the same functionality that you saw in MotionBased, but just with a prettier interface. Over the past year Garmin has improved it quite a bit and eliminated many of the bugs, but I do find that it’s still a bit buggier than it should be for a primetime application that’s been around this long (dropped connections, web server errors, etc…). To use it you simply connect your Garmin Forerunner 305 to your computer and navigate to the site where you click Upload, at which point it will connect to the device and grab your activities. Simple and straightforward.
It also does handy things like inform you of upcoming firmware updates:
Like MotionBased, you can share activities with friends and analyze activities as well. And as of June 2009, Garmin now supports all fitness devices on Garmin Connect (when it was first rolled out, it was only the newer devices).
It also can do a bunch of nifty reporting and allow you to export out your workouts as well.
Finally, like MotionBased, Connect also offers a great way to find routes in other cities through the Explore tab, allowing you to search for runs/rides/activities by city and/or name – perfect for when you are travelling and want to find a good running route. Though at the moment, Motion Based is much more powerful in this area, as you can see below for my search for Boston Marathon, the results…kinda suck:
In general, Garmin Connect is a good way for the casual user to easily house all of your workouts online, without worrying about losing everything if your computer dies. But I find that for my purposes, much of the in depth analysis that I want to do is still lacking (hence why I generally use Sports Tracks or Training Peaks).
Training Peaks is a web based software very similar to Garmin Connect, except it offers a bit more of a holistic view of your training plan. The web based software is offered in a free version and a subscription version, which are detailed here. In addition, there is also a downloadable software package called WKO+, but I haven’t played with it too much as it costs quite a bit.
One of the major reasons athletes use Training Peaks is to communicate training data to their coaches. Training Peaks is unique in that Coaches can easily track multiple athletes from inside a console of sorts, and thus can see uploaded data from the athlete – including their Garmin 305 data.
To upload data you use a small piece of software called the Device Agent, which connects to your Garmin 305 and then grabs the data (it doesn’t delete it, it stays there).
Then, once on Training Peaks, you can view the data and modify the workout descriptions (amongst a host of other options).
In general, Training Peaks is a great way to share workouts with your coach or analyze/track your entire workout/training program (including stuff like calories, resting heart rate and sleep). For me, it’s my primary training log between me and my coach.
The downloadable version of Google Earth rocks. While not as useful for directly viewing athletic data (such as your HR or pace), it’s great for looking at your routes. You can easily export directly from either Motion Based or Sport Tracks to Google Earth and have it automatically open up for you. It’s like having the online Google Earth offline. You can cache up to 2GB of imagery on your local machine for review offline. I downloaded a small utility for pre-caching a specific area (such as all of DC) so I could look at stuff on the plane if I wanted to.
The downloadable Google Earth is free. Above and below are screen shots of it (above uses the Blue Marble NASA overlay to make it look really pretty). It will also do flyovers of your route if you click the play button on the left hand side. The cool part is tons of people have uploaded KML files for just about everything. For example, I found a .zip file with about 100 DC bike routes in KML format to load into Google Earth. From there I can easily examine potential bike routes (or any route).
(An example of a file containing all the bike routes for the DC area, I uploaded it here)
At this point, if you made it this far and still aren’t sure – I’d just go to a local store – pick one up, and give it a shot. ;) If after 30 days you don’t like it, you can easily return it (which is what I did with my Polar). But, I think when you combine it with software – you’ll find it’s quite a blast to play with and analyze data.
I’ve found that by using it I’ve been able to more accurately train and race, especially when I’m concerned with pacing (either via heart rate or speed). I’ve found the cadence meter to be hugely helpful in my cycling, and the pace meter while running very useful for long runs and helping me to keep from going to fast in the beginning.
In short and in summary, I can’t recommend it enough.
Over the past 2 years, I’ve posted a TON of Garmin 305 and related posts, here’s a short list of things you may want to check out-
Finally, if you’re looking at the Garmin 310XT or the Garmin Forerunner 405 as an option – you’ll want to check out my reviews of both of those (they’re even more detailed than this…).
Hopefully you found this review useful. At the end of the day, I’m an athlete just like you looking for the most detail possible on a new purchase – so my review is written from the standpoint of how I used the device.
Unlike other Garmin Forerunner watches, the 305 comes in one simple flavor with the watch and the classic style heart rate strap all included in box. This goes for about $150 these days (the exact price fluctuates based on moon phase and tidal currents). If you found this review helpful in your purchasing decision, you can support future reviews like this (or my weekend race fees) by using any of the Amazon links (accessories list above or the units themselves). The reviews generally take 20-40 hours to put together, so it’s a fair bit of work (and labor of love).
As you’ve seen throughout the review there are numerous compatible accessories for the unit. I’ve consolidated them all into the below chart, with additional information (full posts) available on some of the accessories to the far right. Also, everything here is verified by me – so if it’s on the list, you’ll know it’ll work. And as you can see, I mix and match accessories based on compatibility – so if a compatible accessory is available at a lower price below, you can grab that instead.
Thanks for reading! And as always, feel free to post comments or questions in the comments section below, I’ll be happy to try and answer them as quickly as possible. Further, you can always e-mail me at the address on the sidebar. And lastly, if you felt this review was useful – I always appreciate feedback in the comments below. Thanks!
Finally, if you have a Garmin device or are looking at the 305 – I’ve written up a ton of helpful guides around using these devices, which you may find useful. These guides are all listed on this page here.
I swim, bike and run. Then, I come here and write about my adventures. It’s as simple as that. Most of the time. If you’re new around these parts, here’s the long version of my story.
You'll support the site, and get ad-free DCR! Plus, you'll be more awesome. Click above for all the details. Oh, and you can sign-up for the newsletter here!
Here’s how to save!
Wanna save some cash and support the site? These companies help support the site! With Backcountry.com or Competitive Cyclist with either the coupon code DCRAINMAKER for first time users saving 15% on applicable products.
You can also pick-up tons of gear at REI via these links, which is a long-time supporter as well:
Alternatively, for everything else on the planet, simply buy your goods from Amazon via the link below and I get a tiny bit back as an Amazon Associate. No cost to you, easy as pie!
You can use the above link for any Amazon country and it (should) automatically redirect to your local Amazon site.
While I don't partner with many companies, there's a few that I love, and support the site. Full details!
Want to compare the features of each product, down to the nitty-gritty? No problem, the product comparison data is constantly updated with new products and new features added to old products!
Wanna create comparison chart graphs just like I do for GPS, heart rate, power meters and more? No problem, here's the platform I use - you can too!
Think my written reviews are deep? You should check out my videos. I take things to a whole new level of interactive depth!
Smart Trainers Buyers Guide: Looking at a smart trainer this winter? I cover all the units to buy (and avoid) for indoor training. The good, the bad, and the ugly.
Check out
my weekly podcast - with DesFit, which is packed with both gadget and non-gadget goodness!
Get all your awesome DC Rainmaker gear here!
FAQ’s
I have built an extensive list of my most frequently asked questions. Below are the most popular.
You probably stumbled upon here looking for a review of a sports gadget. If you’re trying to decide which unit to buy – check out my in-depth reviews section. Some reviews are over 60 pages long when printed out, with hundreds of photos! I aim to leave no stone unturned.
I travel a fair bit, both for work and for fun. Here’s a bunch of random trip reports and daily trip-logs that I’ve put together and posted. I’ve sorted it all by world geography, in an attempt to make it easy to figure out where I’ve been.
The most common question I receive outside of the “what’s the best GPS watch for me” variant, are photography-esq based. So in efforts to combat the amount of emails I need to sort through on a daily basis, I’ve complied this “My Photography Gear” post for your curious minds (including drones & action cams!)! It’s a nice break from the day-to-day sports-tech talk, and I hope you get something out of it!
Many readers stumble into my website in search of information on the latest and greatest sports tech products. But at the end of the day, you might just be wondering “What does Ray use when not testing new products?”. So here is the most up to date list of products I like and fit the bill for me and my training needs best! DC Rainmaker 2024 swim, bike, run, and general gear list. But wait, are you a female and feel like these things might not apply to you? If that’s the case (but certainly not saying my choices aren’t good for women), and you just want to see a different gear junkies “picks”, check out The Girl’s Gear Guide too.


