
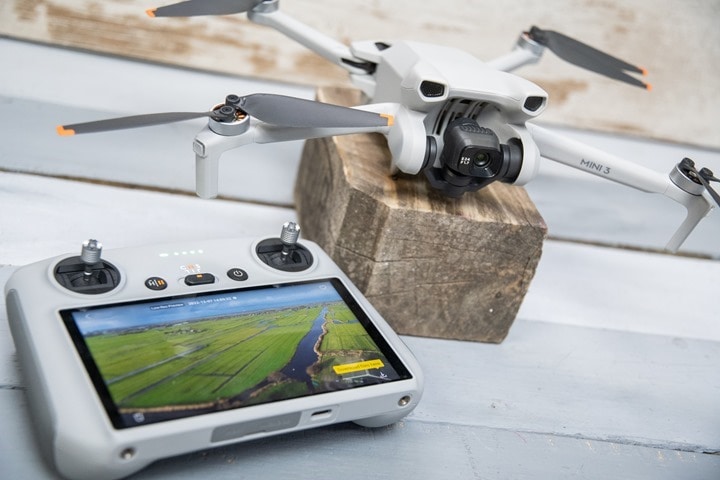
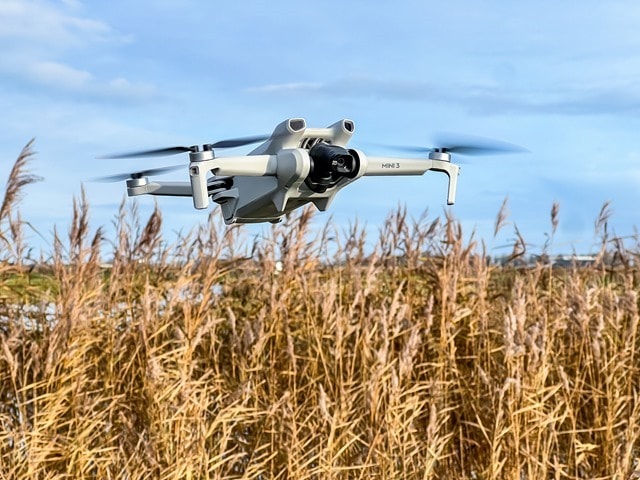
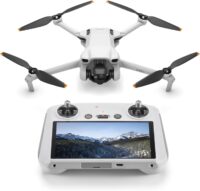
Today DJI has announced their latest (and least expensive) drone, the DJI Mini 3. This variant takes elements of the previous DJI Mini 3 Pro unit launched this past spring, and packages it up at a $469 price point – which is one of the cheapest price points a drone has ever been launched at from DJI. Albeit, that $469 is without the remote, but if you’ve already got a compatible DJI remote, then this option will save you some money (full pricing down below).
The DJI Mini 3 upgrades a number of features over the Mini 2, in particular by taking the entire camera design/gimbal from the Mini 3 Pro, which has native vertical shooting (meaning the whole camera gimbal rotates 90°), while also improving low-light performance with the new F/1.7 lens. Additionally, it’s got substantially increased battery life – up to 38 minutes with the regular battery, and up to 51 minutes with the higher capacity ‘Plus’ battery.
Of course, the lower price point of the Mini 3 compared to the Mini 3 Pro means a few things didn’t make the cut. Notably, this version has no obstacle avoidance sensors, nor ActiveTrack. It does still retain QuickShots (which has elements of ActiveTrack in it, as I show down below in the ‘Sports’ section). Additionally, the Mini 3 (base) lacks higher frame rates like 4K/60fps and 1080/120fps, while also lacking the higher 48MP still photo mode. All of the differences are outlined in the next section, however.
Now I’ve been putting the Mini 3 through its paces, seeing how it handles in a variety of conditions – including even 50KPH winds. In doing so aiming to figure out where it works well, and what features need a bit of love. This unit is a media loaner from DJI, and assuming I don’t end up killing it in a canal or ocean surf, it’ll go back to DJI shortly. If you found this review useful, you can use the links at the bottom, or consider being a DCR Supporter, which gets you exclusive behind-the-scenes content and an ad-free experience here. Plus, it makes you awesome.
What’s New:
Generally speaking, most companies release a ‘next model’ of a product, and then maybe down the road they add a ‘pro’ variant. Or, they release both at the same time. But in this case, DJI actually already released the DJI Mini 3 Pro this past spring, which was, on paper, the successor to the DJI Mini 2. However, in practice, it was more like a DJI Air 2S replacement, offering more and better features in almost every category.
So, I’m splicing this section up into two parts – what’s new compared to the DJI Mini 2, and what’s new compared to the DJI Mini 3 Pro. First though, for context, here’s the pricing with the three remote options:
DJI Mini 3 (no remote): $469/489EUR/439GBP
DJI Mini 3 Pro (no remote): $669
DJI Mini 3 with RC-N1 remote controller: $559/579EUR/519GBP
DJI Mini 3 Pro with RC-N1 remote controller: $759
DJI Mini 3 with DJI RC: $699/749EUR/669GBP
DJI Mini 3 Pro with DJI RC: $909
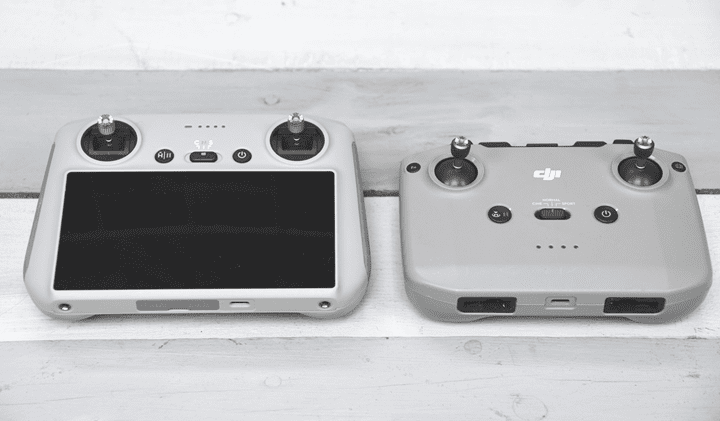
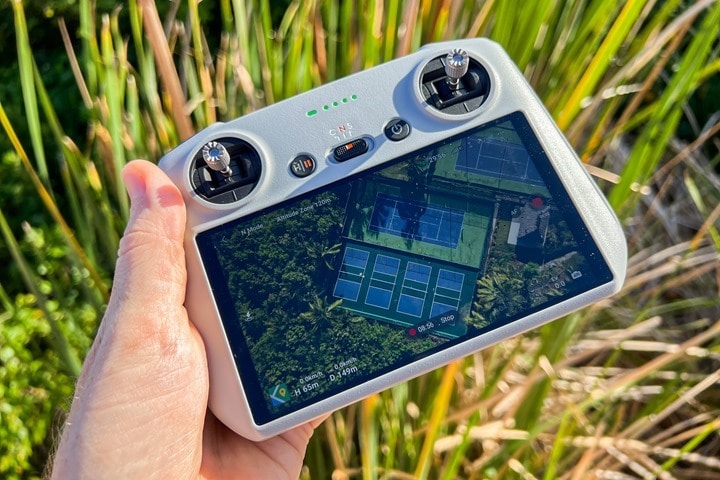
The DJI RC-N1 is the remote you use your phone with, the DJI RC is the one that has the screen built-in (no phone required). At this time, the DJI Mini 3 is not compatible with the DJI RC Pro (the super high-end remote), though I wouldn’t be surprised if that changes down the road. Here’s the two controller options (left: DJI RC, right: DJI RC-N1)
Anyways, here’s what’s new or notable compared to the DJI Mini 2:
– Increased sensor size from 1/2.3” on Mini 2, to 1/1.3” on Mini 3
– Increased aperture from f/2.8 on Mini 2 to f/1.7 on Mini 3 (increased low-light performance)
– Increased battery time from 31 mins to 38 mins with base battery, and 51 mins with Plus battery
– Added rotating camera gimbal for native vertical shooting (can shoot either horizontal or vertical by tapping a button to rotate camera)
– Added QuickShots support in Vertical format/mode
– Increased camera gimbal to rotate upwards 60° (Mini 2 was limited to 20°)
– Increased camera gimbal mechanical range further in all directions (to better handle wind)
– Increased to 4K HDR video (previously just ‘regular’ 4K video)
– Still has QuickShots (but no Asteroid option like Mini 3 Pro)
– Still 249g using the regular battery (but heavier using Plus battery for longer battery life)
– Still same wind resistance level official spec of 24MPH/38KPH (higher in real life)
– Still has downwards ground detection sensors (mainly used during landing)
– Still has interval/AEB/Panorama photo shooting modes, including dual JPEG/DNG (RAW)
As you can see, it’s quite the list. However, where it gets even more interesting is on the comparison to the DJI Mini 3 Pro:
Compared to Mini 3 Pro:

So in the above video, I go through each of the 17 differences beween the two drones. Though, it ends up being closer to about 20ish differences. Still, below are the key differences compared to the DJI Mini 3 Pro. Note that there’s a solid gap between what’s listed on DJI’s marketing pages, and what’s actually different in real life. Lots of little things aren’t listed on the DJI site that I’ve tried to cover below. Here’s what’s missing from the DJI Mini 3 compared to the Mini 3 Pro:
– No front/back obstacle avoidance sensors (thus, no APAS)
– No 10-bit recording
– No 48MP photo mode (still has 12MP photo mode)
– No ability to change recording format (e.g. H.264 vs H.265)
– No ability to change color profiles (e.g. Normal to D-Cinelike)
– No 4K/60FPS frame rate options (tops out at 4K/30FPS)
– No 120FPS options (tops out at 2.7K/60FPS)
– No MasterShots automated shooting reel
– No ActiveTrack or FocusTrack modes
– No Timelapse or HyperLapse modes
– No QuickShot Asteroid Mode (but still has other QuickShot modes like Dronie/etc…)
– Stronger video transmission via DJI O3 (up to 12KM versus 10KM on Mini 2/3)
– Better live view controller performance (1080p on DJI Mini 3 Pro, versus 720p on DJI Mini 3)
Got all that? Good, let’s get rolling.
In the Box:
Now depending on which version you get, you’ll get different things in the box. Roughly speaking though, there are three categories of the Mini 3:
A) Drone only: Drone, battery, charging cable
B) Drone with remote: Drone, battery, remote of choice, charging cables
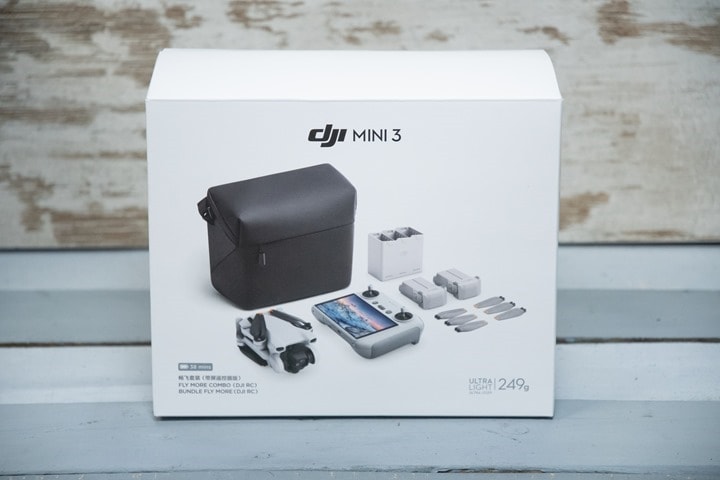
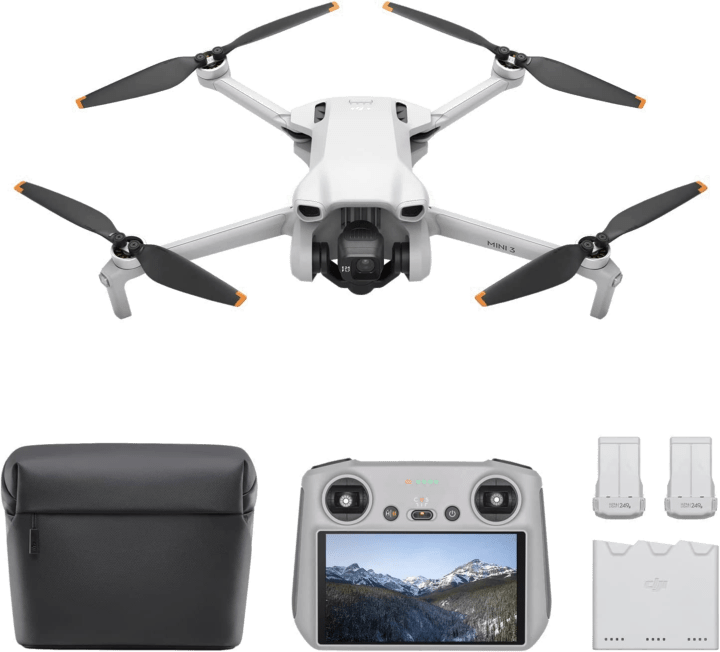
C) Drone Fly More Combo: Drone, three batteries, battery charging hub, remote of choice, charging cables, extra props, carrying bag
However, there’s also the Fly More Plus combo, and the regular combo. The difference simply being the size of the batteries.
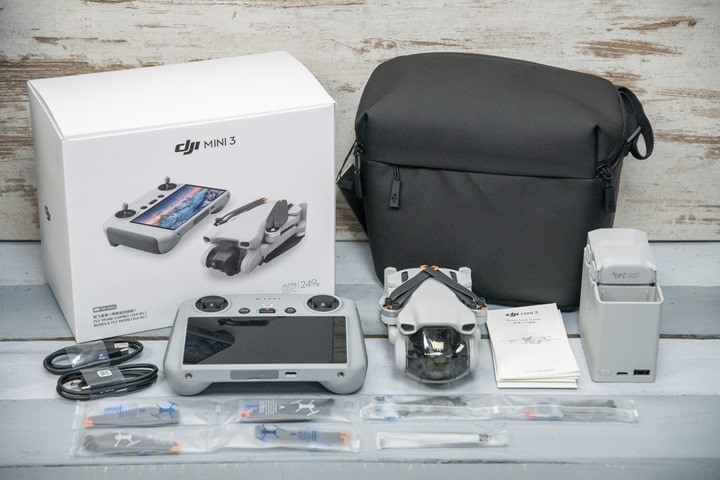
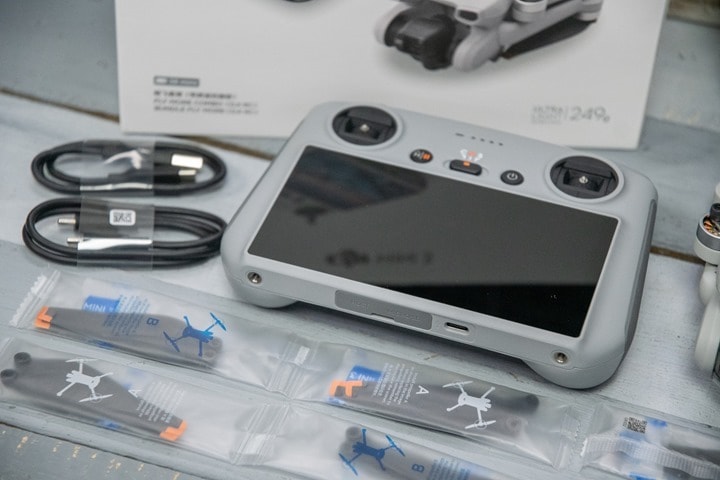
In my case, I’ve got the regular Fly More Combo kit, seen here unpacked:
You can see the slate of three extra complete sets of props, as well as the charging cables & remote. Each plastic bag set includes four props in it, also there’s that small screwdriver you see above (lower, in front of the drone), that tiny Philips screwdriver is required to change the props – so be sure you take it with you!
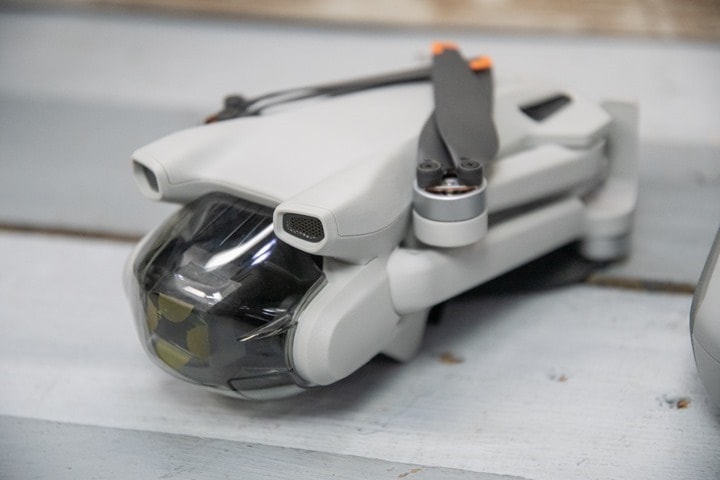
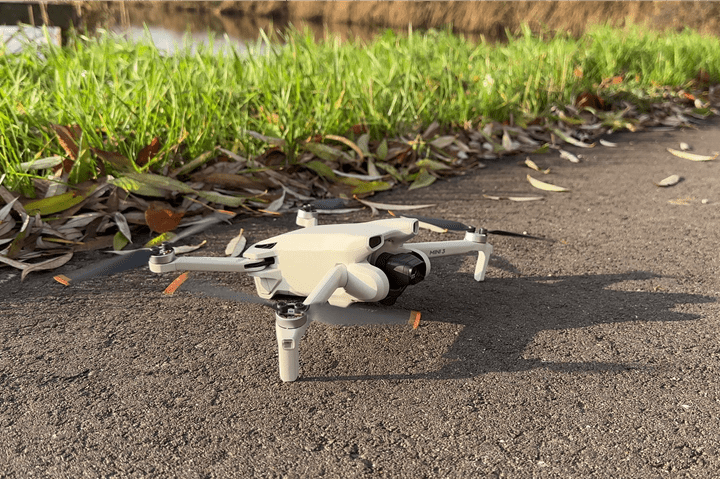
Here’s the drone itself, including protective gimbal cover:
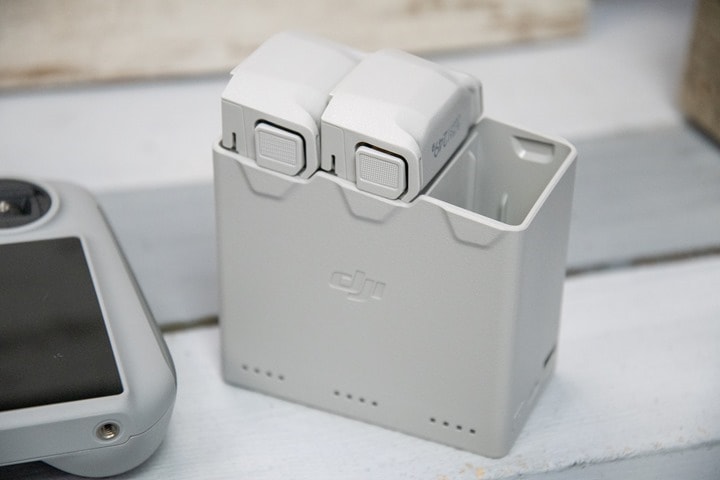
And then there’s the battery charging hub. It charges up to three batteries at once:
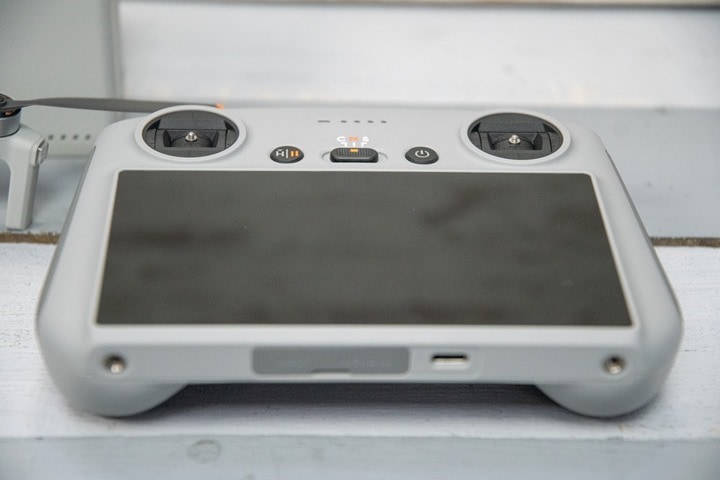
And finally, the DJI RC:
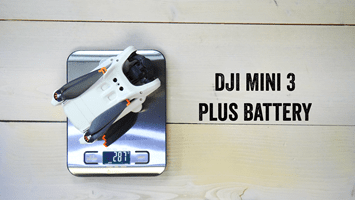
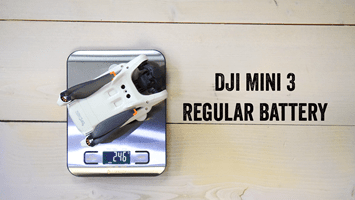
From a weight standpoint, it comes in at 246g with the regular battery, or 287g with the Plus battery (gimbal cover removed, but SD card in slot).
With that, let’s dig deeper into the hardware.
Hardware Overview:
Before we dive into the software and flying aspects, let’s briefly talk about the hardware. As noted earlier on, there are basically two decisions to be made:
A) Which controller to get (DJI RC or RC-N1, or none)
B) Which battery type to get (regular batteries, or ‘Plus’ longer life batteries)
The drone itself is the same though, those two components only come into play if buying a bundle. Whereas if you buy just the drone itself you’ll get no controller and a single base/regular battery.
In my case, I’ve got the DJI Mini 3 Fly More Bundle (with DJI RC), which includes:
– The drone
– The DJI RC
– 3x regular batteries
– Battery charging hub
– A pile of extra props
– The carrying bag/case
As I’ve said for ages, I’m generally not a fan of ‘bundle’ deals. For smart trainers and bike computers for example, I think they’re a waste of money in 99% of the cases. However, DJI is the almost singular rare exception here. If you plan to buy extra batteries, get the bundle. And, unlike most of DJI’s past battery charging hubs, the DJI Mini 3 series hub is awesome. It’s self-contained, easy to travel with, and I can plug it in with a standard USB-C cable from my laptop.
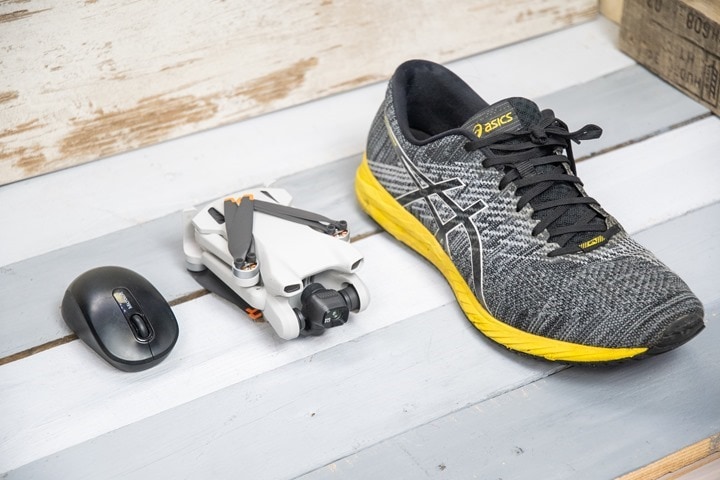
Since we’ve already unboxed that above, here’s a quick size comparison of the DJI Mini 3 to some regular objects:
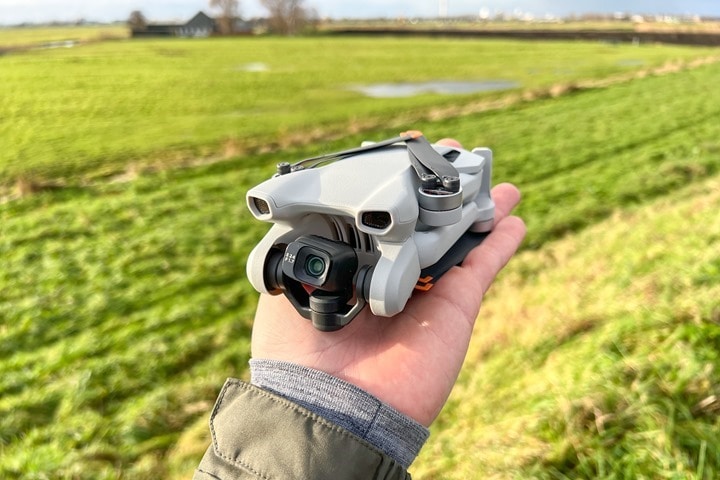
It’s small enough that it fits in the palm of your hand, or even in a back jersey pocket. This summer I did a 180KM/8-day hike with it in the Alps (Mini 3 Pro + DJI RC), which was perfect. Easily fit in my pack with minimal weight impact. It literally fits in your hand:
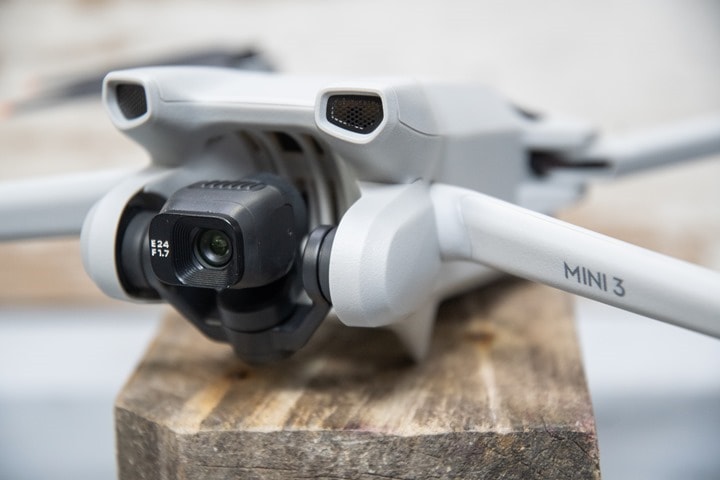
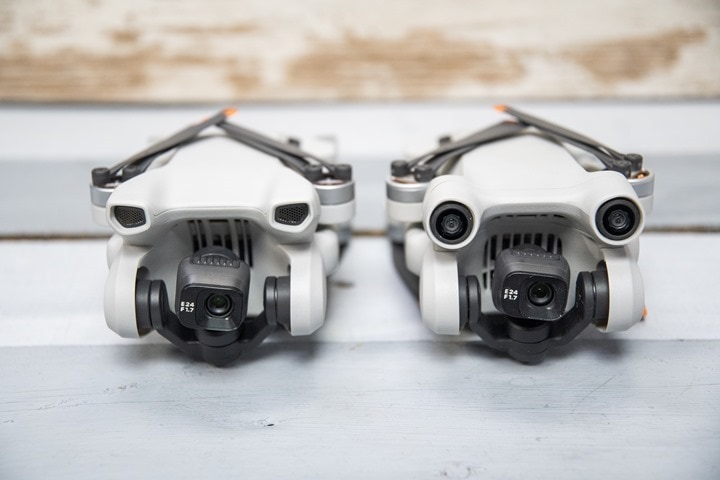
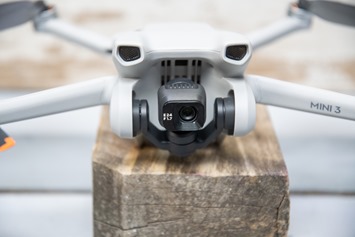
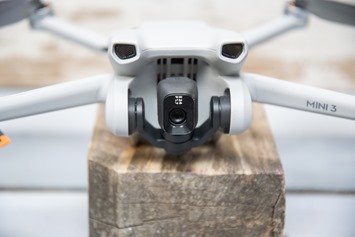
To compare the DJI Mini 3 vs DJI Mini 3 Pro side by side, you’ll see the ‘tell’ are the two bubble-like obstacle avoidance sensors on the Mini 3 Pro, these don’t exist on the Mini 3 (base).
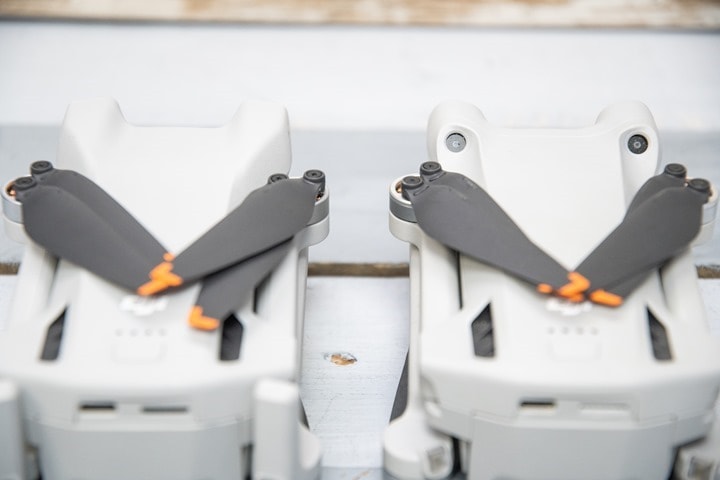
Likewise, when looking at it from the back, the DJI Mini 3 lacks the rearwards facing obstacle avoidance sensors along the upper front edge:
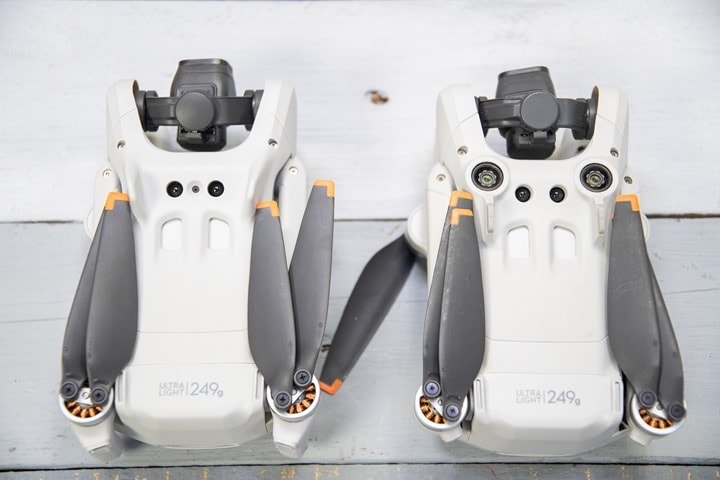
However, the underside is the same, we again see the downwards-facing obstacle avoidance sensors on the DJI Mini 3 Pro (at right), but we do have the two smaller black dots which are the downwards ground detection sensors, which are on both drones. The middle dot on the left drone (Mini 3), is simply a screw for the case.
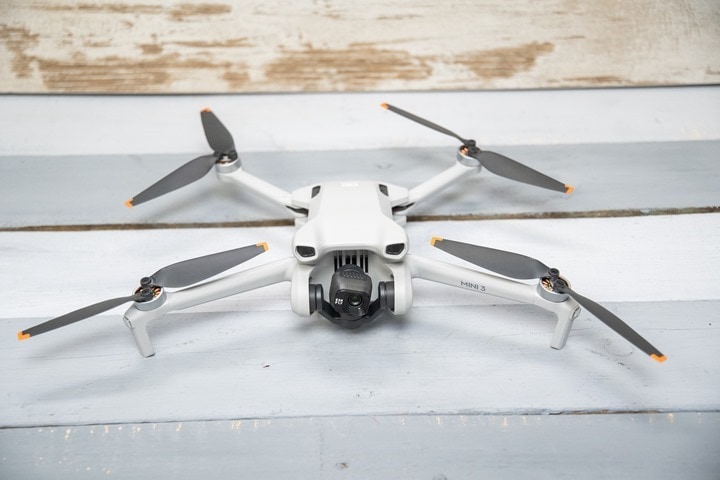
In any case, if we expand out the arms on the Mini 3 base, you’ll see it basically triples in footprint:
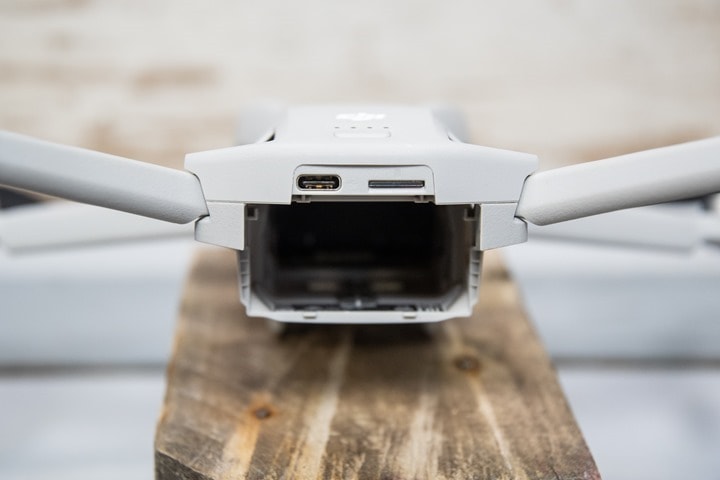
Meanwhile, on the back of the unit there’s the USB-C charging/offloading port, as well as the micro-SD card slot. Below that being the bay for the battery:
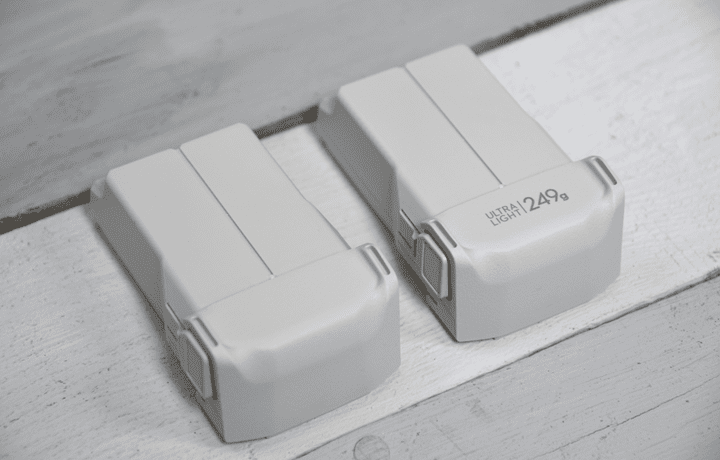
The batteries are the exact same as the DJI Mini 3 Pro, and fully interchangeable between them. There are two battery versions, the base battery, and the ‘Plus’ battery. The base battery gets 38 minutes of flight time, whereas the ‘Plus’ battery gets up to 51 minutes on the DJI Mini 3 (whereas the DJI Mini 3 Pro gets slightly less at 47 minutes). The way you can tell the difference in the ‘base’ batteries from the ‘Plus’ batteries is that the base batteries have labeling indicating they’re 249g compliant, whereas the Plus batteries have nothing, since it pushes the aircraft over 247g (to 287g).
Also note the Plus batteries aren’t available in Europe. DJI has previously said this is to reduce confusion on weight limits and regulations, though honestly that still seems just as confusing as it was when they said it 8 months ago (since the regulatory limit is only if you’re not licensed, if you’re licensed you can fly with the higher weight batteries).
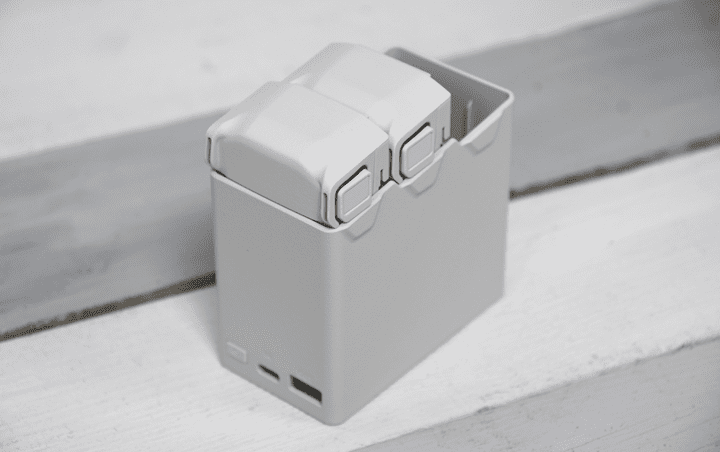
Lastly, there’s the charging hub. This comes in the Fly More Combo bundle, and allows you to charge up to three batteries.
Note that, like DJI’s other charging hubs, this isn’t concurrent. So it’s one after another. It takes about an hour with the standard battery, and about 90 minutes with the larger battery. It just uses a USB-C port on the side to charge, and has a USB-A port for charging other things (like the controller). It has LEDs on the backside to see battery status. I like that all this stuff easily fits in the single DJI drone bag, and then I can use my laptop charger to charge it all on the road. After using it for almost 9 months with the DJI Mini 3 Pro, including tons of travelling, it’s the best battery charging hub they’ve ever made.
Lastly, let’s talk remotes. As noted, you’ve got basically three options:
A) No remote
B) DJI RC-N1
C) DJI RC
Here are the two controllers side by side. At left is the DJI RC, which doesn’t require your phone at all. At right is the DJI RC-N1, which requires your phone.
I’ve used both of these extensively, and vastly prefer the DJI RC. The reason is simple: Size and weight-wise, it’s smaller than the base RC+Phone. Plus, I don’t have to worry about inbound notifications/etc disrupting my aircraft in the air. And most critically, I don’t have to worry about battery of my phone during usage. I know that if the controller is charged (which lasts plenty of flights), then I’ve got enough charge to fly.
As for how it compares to the higher-end DJI RC Pro, the DJI RC is lighter than the DJI RC Pro. In fact, I’ve done an entire comparison on the differences here. They both share the same 1080p display, though the DJI RC ‘only’ has 700 nits of brightness, compared to 1,000 nits on the RC Pro. Note that the DJI Mini 3 only transmits back a 720p stream, not the 1080p stream of the DJI Mini 3 Pro.
In terms of usable brightness, on a sunny beach day, I found the DJI RC basically the same as my iPhone 13 Pro in terms of viewability/visibility. That’s likely because the iPhone 13 Pro on a hot/sunny day will quickly overheat and lessen the display brightness significantly, thus, you’re down to the same comparative ranges. And if you’re in the shade/clouds/not-hot-beach, then the DJI RC is more than bright enough. Absolutely love it.
Now, that said, some have seen signal degradation issues on the DJI RC compared to the regular controller. In my case, all of my flying for the DJI Mini 3 has been in Europe, which already has reduced signal quality due to regulatory stuffs. In my case, I was getting about 800-900m of range on the DJI RC with the DJI Mini 3, at sea level over water, before I started getting moderate signal issues.
Still, in my case, I just don’t have much of a reason to go beyond that. Also note that this signal testing doesn’t apply to the US or other regions, which have higher allowances than the EU has.
Drone Flying Basics & Features
Like the DJI Mini 3 Pro, where I’ve got a massive 50-minute long complete beginners guide, I’ll soon have one for the DJI Mini 3 too. For now though, this section will suffice. I’m going to focus more on tidbits here that are notable, rather than this section being a complete end-to-end manual of the DJI Mini 3.
In my case, I’ll be using the DJI RC, since it’s what I prefer. But virtually everything is the same when using the phone-tethered DJI controller. To get started, you’ll turn on both units, a quick single tap and then long-hold will turn on each part. You’ll then find an empty spot on the ground to get it up in the air. You can hand-launch of course, or do plenty of other silly launching things I’ve done, but starting with an empty spot is best.
In my testing, it took about 20-40 seconds for the aircraft to find GPS before locking enough satellites. It uses GPS to keep position once up in the air, along with the downwards-facing sensors when it’s close enough to the ground.
To take-off you can either pull the two controller sticks inwards and down, or just tap the takeoff button on the controller. Both result in the aircraft getting airborne. By default, you’ll be in ‘Normal’ mode, however there’s both ‘Cinematic’ mode (which basically slows everything down), and ‘Spots’ mode, which lets you go far faster, but can result in some gimbal oddities at the extremes (since this unit doesn’t have obstacle avoidance sensing, there’s no difference there either way – whereas on most other DJI drones, obstacle avoidance is disabled in sport mode).
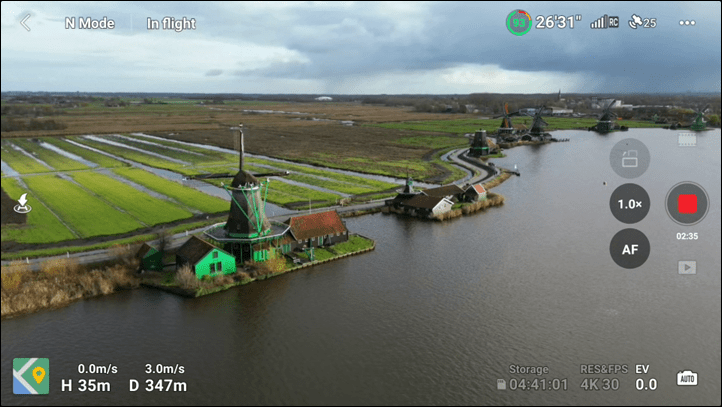
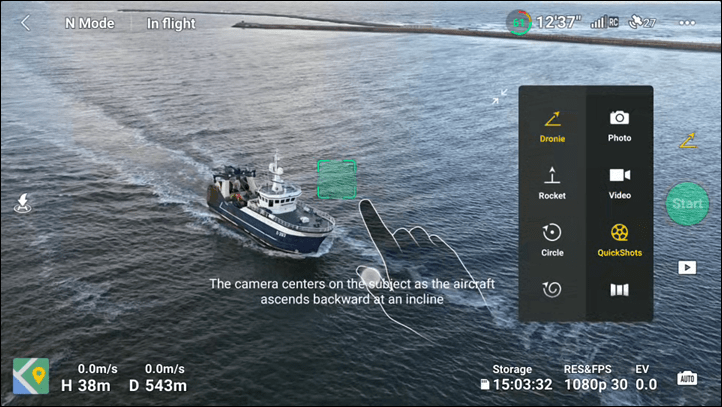
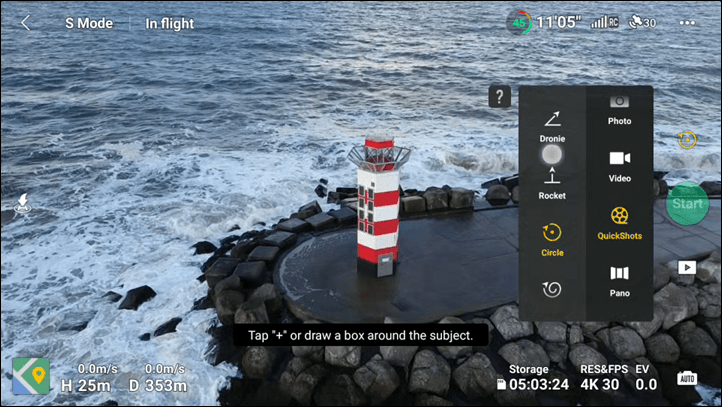
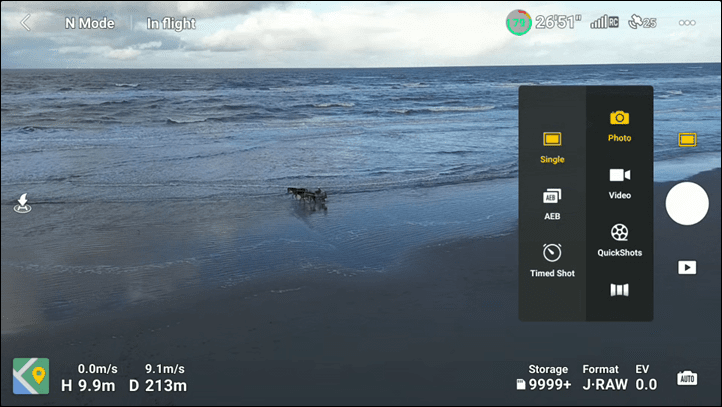
Once up in the air your menus on the right are grouped into two categories: Video and Photo. Toggle one and you’ll get a different set of options, and then switch to the other and the features change. For example, in Video you take videos, in Quickshots you get short automated videos, whereas Photo mode gets you photo options like timer/AEB, and Pano for Panoramic shots
On the bottom left corner is the aircraft position items, such as distance and height. The distance is as-measured from the take-off point. You can change this mid-flight by going to the upper right corner and selecting to update “Home Point”. This was useful for me the other day when I started the flight at the beginning of the pier, but then walked a kilometer or so down the pier as I flew. This updates that figure, and also ensures that if the drone returns to home (RTH) due to connectivity issues or emergency-low-battery, that it does so to the right place. This is also incredibly useful/important when flying from a moving platform like a boat.
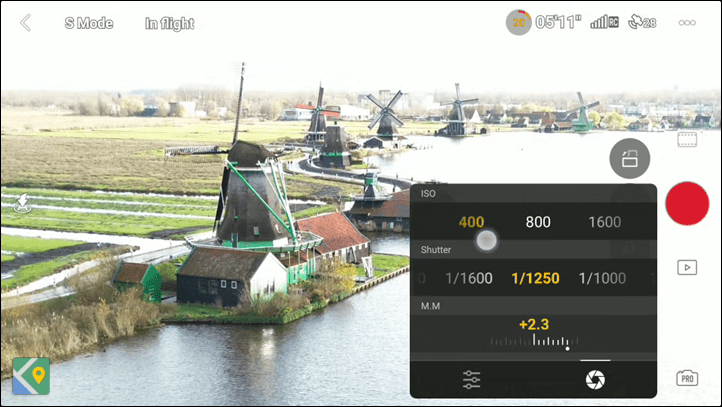
Meanwhile, in the lower right corner are photography/video options, mainly exposure by default, but you can tap that option to toggle into ‘Pro’ mode, which enables a bunch of photo options, such as tweaking the shutter speed, exposure, ISO, etc…controlling them manually.
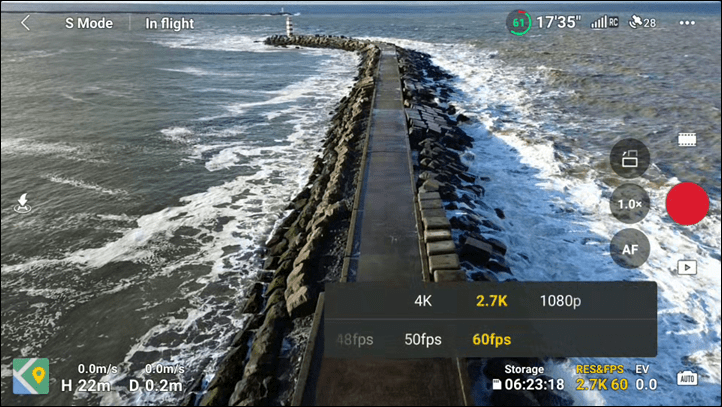
Likewise, also in the corner are the resolution options. Be warned – by default DJI sets all these to 1080p. And not just for regular video, but separately for QuickShots and for photography it defaults to JPEG only. The first time you fly the drone you’ll want to update all of these to higher resolutions, else those beautiful QuickShots you just took will be in 1080p by default (even if you changed to 4K elsewhere in the menus).
You can also change your frame rate here. The frame rate options are as follows:
4K: 3840×2160@24/25/30 fps
2.7K: 2720×1530@24/25/30/48/50/60 fps
FHD: 1920×1080@24/25/30/48/50/60 fps
HDR: Recording with the 24/25/30fps frame rate supports outputting HDR images.
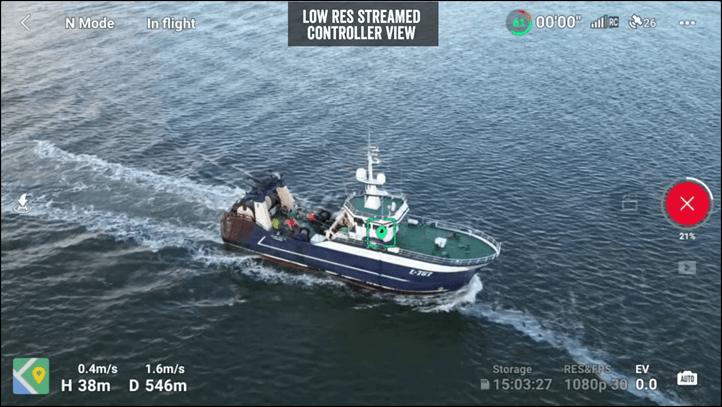
Now, of course, you’re doing this while the drone is flying. One thing that was immediately obvious to me coming from the DJI Mini 3 Pro is the lower transmission resolution of the Mini 3 (non-Pro). Sure, they both *record* at 4K, but they transmit in real-time to the controller differently. The DJI Mini 3 Pro transmits at 1080p, whereas the Mini 3 (non-Pro) is 720. Frankly, you’d likely not notice unless you had them side-by-side, but in my case my wife and I were side by side with both units and it was surprisingly obvious that the DJI Mini 3 image was ‘softer’. Yet, once back home, the two files recorded on the SD card were identical.
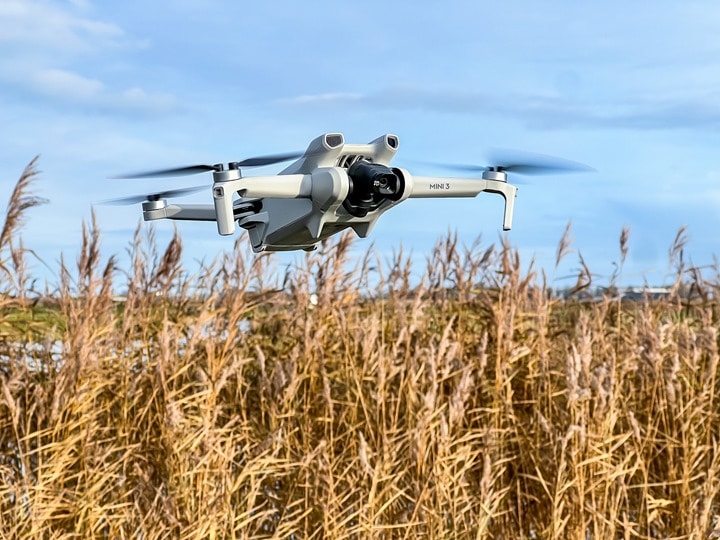
In terms of flying performance, it felt virtually identical to the Mini 3 Pro. While the winds have been relatively tame here by normal Dutch standards, I was out flying on Wednesday and the winds peaked at 50KPH at one point as I was doing orbits around the lighthouse. There’s footage of that in the video, though frankly, you’d never notice as it appears silky smooth.
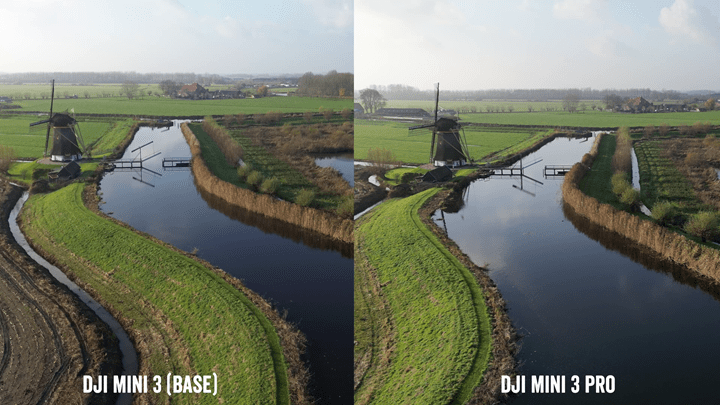
From a visual standpoint, that too also felt essentially identical. In more side-by-side scenarios, it all looked the same. However, what’s important to note is that while the imaging pipeline might be the same (an assumption, not a guarantee), there are differences in that the DJI Mini 3 Pro can do 10-bit video, as well as D-CINELIKE for grading after the fact, whereas the Mini 3 (base) cannot. Likewise, the Mini 3 Pro has the ability to do 48MP stills, whereas the Mini 3 is limited to 12MP stills. Albeit, there’s some debate on how ‘real’ the MP count there is on the 48MP stills, based on how DJI does them.
Still, it’s hard to argue with incredible still shots with the Mini 3 (non-Pro). As is often the case with drone footage, it’s very rarely about the camera/drone you’re using, and more about the shots you come up with. It’s knowing how to get the right angles and most interesting perspectives. It’s about leveraging creativity in numerous shot types, and not having it all be the same shot.
One significantly unique feature of the DJI Mini 3 series (both editions) is the ability for the gimbal to rotate vertically.
From a unique features standpoint, on the video side you’ve really only got QuickShots. These allow you to iterate through five preset shot types: Dronie, Rocket, Circle, Helix, and Boomerang.
I talk about this in more depth later in the Sports Tracking section, but the idea here is that if you’re newer to drone flying, doing an orbit correctly can be surprisingly difficult. Same goes for most of these quick shot moves, which requires concurrent up/down + left/right + camera gimbal changes. While many more experienced flyers can replicate these moves manually, these make it dead-simple to get perfect results each time.
The Mini 3 (base) doesn’t have MasterShots however. MasterShots essentially takes those QuickShot moves and does a slate of them plus a few more, together. This is likely, again, due to the lack of obstacle avoidance sensors. With the basic QuickShot moves, the drone does its thing and is done in 15-30 seconds. The path is predictable, and you know what it might hit. Whereas with MasterShots, it’s a substantially more complex web of of a drone flight path, which goes all over creation to get the shots it needs.
Next, hitting up the photography side briefly, you can do both single shots, as well as timed shots and AEB shots (which creates multiple bracketed shots). Timed shots operated on a repeating timer, and are ideal when you might put the controller down behind you, or otherwise want a ‘clean’ shot of something. For example, if laws allow, you could set up the shot in the air on a 2-second timer, and then do whatever sports or action thing you want in the frame. Certainly, you could grab stills from a 4K video instead, but with the photo timer you get higher-resolution JPG+RAW photos. And in particular, it’s the raw imagery that gives you more flexibility in post-production.
Here’s a few static photos from the camera, all untouched. Some of these appear a bit darker, but that’s simply because it’s the Netherlands in winter, on mixed-cloudy sky days. Such is reality. Thankfully, that’s also the power of having raw images to be able to easily improve exposure.
Finally, once you’re done shooting, you’ve got a few options for saving the footage. Remember, all footage is written to the SD card in the drone. But concurrently a copy is also streamed to your controller. In the case of the DJI RC, you get a lower res copy of the photos that are accessible there (practically speaking though, they aren’t accessible from your phone if you’re using the DJI RC). Whereas with the DJI RC-N1 controller, you get both low-res photos and videos, saved directly to your phone.
However, as noted, these are the low-res versions. If you want the high-rest stuff (and you do), then you can either move the SD card out of the drone, like any other SD card. Or, you can use DJI’s Quick Transfer feature, which sets up a fast transfer WiFi connection directly between the drone and your phone. This is notable if you use the DJI RC, because you won’t have a copy otherwise on your phone. The procedure is the same as the DJI Mini 3 (and the Mini 2 for that matter). I outline it in the video below. The most important thing in this entire video though is to open the arms of the drone. Seriously. You have to do that or performance is garbage (at best).

Finally, what about battery life? Well, I listed the claimed specs up in the earlier section. But those claims are basically in windless conditions with late-spring temperatures (historically DJI has specified 72-78°F temps), where batteries perform best. For the DJI Mini 3, their specific claims are: “Measured in a controlled test environment. Specific test conditions are as follows: flying forward at a constant speed of 21.6 kph in a windless laboratory environment, in photo mode (without photo taking operation during flight), and from 100% battery level until 0%”.
Point is, I have none of that. My temperatures were roughly 7°C (45°F), and winds ranging from 20KPH to 50KPH (12MPH-30MPH). The wind impacts things, but mostly it’s the air temperature that has the biggest impact. However, I’m going to take a guess that the performance will be like I saw on the Mini 3 Pro over the summer, which is to say assume about 15% less than specs as the norm. Which, is honestly fine by me – I rarely need that much battery at those temps.
Sports Tracking:
This section will be relatively short. While the DJI Mini 3 Pro has obstacle avoidance sensors, the DJI Mini 3 (base) does not. As a result, DJI does not include their ActiveTrack feature on these drones. Therefore, there is no sports tracking in the DJI Mini 3…mostly.
To back up briefly, ActiveTrack is DJI’s suite of tools that basically allows you to track an object, and then the drone will fly along and follow it. It’ll use its obstacle avoidance sensors to avoid running into things (most of the time), and overall on the DJI Mini 3 Pro it works fairly well. However, under the covers of ActiveTrack is actually DJI’s Spotlight/FocusTrack features, which do the heavy lifting of identifying what an object is (e.g. a person, vehicle, etc…).
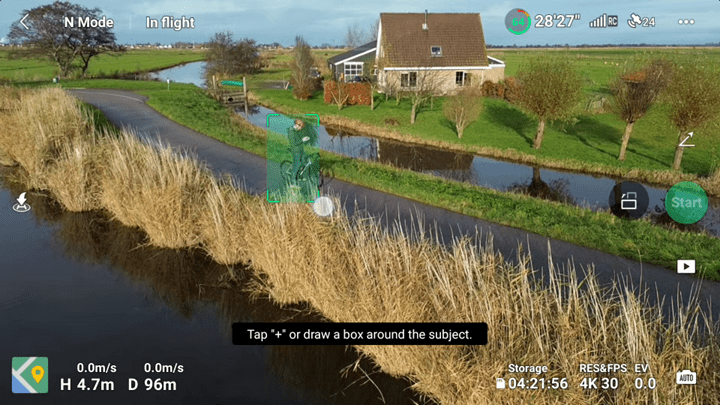
And in fact, the foundations of those features are found within the QuickShots module as well. QuickShots has the drone fly a handful of mostly predetermined flight paths getting shots like a Dronie, Orbit, Rocket, etc… These are considered lower-risk since you roughly know where the drone is going to go once you tap start. The shots last about 15-30 seconds long, and then return to their starting point. The scenario here is something like standing on the edge of a mountain, tapping ‘Dronie’, and it flies out to reveal the landscape around you.
However, the key part of that tech is that it DOES identify what objects are in the picture, and presents a small dot over each one you can tap. You can also drag with your finger a square over an object and it’ll track that too – keeping it in frame.
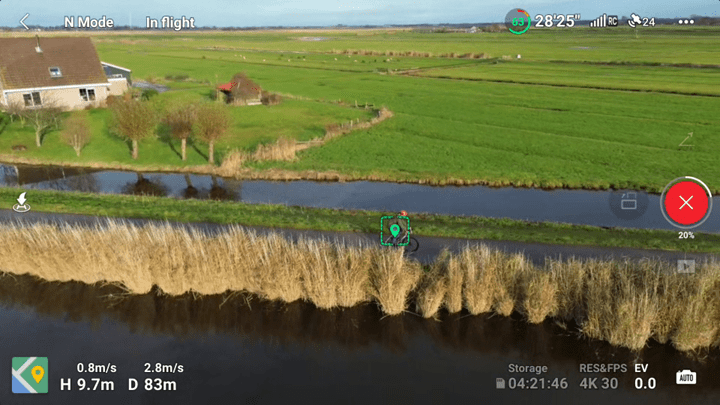
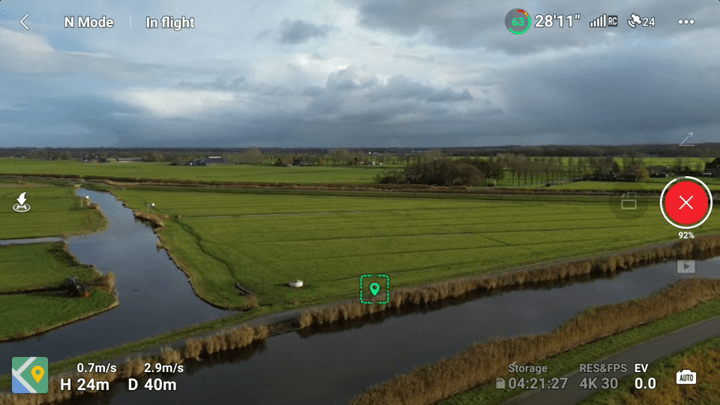
The trick to all this is that it’ll keep tracking said object while it moves, even if the object moves too. I’ve shown this on the DJI Mini 1 and DJI Mini 2 drones in the past, and sure enough, it applies to the DJI Mini 3 (base). So even though it lacks DJI’s fancy ActiveTrack for proper follow-me, it can go ahead and briefly follow/track an object (such as a runner or cyclist), for short Instagram-length moments.
Like when I showed this before on the Mini 1/2, this takes a bit of practice to master. The tracking within QuickShots doesn’t give a ton of tolerance for fast-moving objects at close range, but is willing to deal with full-speed cyclists at further ranges. The challenge is that you have to start the tracking close-up, and then increase speed as the drone flies further away.
You can watch my previous videos on this, and I’ll probably make one for the DJI Mini 3 too. But in short, your best bet is the ‘dronie’ shot, though you can do it with the orbit too. After tapping go and it completes the countdown, wait about 3-5 more seconds before you start to move. Go somewhat slowly at first, and then speed up. The camera will follow you in about half the cases, less if you haven’t already spent 30 minutes in the cold practicing.

When all is said and done you can string together a surprisingly good set of short snippets, which, for most b-roll purposes, is all you’re gonna use anyway.
But ultimately, if you want a drone to follow you somewhere, the DJI Mini 3 isn’t it. For that, you want the DJI Mini 3 Pro or Mavic 3 (and I’d argue, still the Mini 3 Pro), as when it eventually crashes into a tree, it almost certainly will survive without issue. Whereas there’s a very strong chance the Mavic 3 will be broken in some regard when it crashes, due to the vastly heavier weight. This coming from someone who is an expert at crashing both drones over the last 9-12 months extensively during ActiveTrack scenarios.
Wrap-Up:
Overall, the DJI Mini 3 is a great option at a great price. After all, it’s been a long time since we’ve seen a DJI drone launch at a sub-$500 price point. All the way back to the DJI Spark in 2017 (a review I ironically also wrote in the Netherlands, years before I moved here). The upgrades from the DJI Mini 2 to the DJI Mini 3 are pretty solid, especially for those wanting either vertical videos, or a heck of a lot longer battery life (with the Plus batteries). Sure, there aren’t major frame rate changes or other major feature additions, but the gimbal changes alone are pretty significant (including the 60° up-angle option).
Of course, the challenge for the Mini 3 is simply…well…the Mini 3 Pro. At $220 more for the Mini 3 Pro, I’d generally recommend that drone if at all possible. The reason is simple: If you’re a new drone flyer, then you won’t likely be great at the controls. The obstacle avoidance sensors on the Mini 3 Pro gives you a bit of peace of mind, especially in those first few days when you’ll invariably high-speed fly it straight into your garage door while showing your friends in your driveway. YouTube is full of these first-flight videos. Plus, you’ll also get ActiveTrack, higher 60FPS video, 10-bit video, and better photos.
Which isn’t to say obstacle avoidance is always perfect – but in most cases where it does miss things (winter, thin no-leaf branches), it’s usually above relatively soft ground, and I’ve yet to break a Mini 3 series device, despite consistently crashing it into things over the past 8 or so months.
Either way, both drones are very capable, and generally speaking shoot as good of videos as you can creatively come up with. The limitation on drone video quality isn’t the camera anymore, it’s thinking about unique shots that tell a story.
With that – thanks for reading!
Found This Post Useful? Support The Site!
Hopefully you found this review/post useful. At the end of the day, I’m an athlete just like you looking for the most detail possible on a new purchase – so my review is written from the standpoint of how I used the device. The reviews generally take a lot of hours to put together, so it’s a fair bit of work (and labor of love). As you probably noticed by looking below, I also take time to answer all the questions posted in the comments – and there’s quite a bit of detail in there as well.
If you're shopping for the DJI Mini 3 Fly More Combo with DJI RC or any other accessory items, please consider using the affiliate links below! As an Amazon Associate I earn from qualifying purchases. It doesn’t cost you anything extra, but your purchases help support this website a lot.
Here's a few other variants or sibling products that are worth considering:
I've also put together a quick list of some of my favorite or most compatible accessories for this unit:
And of course – you can always sign-up to be a DCR Supporter! That gets you an ad-free DCR, access to the DCR Quarantine Corner video series packed with behind the scenes tidbits...and it also makes you awesome. And being awesome is what it’s all about!
Thanks for reading! And as always, feel free to post comments or questions in the comments section below, I’ll be happy to try and answer them as quickly as possible. And lastly, if you felt this review was useful – I always appreciate feedback in the comments below. Thanks!


![clip_image001[9] clip_image001[9]](https://media.dcrainmaker.com/images/2022/05/clip_image0019_thumb.png)




Hey Ray! Do you know what’s the resolution of sphere photos? They’ve removed it from the specs on all drones :/ Mini 2 had a pretty low res while Mini 3 Pro had like double the amount of pixels. All the best!
Ok, I went down a long rabbit hole here for this answer…and then stupidly closed out the Notepad session I had writing up all the details.
TLDR (cause I deleted it):
Starting with the individual files, it shoots those at dual RAW/JPEG. Resolution is 2000x1500px, for a Sphere, it’s about 16 photos.
As for the compiled file, it’s oddly not showing up on the drone SD card. I’ve tried multiple times. The App says it should be there at 53.35MB for DJI_87.pano, but it’s not. Likewise, there should be a single compiled photo, but it’s neither in the Pano folder or the regular media folder or the individual Pano # folder.
So I then had the app export it out to my phone, and that one is only 4096x2048x at a mere 1.5MB.
Thank you, really appreciate it. So it’s the same lame resolution as on Mini 2 which is a huge no for me. A real shame as I really like taking these pictures. Especially considering it’s the same sensor as on 3 Pro :/
Use something like link to github.com instead of notepad, it saves the file as you type.
The 24 mph/38 kph wind, and 51 minute battery ratings caught my eye, and then you noted it flew in 50 kph winds. I’m betting it’s to avoid export control regulations. There are restrictions on the export of ‘unmanned aerial vehicles’ (See Wassenaar.org for 9.A.12, US Export Administration Regulations (EAR) 9A012) if the aircraft can either (1) take off and have stable flight in 25 knot/46 kph winds and fly 30 minutes or more, or (2) more than an hour, regardless of winds. This seems to have been spec’d to just fly under the regulations. Needing export licenses to move these from country to country really messes up sales. I’m sure DJI would be shocked (shocked!) to find out their devices can have stable flight at higher wind speeds.
It also shows that the export regulations are often woefully behind what’s available on store shelves.
Super interesting catch.
Indeed, I’ve done wind drone tests (on YouTube) for virtually every DJI drone in the past 7 years, and all of them at 50KPH+. Ultimately, the dirty secret there is that the top wind speed it can handle is really just top speed of the aircraft (usually defined as the Sport Mode speed on DJI). And then their wind resistance speeds have always been lower.
But yeah, that’s a super interesting find!
I was curious about this release given I had already purchased the Mini Pro. Thanks for clarifying key differences between the two drones. It pinpoints where the Pro sits in the lineup. I have no regrets spending more for the Pro, only because of I understand the value of those extra features now that I’ve used and can’t imagine going without. Regardless, as you mention, the Mini is still an awesome value.
Thanks! I’ve also got another video going live in a few hours that goes into the differences a bit more, some more nuanced bits.
Just putting finishing touches on that.
…and that video is up, published here: link to youtube.com
The first picture, the two obstacle avoidance sensors look like the eye holes on the old viewmaster, I thought it was a headset :)
Question about the charging hub: does leaving the batteries in the hub discharge them a little (by the hub “reading” their charge status)?
I ask because I’ve noticed that if I charge all three and leave them in the charger, then go out and fly on ONE battery, when I put it in the charger with the other two, the other two will “top up” before charging the “depleted” one. I know this is how the hub is supposed to work but why are the other two needing to be charged, if I haven’t used them?
Hello, How useful is the HDR video mode? I can’t find your opinion on this.
I have a Dji mini 2 but when the sun is in front of the video, I can’t record bot sky and ground both good exposed.
Is it fixed the new 4K HDR mode of the Dji mini 3?
Thanks