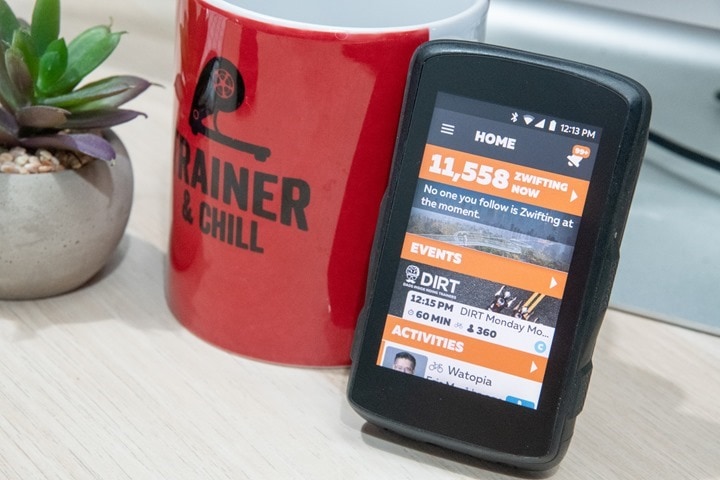
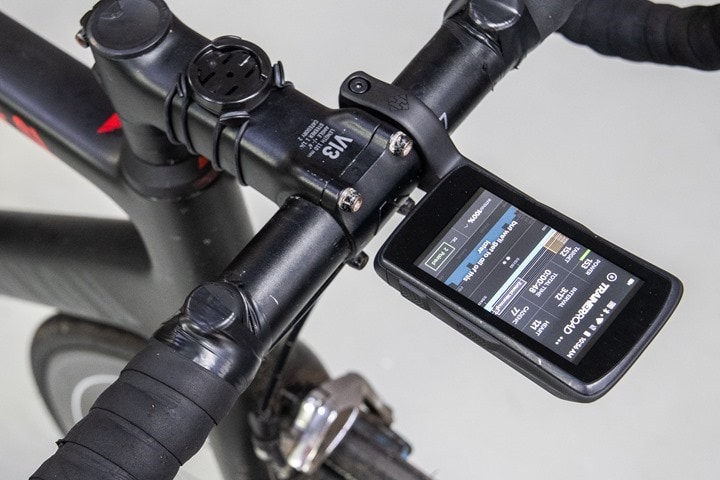
Without hesitation or question, my favorite feature of the Hammerhead Karoo series is the ability to record the screen – allowing me to show you exactly what I’m seeing. It enables me to get a crystal clear recording of things in real-time, even letting me merge it with GoPro footage to make explainer ride-along videos like this. It’s awesome, and I’d basically trade any other feature on a Wahoo or Garmin GPS to get that functionality there too.
However, while screen recording functionality isn’t really something most of you care about. Myself and a few other reviewers – sure. But not most of you. But the way I do it is applicable to more of you, as it’s ultimately just loading Android apps on the Karoo 2. That’s because the Karoo series bike computer (1 and 2) are simply Android devices. Sure, you don’t really see it in any overtly obvious way for most people.
With the Karoo 3 shipments going out full speed now, I’ve seen more and more questions on how I sideload apps. Up until this point, I’ve just been pointing people at my Peloton sideloading apps instructions, but I figured I’d write something more specific here.
Note that sideloading apps means that you can load something like the Zwift Companion app, or TrainerRoad, or any other Android app you can think of. Heck, TikTok I suppose. Whether or not there’s any actual non-gee value in doing so will depend on your requirements. To each your own, I won’t judge you….too much. You do you!
If you’re tech savvy, the overall install process is pretty easy – about 10 mins for the first app you load, and about 2-3 mins for each additional app. If you’re familiar with sideloading Android apps, then it’s trivial. Whereas if you come from the iOS world, you’ll probably scratch your head a few times but keep on chuggin’. To my knowledge, there is nothing here that ‘voids’ your Karoo warranty per se (at worst you simply reset your screen to defaults).
(Note: These steps have been confirmed to work just fine on all three versions, including the newer Karoo 3.)
The Foundational Bits:
Estimated Time: 5-10 mins
These first steps are required no matter what app you’re installing. And realistically this would be the same whether it was Zwift Companion App, TrainerRoad, or Netflix. Note that there are numerous ways to slice the Android onion. For example, you could add a new loader instead, and then switch back and forth, but frankly I just find that too much juggling. I just want the darn app available right next to other Karoo features.
Note: I’m writing these instructions using a PC because I’m mostly a PC guy. But a DCR Reader also sent-in Mac instructions after the fact, which I’ve included concurrently down below.
1A) Karoo 1 Units: You need a micro-USB cable, specifically one that supports data. Most support data, but not all. If you happen to have had a Garmin bike computer prior, it’ll actually say ‘GARMIN’ on the cable, and that’s a way to know 100% it supports data. There isn’t any great way of knowing if your cable is a data one, or charge-only. If it’s charge-only, then the computer will only charge it, but can’t access data.
1B) Karoo 2 Units: You’ll need a USB-C cable, which, is what came with your Karoo 2. That’s a great cable to use. If you have a computer with only USB-C ports though, you’ll by now have noticed the Karoo 2 cable only has USB-C at one end. Thus, you’ll either need a USB-C to USB-C cable, or a USB-C dongle. Likely though, if you’ve got a computer with only USB-C ports, you’ve probably already bought a USB-C dongle a long time ago.
2) Next, turn on developer mode on the Karoo:
A) Power on the Karoo
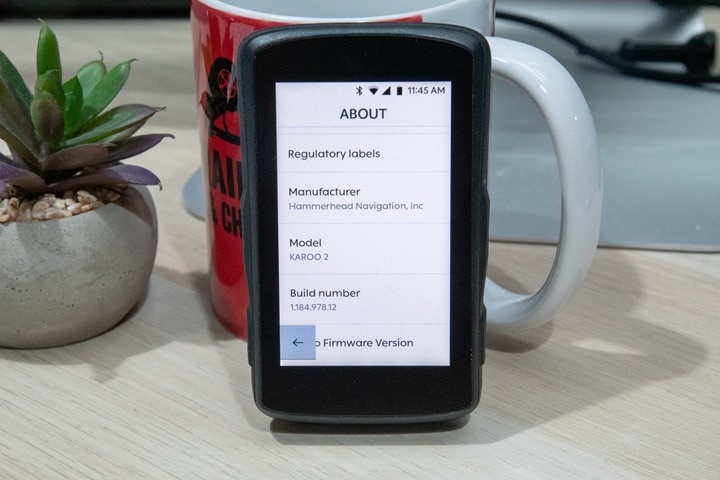
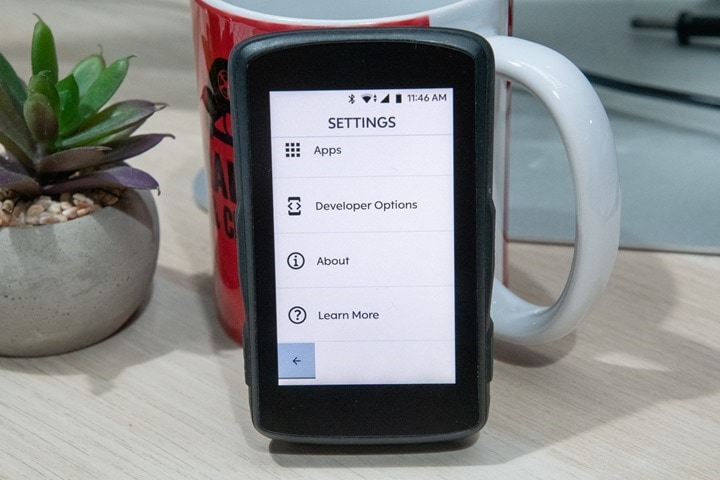
B) Swipe to ‘Settings’ in the lower bar, then all the way down to ‘About’, and then tap the ‘Build Number’ box repeatedly until it says you’re a Developer
C) If you press back once, you should see ‘Developer Options’ showing now, tap to open the ‘Developer Options’
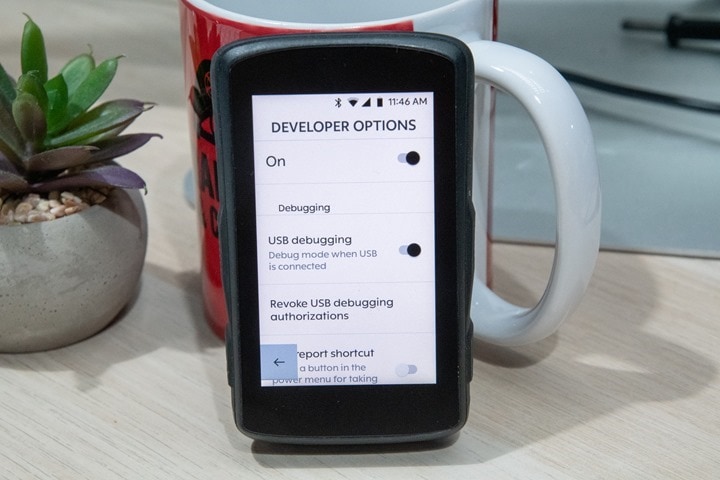
D) Scroll down to ‘USB debugging’ and enable that, this is basically how you get apps on your Karoo.
(Note: For Step 3, I’ve split it out into PC & Mac Instructions – all other steps are the same, scroll down slightly for the Step 3 Mac instructions. Thanks for a DCR Reader for sending in the Mac instructions)
3) PC Instructions: Next, we need to install the Android Developer tools on your Windows computer. Select the option that says ‘Download SDK Platform-tools for Windows’. To ‘install’ them, you’re basically just copying the contents to a folder. In my case, to keep things simple, I’ve created a folder called ‘Android’ on my computer:
(Note: It may unzip into a folder called ‘Platform-Tools’, that’s fine. I just put everything into the Android folder for simplicity here. Also, as you’ll see in a second, I created a folder calls ‘Apps’ inside it, where I stash all my apps.)
3) Mac Instructions: Next, we need to install the Android Developer Tools. Download the tools from here and select the download for Mac. By default, this will download to you Downloads folder. To ‘install’ them, you’re basically just copying the contents to a folder. In my case, to keep things simple, I’ve created a folder called ‘Android’ on my computer.
After double-clicking on the downloaded zip file, the platform-tools directory is created in the same location. In the platform-tools directory, you can see the adb (Android Debug Bridge), which is used to side-load the applications. The below diagram shows the resulting expanded zip file which created the platform-tools directory.
You will be accessing the adb utility from the command line. You must either run adb by pathing to it directly or by adding it to your path. We’ll assume you can add it to your path if you are inclined to that option. We’ll show the direct pathing option in this example.
The screen-shot below shows that we have navigated to the platform-tools directory that we created in the above steps. We run ./adb devices from that location and see the serial number of the attached Karoo 2. Several fields have been blocked out to obscure personal information.
Now that we have shown adb is able to see Karoo 2, continue with the instructions. When calling the adb tool (assuming you didn’t add it to your path) remember to use the linux ./adb form to run the utility.
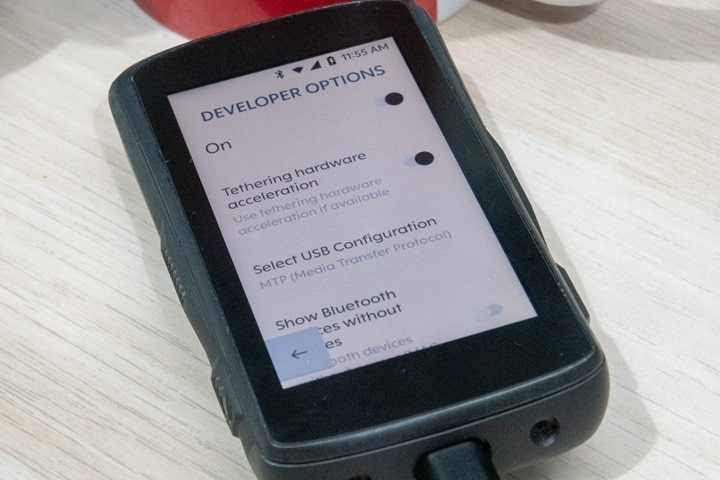
4) Now, plug your Karoo into your computer using that USB cable. By default it won’t actually show as a USB drive or such on your computer. That’s OK, and isn’t needed for loading apps. But I kinda like it for other purposes (like getting my screen recordings). So, in case you want it to show up, simply go back to the Developer Options, and scroll-down a ton until you find ‘Select USB Configuration’, and change it to MTP (Media Transfer Protocol):
You should now see your Karoo up on your computer. It’ll simply be named k2. Note that I’ve noticed that for whatever reason, this setting doesn’t seem to save each time I power off the Karoo 2 (whereas it does save on some of my other Android devices). I’m sure some Android person could tell me why this is. Just an FYI for next time.
5) Now, open up a Command Prompt, and get to the same directory as where you installed all these files. In my case, that’s the Android folder on my C: drive (for Mac people, you’ll type: ./adb devices instead)
Then once there type: adb.exe devices
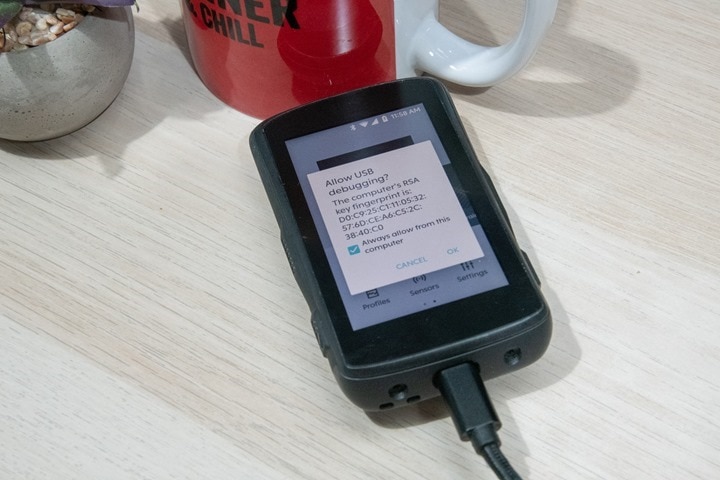
6) You’ll get a prompt on your Karoo to authorize that request from your computer, press to accept (and probably check that box to make your life easier in the future).
7) Now, for PC people type the command again: adb.exe devices
For Mac people, type: ./adb devices
You’ll see this time it shows a device returned (KAROO20ALA091100544), which simply means it successfully connected to my Karoo.
Ok, with these steps done we’re ready to install *ANY* app you want. In other words, you accomplished the hard part. Now it’s easy from here on out!
Example App Install:
Estimated time: 5-10 minutes
I’m going to use the Zwift Companion App here, just because it looks pretty. Practically speaking, doing TrainerRoad is probably more useful (but, I documented how to do that already in my Peloton side-loading post). I’ll warn you that while the Zwift Companion app works just fine, I personally find it a bit small on the Karoo 2, especially for some of the navigational bits. But that’s besides the point, the process is *EXACTLY* the same no matter which app you use.
The way ‘side-loading’ works is that Android apps come in an APK file, which is basically a self-contained file that includes the entire apps. Mostly (there are some exceptions, such as the full Zwift install – but I also cover that in my Peloton bike post too, in the Zwift section). No matter the app, you need to get the self-contained APK file. That’s because the Karoo doesn’t simply have the Google Play store installed, we’ll need to use 3rd party sites to download these same APK files. Sometimes companies will also make them available easily too.
In the case of the Zwift Companion App, the APK file is available from PureAPK. It shows the most recent/current Android version from December 29th, 2020 (the most recent version as of this writing).
(Note: Anytime you download an app from a 3rd party service, you risk a scenario where the 3rd party app is compromised. That’s a pretty darn low chance here, but just want to be aware of that.)
Now, download that APK file into that Android folder. I created an ‘Apps’ folder to make my life more organized, but you don’t need to.
Ok, back to your command prompt and type the below and press enter:
adb.exe install “AppsZwift Companion_v3.21.0_apkpure.com.apk”
(Pro Tip: Just type: Adb install appsZwift and then hit tab, it’ll do the rest for you.)
It’ll come back with ‘Success’ a few seconds later.
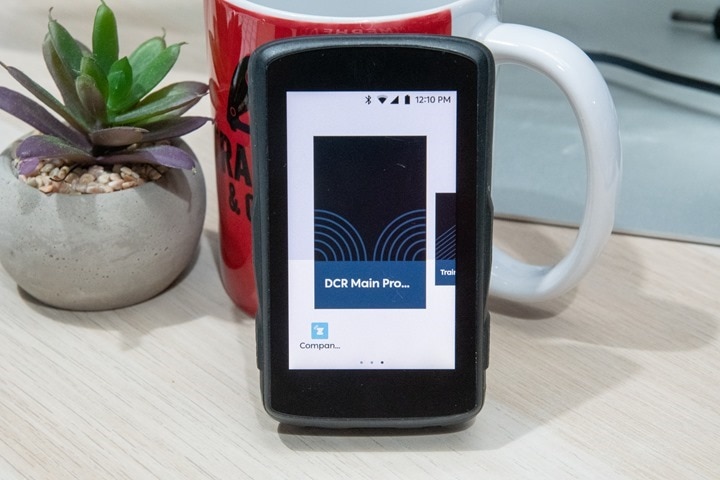
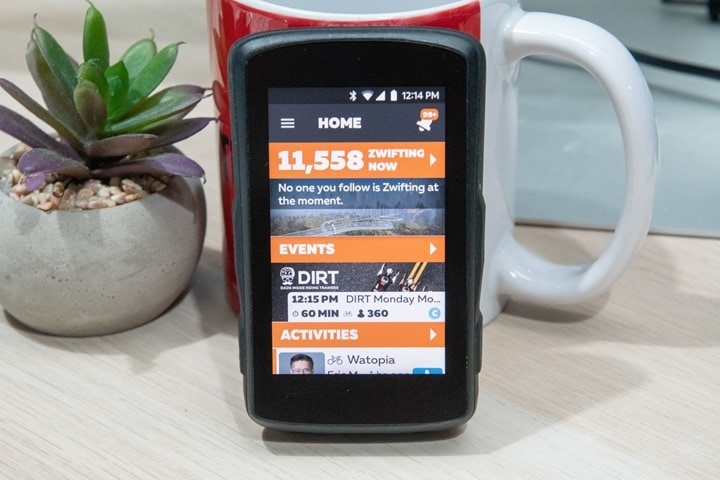
Now, back on your Karoo simply swipe along the bottom and you’ll notice you’ll now have an extra ‘dot’, showing the Zwift Companion App installed. To state the obvious, tap it to open the app:
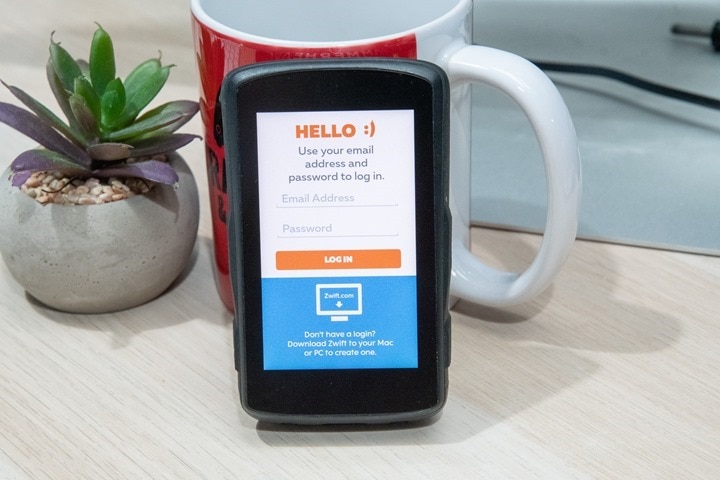
And here it is, opened up, ready to use:
Once you’ve signed in you’re ready to use it just like normal:
Note that for the Zwift Companion app specifically, the Dashboard/Zwifters/Messages pages tend to work best, whereas the map page is a bit more funky because of the small screen size. It works, but your metrics sorta overlay atop 2/3rds the map.
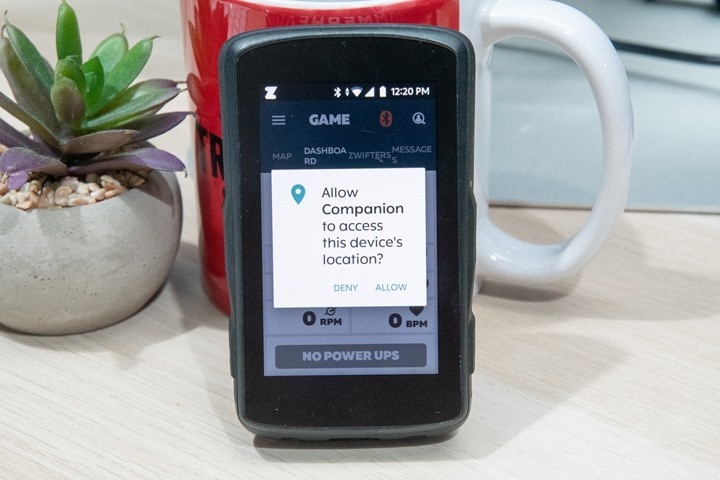
If you want to use Bluetooth sensors from the Zwift Companion app, then you’ll get a pop-up requiring you grant the location permissions. This is due to a weird quirk in how Android grants permission to the Bluetooth stack:
(Note: While the Karoo does support pairing to ANT+ sensors, the underlying Zwift Companion app doesn’t support ANT+ sensor bridging, unfortunately.)
With that, you’re ready to roll!
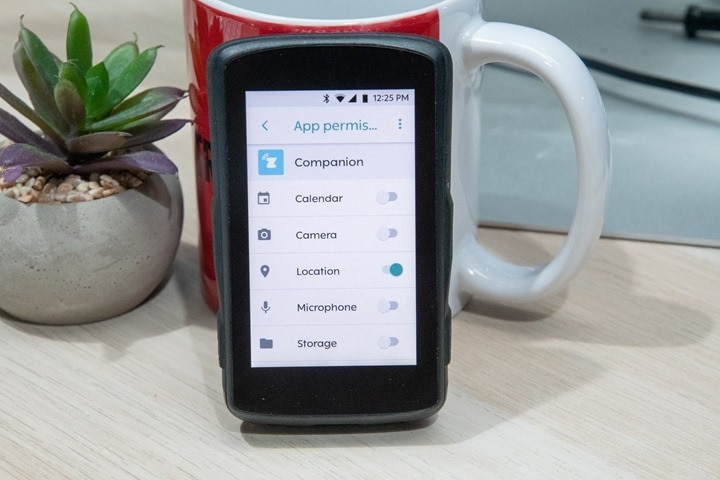
Also, for some apps, you may need to manually grant permission to use sensors (like Bluetooth or ANT+), storage, or location (via GPS). Most apps will pop-up and ask you to approve, but some apps like the full Zwift install will fail if you don’t manually approve them (in my experience). You can always manually approve apps by going to Settings > Apps > [Then your app] > Permissions, and you can give it whichever permissions it needs:
In my experience, the two most common ones are:
A) Location: Used for GPS and Bluetooth sensors
B) Storage: Used for writing to the file system
But I’ve also seen the quirky camera permission come up here and there, when an app may use that for taking screenshots. Go forth and enjoy!
Oh, and if you need to get out out of the app, simply hit the lower-left button (back), which gets you back to the Karoo screen. Remember just like on your phone, this app is still running in the background though. But, this does allow you to switch back and forth between apps.
Wrap-Up:
Now before we wrap-up, I’d be remiss if I didn’t note that since Hammerhead’s first Karoo announcement, a core tenet of why they’ve developed on Android was to try and get 3rd party apps to develop for the Karoo more natively. By using Android as the base, it would require minimal effort compared to developing an app for Connect IQ on Garmin (for example). If an app were to become natively compatible, you wouldn’t need to mess with any of this. It’d just likely show up on your Karoo unit without all the fuss – just like apps/features do on other platforms. Hammerhead has said they expect to announce their first 3rd party app here soon, so hopefully that’ll usher more apps to consider adding compatibility. And while the Karoo 2 isn’t fundamentally that different than the Karoo 1 (they run the same software), the reality is that Hammerhead didn’t have any inventory to sell and ship for basically a year – so their market share would have been a challenge proposition to convince 3rd party companies/apps.
But I think that’s going to change over the course of 2021, and the amount of native features they have now compared to even one year ago, let alone 2-3 years ago – is vastly different. Of course, that’s all besides the point here on this geeky post.
With that – I leave you to go back and install other Android apps that have no purpose being on a bike computer, because if it’s anything a bunch of geeks do best, it’s creating solutions for problems that didn’t exist. Now, back to my screen recorder. ;)
Thanks for reading!
Found This Post Useful? Support The Site!
At the end of the day, I’m an athlete just like you looking for the most detail possible on a new purchase. These posts generally take a lot of time to put together, so if you're shopping for the Hammerhead Karoo 3 or any other accessory items, please consider using the affiliate links below! As an Amazon Associate I earn from qualifying purchases. It doesn’t cost you anything extra, but your purchases help support this website a lot.
And of course – you can always sign-up to be a DCR Supporter! That gets you an ad-free DCR, access to the DCR Quarantine Corner video series packed with behind the scenes tidbits...and it also makes you awesome. And being awesome is what it’s all about!


