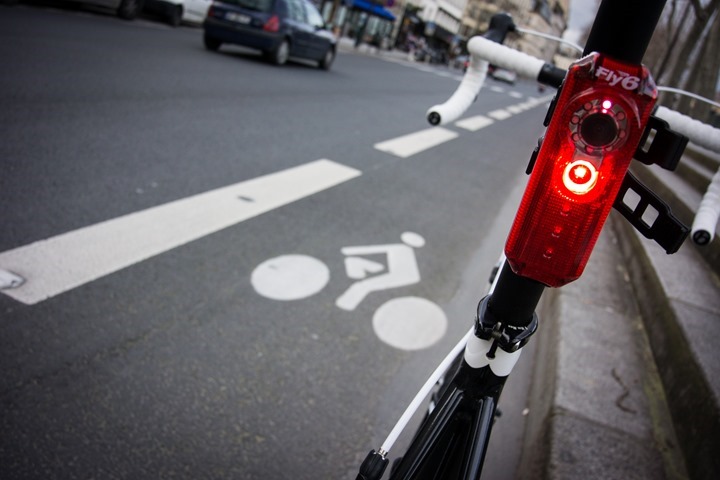
Yesterday I got to take out for a spin a new combination tail-light and HD camera that just launched on Kickstarter yesterday as well. The Fly6 camera is designed to act as a bit of a safety cam – recording whatever goes on behind you, while at the same time acting as a rear light.
While I’ve only spent a short amount of time with the unit, it seems to be enough to get the gist of things and provide some initial opinions. Given Kickstarter campaigns have a finite life (30 days), and and even smaller window for the cheaper options, I figured sooner was better.
What’s in the box:
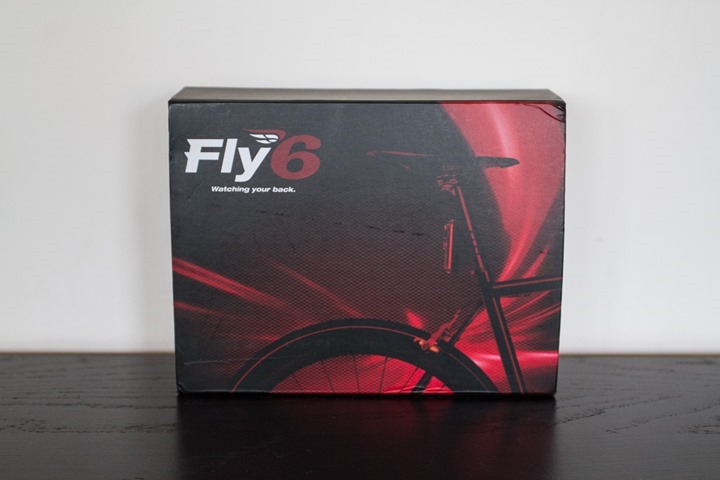
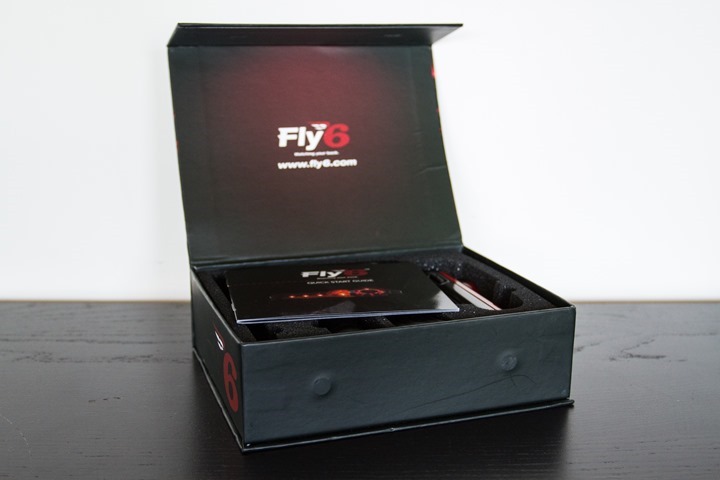
Cracking open the box, you’ll find things very well padded/secured. The box itself is about the size of a cigar box.
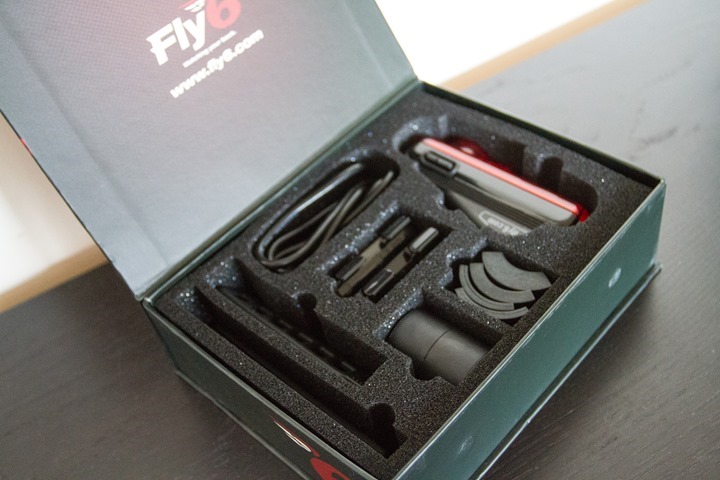
As you can see above, everything is very neatly arranged inside with each component in their own little foam homes. I do suspect that long-term they’ll probably minimize all that separation for the non-light pieces (mounts), as it realistically just adds a lot to international shipping costs and they could probably slice the box in half without it.
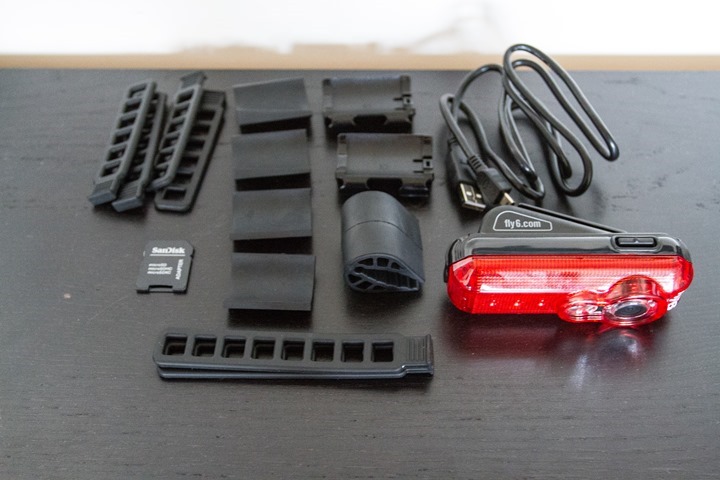
Here’s what you’ll find inside. On the upper left and bottom you have the rubber straps that secure it to your seatpost. In the center you’ve got a variety of mounts, also used for securing to the seatpost. On the right there’s the unit itself, along with the standard mini-USB cable. And finally, on the middle-left you’ve got the Micro-SD card adapter, used to put the Micro-SD card from the unit into your computer.
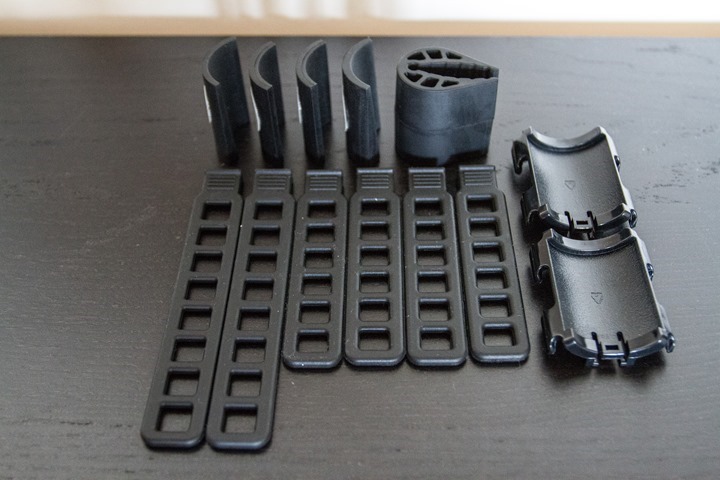
Here’s a closer look at the mounts. In order to mount a unit you’ll need two straps and one of the plastic things on the right side. The rubber pieces up top allow you to change the angle based on your seatpost angle. If you look at your bike you’ll find that very rarely are seatpost’s directly straight up and down. So these are little wedges to even it out. And finally, the big wedge up there is to attach to an aero seatpost. So, all in, you’ve got enough to mount to two bikes concurrently (limited by the two plastic pieces).
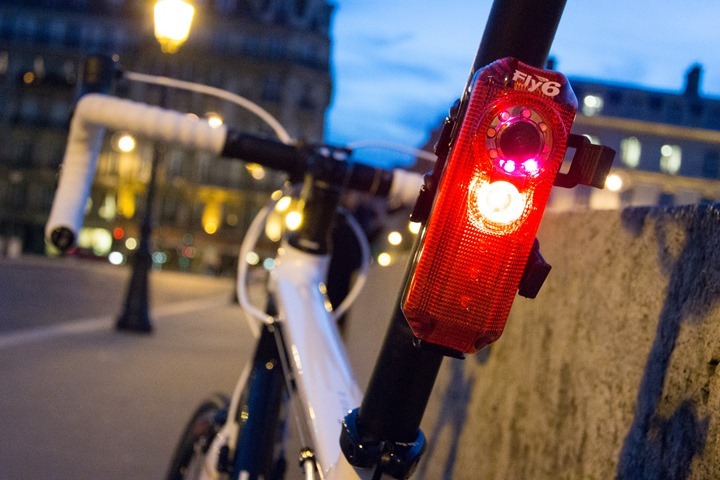
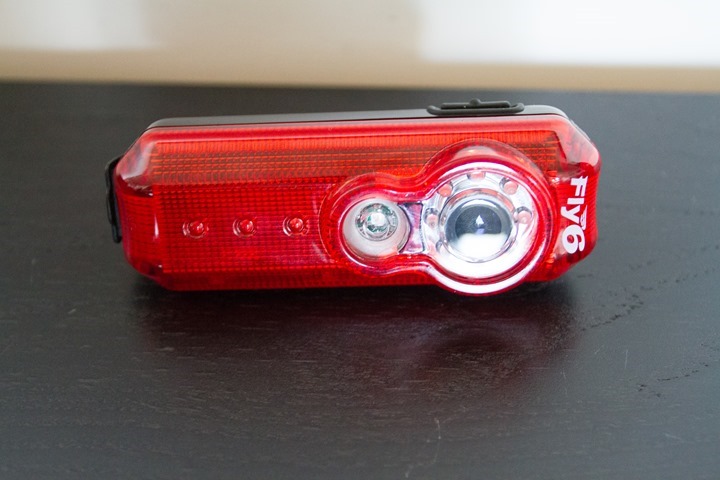
Finally, here’s the unit itself, as seen from the front:
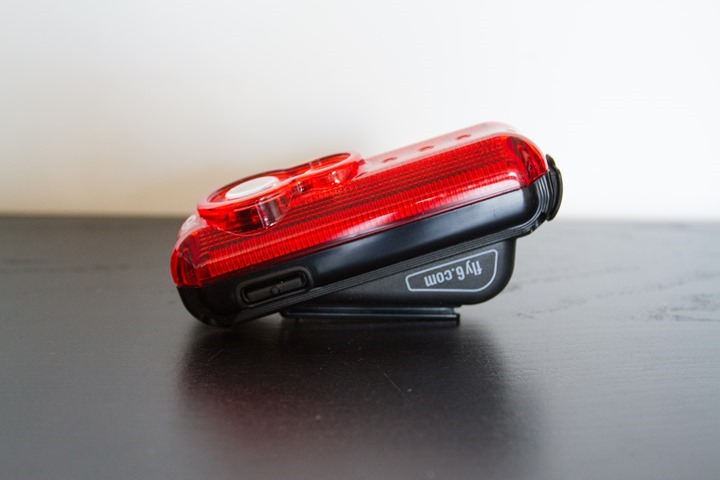
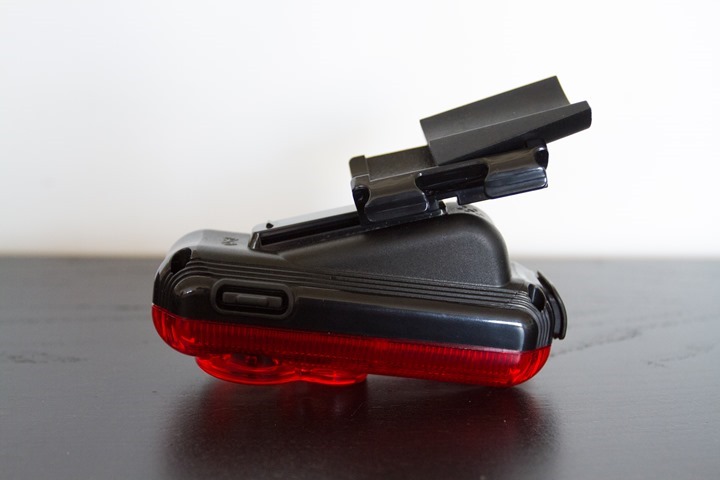
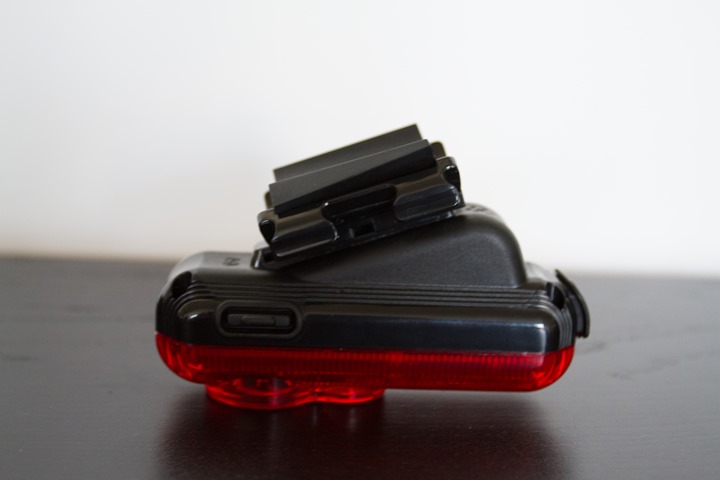
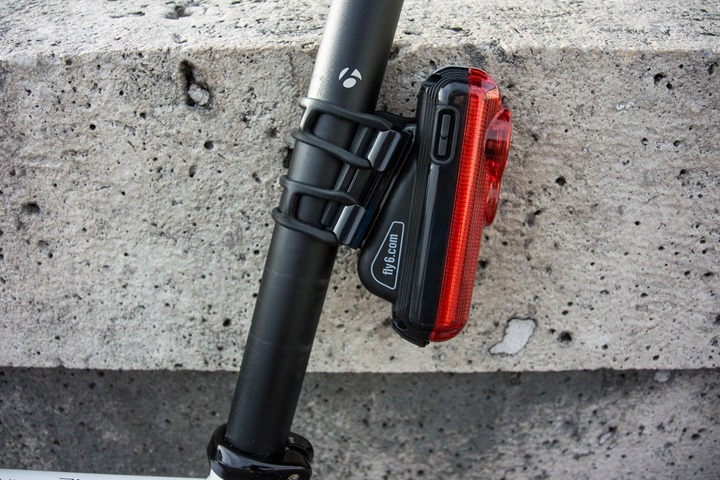
And, as seen from the side. You can see the power button on the left side there. And then the ‘rail’ that it slides down into the mount on; it’s sitting on the rail in this shot.
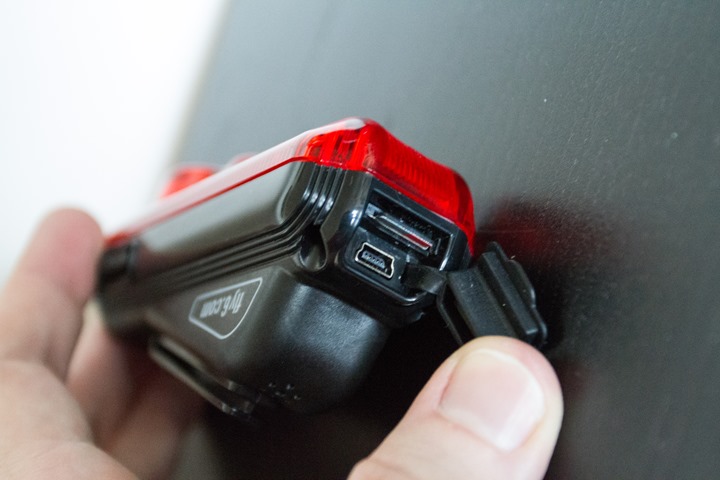
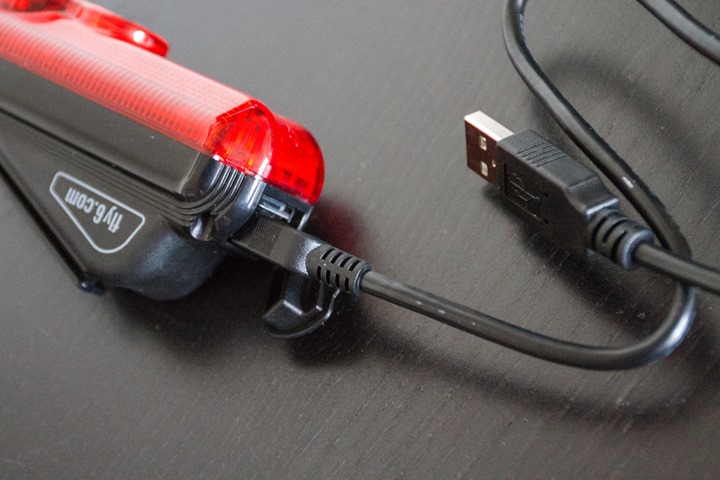
Oh, and here’s one last look, removing the cap to show the USB port itself as well as the Micro-SD card itself. The unit is interestingly proofed with a waterproofing technology that keeps everything completely waterproof. You often see companies demonstrating it at CES & trade shows where they’ll drop full phones/iPad’s/etc straight into an aquarium and leave it there. Effectively internally waterproofing it. The process is called Nano-Tech waterproofing, and you can read more about it on the interwebs.
Installation and Setup:
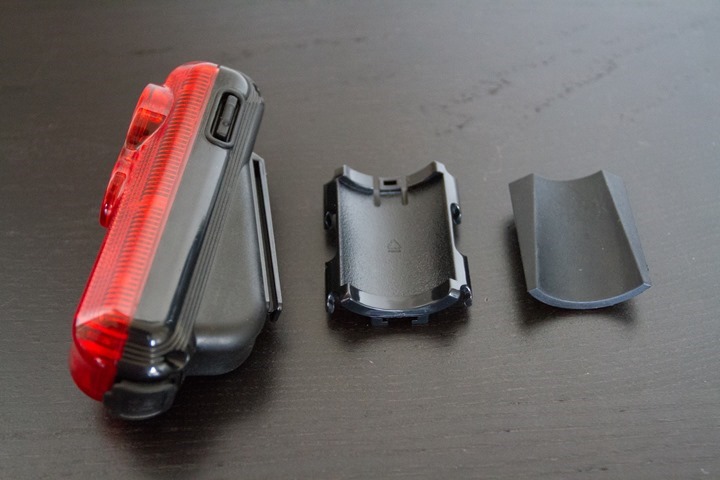
Ok, in order to install the thing on your bike you’ll basically need three components + two straps. Starting with the components above you’ve got the light itself, then the plastic mount, and then the rubber wedge.
You can see how these come together below:
Ultimately, the rubber wedge and the plastic piece stay on your bike using the rubber mounting bands. And then the unit just slides in and out on a rail so you can stick it in your pocket (or cycling shoes) for safe-keeping.
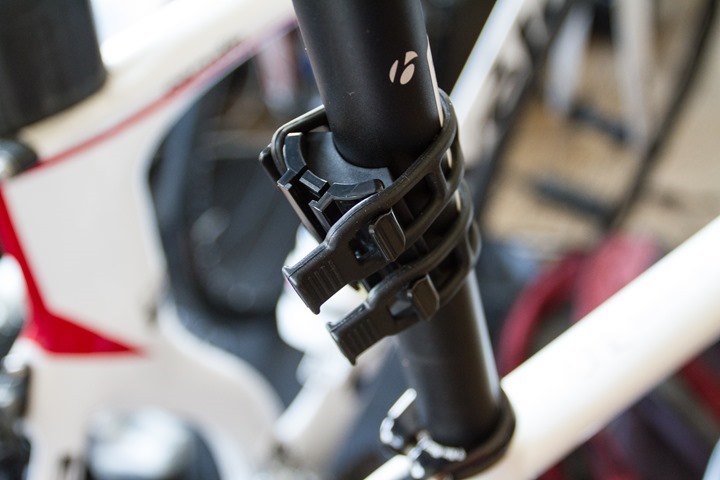
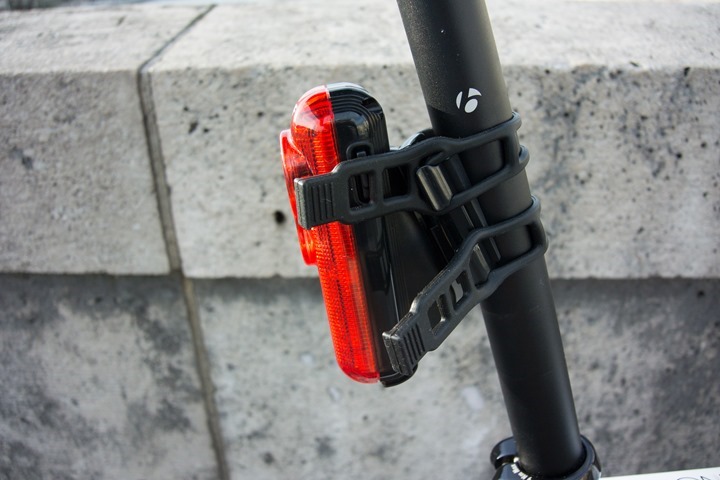
Next is the mounting on the poke. In this case you simply take the two bands and wrap them around. You can play around with how tight you make the bands. I went for a bit tighter after taking the below photo.
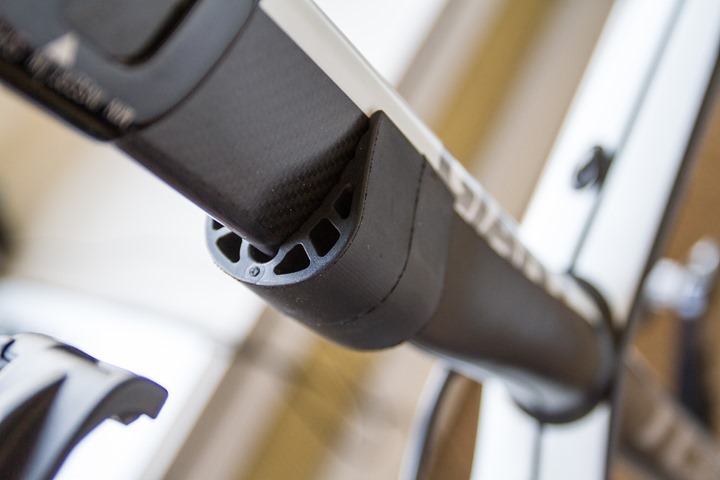
In the event you’ve got an aero seatpost, like below, you’ll use the bigger wedge first, and then the bands. Here’s the wedge on such a bike.
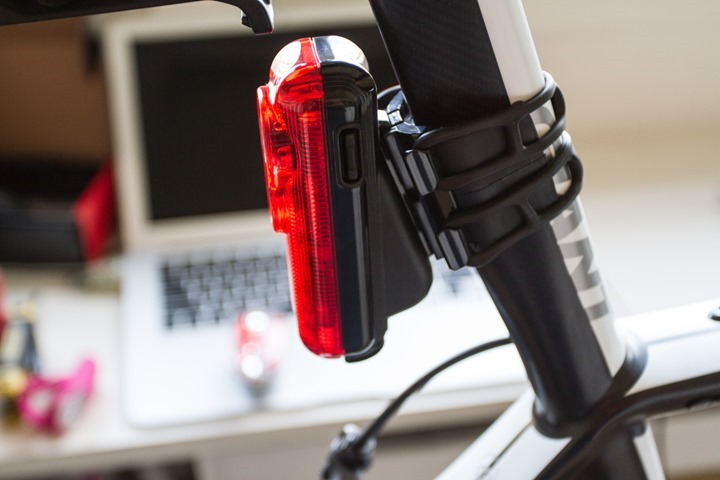
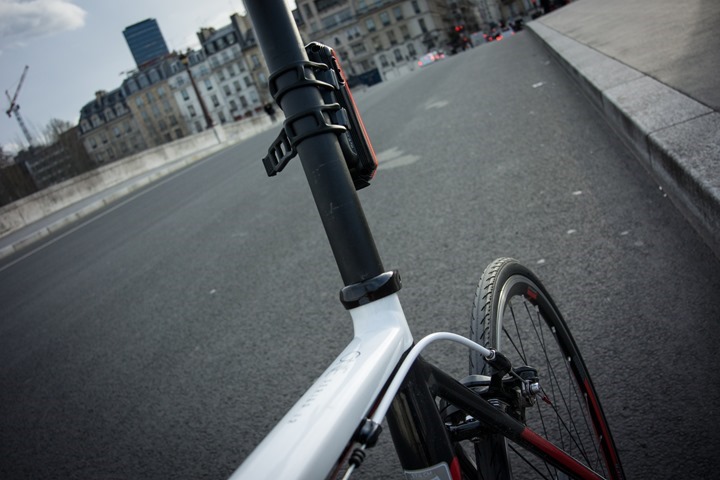
And then here’s the whole thing installed on the aero seatpost. Pretty straight forward and kinda hard to screw up.
Finally, note that the unit is rated for a 5 hour run time. I haven’t tested that piece yet. And of course, it just detaches with a little tug upwards to then plug into any USB outlet you can find.
On the bike and test videos:
Now that we’ve got everything all set, it’s time to head out for a ride. To turn it on, you’ll simply hold the left button down for 2 seconds. That’s it. It’ll make some sharp beeps to let you know of the battery state. It’s very loud and easy to hear.
At that point it’s both blinking and recording. You’ll know the camera is operating when the swirling flashing light is…well…swirling.
You can then cycle through three different blink modes by using the right button. By default it’ll always start-up to the ‘high’ mode. But you can press it again to go into the least-bright mode (low), then again for no LED mode, and three times for super-bright mode. The camera is always on, it cannot be turned off (that’s sorta the point). The reason you might dim the lights is if you were in some setting such as a group ride and it was a bit bright for people on your wheel.
Here’s a quick demonstration video of me turning on the unit sitting in the dark, and then iterating through the three modes, and then finally walking back a bit so you can see the brightness. At it stands today the prototype units are rated at 9 lumens, however the next pilot group in March will be 15 lumens.

Before we get to some actual video, a few notes on the straps. In my case, even the small straps were kinda oversized – so they were a bit sloppy on one side.
I wanted to show the above, because I suspect that virtually every other shot you’ll see will look all pretty and show the other side, seen below:
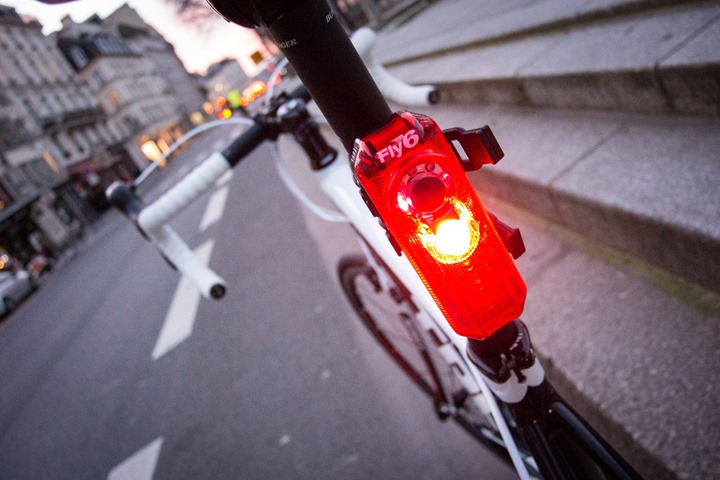
And here’s how it looks looking back:
Ok, with that, let’s take a look at some footage. I’ve got three pieces of footage that I’ve uploaded without any editing or tweaking. Just chunks of me riding on the bike around the city. The first was done in broad daylight, about 3:55PM – almost two hours before sunset. It’s interesting to note that in all three videos the video does appear slightly darker than it actually was outside. Here’s the first daylight video:

The second was done at dusk, about 20-30 minutes before darkness:

And finally, the third was done just after dusk. It might get a smidge darker, but here in the city there’s tons of ambient light – so that’s about as dark as it’ll get. The camera does not have any night-vision type functionality in it, so it needs some sort of light to illuminate items (street/sun/etc…).

As you can see with the last one, you can see the effect of the light ring looping around. Because the purpose of said video is really more about recording an incident than it is about producing an award winning film, that doesn’t bother me too much.
I did see one issue where the camera is randomly shutting off about 10-20 minutes into a clip. I’m not clear why. However, I noticed after my first segment that there was a rattle coming from inside, so I think something inside broke that may be impacting things somehow. It’s a prototype unit, so I’m not terribly concerned about that bug/issue at the moment. They provided a laundry list of other bugs that they were working on for the March beta shipments.
Viewing the files/recording details:
In the event you want to view the files post-ride, you’ve got two options. First, you can simply plug the whole thing into your computer via the provided USB cable, and the device will surface up just like any USB thumb drive.
The second option is that you can use the included Micro-SD card adapter, which turns the Micro-SD card into a standard SD card – just like your camera probably has. This can then be slipped into the computer (assuming your computer has such a slot), or, an adapter. Either way, pretty easy.
The unit records an .AVI file in 720p resolution, which can be easily played with just about any video player on earth. In the event your computer doesn’t play the .AVI file, I suggest returning that 386/DX Packard Bell to Circuit City or CompUSA and upgrading.
As for the quality, you’ve gotta keep in mind that this isn’t designed to be a GoPro replacement. Rather, it’s designed to record what’s going on behind you in the event of an incident. There’s obviously a clear difference in quality between a GoPro (or similar action cam) at 720p and this unit at 720p. But, that’s sorta why the GoPro costs twice as much, and lacks the blinking tail-light piece.
As you can see above, a 4 minute file takes up about 220MB, so an hour’s worth of footage takes up about 3.3GB (3,300MB). The unit includes an 8GB card – so enough for a little more than 2 hours worth of footage. It’ll also automatically loop/overwrite itself, so you don’t have to worry about clearing old files off.
Because the unit uses standard Micro-SD cards, you can buy your own (larger) card for about $10-$20. I stuck with a 32GB card for about half my tests, simply to validate there were no problems. The unit at this time doesn’t support 64GB cards, but it’s not clear if that’s just a beta limitation or not.
Final Thoughts:
Overall, I’m fairly impressed with the simplicity of the unit and the ‘just works’ factor of the Fly6 unit. There’s been a few other rear and forward facing units on the market lately (well, Kickstarter anyway), but this is a much more seamless integration into a component I already need (the light) than the others.
And, more importantly – they actually have a working sample to send to me. I can’t stress the importance of that enough when it comes to Kickstarter projects. In fact, it’s my ‘golden rule’ for whether I write a full post about a project (like this), or if a project is just relegated to the ‘Week in Review’ posts. If a company can’t send me a unit to poke at, or, can’t at least physically show me a unit I can lay my hands on – then I don’t really trust that they’re at the point of being ready to launch a Kickstarter project. Or at least, a Kickstarter project that I’ll write about. History has shown time and time again how poor companies are on Kickstarter at managing timelines, expectations, communications, and product delivery.
So with that – keep in mind that Kickstarter is a ‘buyer beware’ type venture. Looking at what they delivered me, I’d classify the project as ‘low risk’. The unit works today, has some minor bugs, but otherwise is fairly solid from what I can tell. They noted they have 150 other units out in the field with riders today, so that’s also positive.
As for whether or not you should get an action camera or a safety camera – that’s really a personal choice. Action cameras are great for capturing action you want to share, usually with some sort of storyline around it (even if it’s as simple as: Watch me beat my friends cycling). Whereas safety cameras should be as simple and seamless as possible so that they’re dependable with minimal features. Power on, record. That’s it. Just my two cents.
With that – thanks for reading!






Yeah I saw u mention this and went to check it out. I think for me the price is its biggest feature. For what you get for the money the value is unbelievable.
Would be fun within races. Nice to see later what is happening behind you!
Some of the license plate numbers are visible in the daylight video, others not so much, and it seems like Paris tag numbers are pretty big to start with. Can the video this unit produces be expanded or enhanced to get license plate numbers in the event of a hit and run? Would this unit be useful for that?
YouTube compresses video horribly; I’m sure the original video is much clearer.
The same camera used at the front of the bike, facing forward, would probably be able to record license plate numbers, since license plates at the back of a car (unlike the ones at the front) are lit.
I know you get the added advantage of the light, but isn’t the price creeping a bit close to the low end GoPro models?
The GoPro’s generally start at about $199. This is about $119.
Advantage of the light ?
It’s no use , it comes with low lumen compared to today standard.
With that hefty price tag ( referring to Fly 6 version 2 ) they should give out brighter and better lights.
When you look at rear lights, it’s certainly as bright as most average bike commuter lights I see around the city. This isn’t a front light – you aren’t illuminating the ground.
I couldn’t see anything on the Kickstarter page. Does it stop recording after 5 minutes if it experiences a certain g-force or something like that? I ask because what happens if you are in a crash and knocked unconscious, you are carted off to hospital and the camera just keeps recording reaching its 2 hour capacity and going over the now very important footage?
No, nothing along those lines. Sounds like it’s time to purchase the 32GB card so you’ve got 8 hours. ;)
Edit: I’ve been told that it has a provision in the unit to detect the bike lying on it’s side.
The kickstarter page claims only a 5hr batt life so the batt should die before it records over the incident if you have a big enough SD card.
Think it does, actually. The Kickstarter mentions Incident Capture Protection, and this FAQ page link to fly6.com says
“What happens to the footage if I am in an accident?
Hopefully this never happens but if it does and your bike is down for more than 3 seconds, your Fly6 will continue recording (subject to battery life and the device not being damaged) for one hour then will automatically turn off. This is for the purpose of capturing any post incident footage that may be worth preserving.”
The rattle in the unit is the reed switch which is used to detect the bike laying on the side etc. It is supposed to turn off after 1 hour of riding after the bike is placed on its side. This is to capture post incident events and preserve the accident footage.
I personally had one case where it switched off really quickly after a bathroom break but I haven’t played with it very scientifically yet.
There is something mentioned in the comments about the fly6 switching itself off if it is on its side for a certain amount of time.
Nice review.
@DaveH: Dave if the bike is tipped over 45degrees for more than 3 secs, it triggers a function to stop recording after an hour. In this way, the crash is quarantined. If you have a 32GB card (about $20) you should be fine.
I’ve covered all this in my review (feel free to pull this link DC): link to velonomad.com
This is a novel way to deal with the issue of the rider not being able to stop the recording after a crash. My concern is with the recording stopping if I have the bike leaning against the outside of the coffee shop in the middle of the ride, and then I forget to turn it on again. Though 45 degrees should be enough even in this case.
Now all that is needed is an app to connect it to google glass and you have a HUD rear view mirror.
Needs some kind of wind sock, even a little piece of foam stuffed in the mic port would help. looks like a good product, I know several people over the years that have been hit from behind and probably could have used this to identify the hit and run drivers.
So you’re telling me, someone is coming up with a 5hour battery life 720p camera with MicroSD slot, with an integrated rear light with usb.
This sounds amazing especially if that price stays where it’s at. They should eventually consider making a front light with the same design in mind if you ask me ! Make it bright enough and you may actually have a game changer for anyone who feels they need it for added safety.
This sounds like a great bit of kit. If it accepts even bigger sd cards all the better.
Cheers
No positive latching system? It just slides on and off?
Even a $15 Cateye light has a little positive latch, one that requires a couple extra fingers to slide off.
The rail has a notch in it, so it takes a fair bit of pressure to pop it out.
no privacy issues there – it clearly shows a red light if recording:-)
Hehehe very true!
Nifty. Just when I get the laser safety lanes in place… another cool gadget comes along. Look forward to the BT android version of the camera switch from drop bar end mirrors.
Could you please post the dimensions? I couldn’t find the info on the fly6 site and my saddle bag + short seat post could be a problem.
11cm in length, 4cm in width, and at it’s shallowest (top), the depth is 3.5cm, and at it’s deepest (bottom) it’s 5cm deep.
Thanks!
The prices on Kickstarter are in Australian dollars, with international shipping it’s slightly under 90 euros for the estimated May 2014 delivery. link to kickstarter.com
Ah I didn’t notice the currency. I thought this was rather expensive for what it is.
Why wouldn’t the use a MicroUsb connection?
Looks interesting, thanks for sharing! I love the marketing claim, “World First Incorporation of nano technology into a cycling device.” I don’t have the expertise to comment on the veracity of this claim, though the incorporation of nano particles into bike FRAMES has been going on for years!
Now, wouldn’t this be cool if you had it streaming to a head unit for speed, cadence, hr, power and rear view imaging. Probably wouldn’t add much cost to a display unit and could be either an overlay or just switchable. Would be much better than a small mirror on city streets.
So, legally speaking:
– this light would require a constant on red light companion (dusk-dawn steady red light and front light are the oldest lighting requirement on the books)
– and you may get ticketed as in some countries flashing bike lights are expressly prohibited
Nonetheless a good development.
For me they would need to:
– ditch the circular flashing LEDs as it interferes with recording
– have one or two steady LEDs and a couple flashing ones (away from the camera lens)
– extend the battery life or supply a dynamo for continued power
and develop a companion recorder with white LEDs for the front.
I was going to raise the same points about the light part, the swirling circle looks like an especially silly choice, but then again, I’m not sold on the usefulness of such cameras, except maybe as a deterrent (but you better make sure the freaks can tell you have a camera on board), in which case the swirling light makes it easy to spot.
I guess a blinker, although technically forbidden in many countries, does work better for visibility in urban areas where estimating distance is not really an issue and where probably this camera is supposed to be used the most. And I have a hunch the battery wouldn’t last long in steady mode, unless the brightness is significantly toned down.
BTW Ray: “The unit is interestingly proofed with a waterproofing technology that keeps everything completely waterproof.” but is it waterproof? :)
Yeah, I had intended on leaving it in a pot of water for a bit to see what would happen. Just forgot by time I finished writing. I’ll probably do it on Sunday night when I get back home for fun.
Long term though, I’ve got something way more fun cooking for waterproofing tests though, more on that later in the spring once it’s completed…
I’ve used my test, pre-release unit for well over 5 hours. Closer to 6. That is with the lower lumen light in it so the production one may run for less time.
My partner and I pledged to this project to support the development of the concept. A camera and light with incident recording/auto-stopping is pretty clever for the price.
I’m keen on this project funding a white-LED front light in the future as most incidents I seem to get entangled in are motorists passing too closely and being cut off at intersections (I see the creators already have ideas from their Kickstarter comments). It would also be useful if witnessing an incident and riding towards it to render assistance while the camera is already recording.
In relation to flashing lights not legal in some places, dynos etc, I think this is a great first-of-breed and, with success, hope the suggested modifications can be incorporated to suit a wide audience.
I was all set to pay the kickstarter until the video. The product is bang on but the video quality doesnt show the plate clear enough. The video in 720p isn’t any clearer not sure if thats still less then the actual quality RAW from the unit? Amazing to think what next gen devices may do?
Looks like the plates are intentionally blurred (for legal reasons) on the videos I watched on their website.
I personally think you are doing yourself a disservice. Most cycling safety bloggers I know call out license plate numbers as they know even their Go 3’s often can’t make out a plate.
These things can of course make out plates given the right circumstances however you can’t rely on it like any other camera.
You can however use the footage with all other witness accounts etc to make a case.
Not sure if linking works here, I’ll try but there is a video on Youtube called “Coro Drive Lunatic” which was an incident from last Friday taken with a fly6. It is likely to result in charges being laid on the driver involved. You can clearly see the plates. link to youtube.com
Also…
I’ve had a pre-production version for a few weeks now and I can often see plates. I can personally state that Youtube does mess up these videos. They are MUCH better in their raw form.
They have that video on their website but with the license plate blurred out.
If folks are curious, I can try and find a spot where I can put up the raw files. They range from 147MB (Night ride) to 220MB (Day) to 541MB (Dusk). Let me do some poking here shortly.
Try Vimeo
Hi All-
I’ve posted the raw files for folks to download at the following links:
Day Ride: link to dcrainmaker.box.com (220MB – .AVI)
Dusk Ride: link to dcrainmaker.box.com (541MB – .AVI)
Night Ride: link to dcrainmaker.box.com (147MB – .AVI)
Enjoy!
I actually backed this yesterday.
I think it is fantastic value, 5hr battery life, with loop recording (no need to format). It accepts 32gb class 10 cards (Contour + doesn’t).
The only negative point is what you Ray pointed out with the strapping on one side, but I’m sure they will fix that.
I was involved in a RTA last year, a hit and run, stopped at a set of traffic lights, and was hit from behind. I was thrown up into the air and landed unconsciously on the ground with a fractured clavicle, that I had surgery on. I was out of work for 2 months, if only I had the fly6, at least I would have got the number plate.
That is the point of fly6, its no GoPro or Contour, but heck its fantastic value, and as my mom always said “i’m watching you ;), i’ve got eyes in the back of my head”, and I will too, if the project gets backed.
Great idea – I would like to see a version for the front.
I live in a state where there are no license plates on the front of cars, so you could only go by color/car and not much else in an accident.
Just thought of a solution to my challenge: A clear lens (and wedge/straps) as an accessory. That way I can decide whether to locate up front or under my saddle.
Looks just like what I need for my commuter, but do they have a mount that will work on a rear rack? I have a rack on my commuter and would need a mount that works with the rack. Seatpost and seat stay mounts won’t work as my commuting bag covers them up. Other than that this looks like a winner!
If it just recorded the last minute or two and the same after a crash it would be just as useful and it would have no capacity issues. That’s how cameras in commercial vehicles work.
Nice review – It would seem that the rubber straps might rub on the inner thigh? I have short legs and big thighs (choose your parents wisely :) – and would be concerned of leg rub as I only have about 8″ of seat post sticking out and I have to always place rear lights as low as I can. Thoughts?
Ray, Is this your image as well?
link to gearjunkie.com
Noticed your Gizmodo stolen photo post on twitter. Then I notice that Gear Junkie stole your photo too without a credit: link to gearjunkie.com
Doesn’t seem right – but that’s the internet for you.
Nathan
Sigh, yeah. Thankfully, both quickly corrected it and apologized (including from the Managing Editor at Gizmodo), and founder at Gearjunkie for pulling. They thought it was professionally shot photos from the company.
Which is, in part, a compliment to your photography skillz…just like your MS Paint artistry…
Yeah, I need to get some more MSPaint artwork in my posts again…
But did anyone notice in the first video (at 1:32) the running couple pushing the stroller going the wrong way!?
Nice to see these devices are starting to pop up. No time before we have live streaming video transmitted through our phones for cheap.
Yeah, that was one of the weirdest things I’ve seen lately while riding. Caught me totally offguard. Many runners run in that section of the bus lanes because the sidewalk is often really crowded with tourists. And since the buses are easy to spot it’s not a big deal. Taxi’s can also use the bus lanes, but they don’t like that particular section because tour buses often stop there and then they get stuck behind them.
In any case, I’m reasonably certain running the wrong way down an active bus lane with a double-wide stroller is probably less than ideal..
I’m really tempted by the unit, but worry about the available real estate on my seatpost. I’ve got about 90 MM to work with, including room for the seat wedge. How much room does the mount for the Fly6 require?
The actual mount is about 50mm. The light itself is about 90mm above the very bottom section of the seatpost where you can wrap the rubber.
So as long as your saddle is above say 100mm above the seatpost clamp then you should have room. You only need 50mm for the mount itself.
You can simply turn the unit sideways to get it on and off the bike.
That’s really helpful, thanks.
Hi guys – CEO of Fly Lites & co-inventor of Fly6 here! Would like to address some of your comments if you don’t mind (well, ones that appear to be unresolved or where I can add a little more detail). Also feel free to contact me directly via our web site (www.fly6.com) we welcome your comments & suggestions.
– There have been loads of Fly6s used in races & events. Wish I had more time as I’d love to do a little montage of some of the user submitted racing content…awesome stuff (my favorite is the MTB action…)
– I did get time to screen shot a number of license plates and montage them onto a image I have posted recently on our Kickstarter page. You can see that some are very easy to see and some are very difficult and as mentioned, it largely depends on the conditions. Generally speaking tho (I know this is obvious) but the closer the car the easier to see the plates. Usually incidents require a ‘close encounter’ and therefore getting the plate number would be more likely. Don’t forget tho, a partial plate reading and the car type will in most cases identify the vehicle – the police are pretty good at that stuff!
– please don’t compare Fly6 to a GoPro! GoPros in my opinion are the best in class, yes they work on bikes, but are not really designed for them. Fly6 is only designed for attaching to the seat post on a bike and has features like looping because we are not filming action, we are just going for a ride and don’t want to format the card after every ride so we can record the next ride! Keen cyclists often ride for more than the stated battery life of GoPros and our focus groups and research screamed loudly for at least 5 hours. We were very pleased do give it to them in around 100grams of device which most of the weight is the battery! I know the comment was a price comparison and the AUD was clarified but it’s good to mention that we sell Fly6 for such a low price point because we are selling it direct and not retailing it through stores where a number of parties need to get paid for their part in getting it on the shelves. If not for our direct selling model, it would have to sell for around $250(USD). We didn’t want that even tho there was and still is significant pressure to do so!
– We have had a few people pull the ‘coffee shop lean’ and have the device turn off as they are riding home. The device sounds three loud beeps signalling the device is turning off so you will know if you have done this and just turn it back on and away you go.
– Wind sock, interesting issue and I challenge Ray (DC) to find the mic on the unit…let’s see if he can before the discussion continues…
– Front light – our most requested feature (or in reality, a whole new device!). It was the first thing we thought of when we thought of the rear solution! As there are only two of us in the company, we have focused our efforts on the rear version (given there are other video solutions out there for the front already). With time & resources we will jump all over the front version.
– MicroUSBs, we find, are less widely used. We wanted Fly6 to be very simple and easy to charge both at work or at home (where you most likely will find miniUSB cables more than microUSB cables). We will look at this option for V2 tho…thanks!
– The “‘world first nano technology on a cycling accessory” claim was provided by the nano technology patent holders. Understand it is used in bike frames and other ‘parts’ but not on accessories!
– different lighting requirements in different countries – we are looking into them now and might be able to address them in our first production run (maybe). Steady mode will reduce the battery life but we are exploring this as well….
– you can extend the battery life of Fly6 with an external power source plugged into the (commonly found) microUSB port!
– nano-technology protects all surfaces from corrosion and water damage. It does not make the device “water-proof”. I think it is a commonly mistaken way of describing nano-technology. You might have seen YouTube videos of a mobile phone going in the water and coming out working? The water filled into the phone (therefore it is not ‘water proof’) but more ‘protected from water’ or more correctly said ‘proof from water damage’! We used nano-tech because we have both had many lights that get a little water in them then the die…not fair and not warrant-able…Not sure what Ray has in store for his prototype however he can immerse it in water (even turned on) and it will work for a while until the currents pass through the water onto other parts of the PC board shorting out Fly6. Empty the water out and let it dry and you will find it works just the same as before! Try it with out the USB cover inserted….fills up with water faster….
– Nicole, thanks for your vote of confidence and understanding that this is our first version! Much like the clunky old iPhone 1..remember that big, slow, heavy, glitchy old thing?? We all loved it at the time, as do most people love Fly6. We have great ideas from everybody for V2 and will apply our simple thinking to them and let’s see what comes out?!
– we do blur out plates on our web site. It’s really because we don’t think it is our position to ‘name & shame’ people for their bad behavior or lack of attention. We don’t want to fuel the bikes v cars stuff. The ‘corro drive’ video (with number plate in full view) was posted by a Fly6 user to his YouTube channel – pretty effective!
– we can look at the strapping however it requires re-tooling every time we do that (expensive & lead time concerns). I think we will stick with what we have at the moment as they totally work for all seat posts at the moment so changing this might (have to look at this closely) limit their versatility.
– What happens to the footage in the event of a substantial incident? Fly6 is tucked into quite a secure spot so should be one of the last places to get effected by an incident. But what if it is you say? Well, the data is recorded live or in real-time onto the microSD card (sorry – didn’t use a nano-card either!) so if the device is compromised all the data up to the event will be captured…perhaps the most crucial footage to have. Furthermore, the card is inserted almost into the middle of the device making it the last place to be affected by damage. Ray can provide some comments on how Fly6 feels – I would guess he would use words like “sturdy construction” or “feels well engineered” or “does not feel like it would break in a hurry”.
– No mounting solutions for racks, panniers, helmets, jerseys, pouches or anything else at this stage (sorry). One of the key benefits of Fly6 is the camera footage. It is surprisingly smooth/steady (our Vimeo page shows HD versions of footage in most cases). This is due to the unique method and location of attachment to the bike. While we will look into alternatives, it will only be on the basis that it can deliver equally as smooth footage. If it doesn’t, in our humble opinions, there is no point having it there at all. We are very aware (& very sorry) that this will marginalize many people but it is what we have come up with for our first version.
– Having a keen interest in where Fly6 pops up on the internet, I have found many more (at least 5) of your images on other sites Ray…let me know if you want the urls…it is the ultimate complement for your photography skills
Apologize for the long winded post…hope you didn’t fall asleep while reading….all the best, Andrew Hagen
Please help, I am having major issues with the camera only recording the last 10 mins of an hour plus ride. and when i tested at home it ran for 20 mins and then shut off by itself (no movement at all). This makes no sense and I’m very frustrated and thinking of returning it! A 3 hour ride the other day and only saw last 10 mins once again?
Please could you respond direct to me since there is no phone number to call for help?
Thanks
Hi Andy – we don’t have a number as we don’t have a 24hr support service given we have an international product. We do however have a fantastic support service & team who you can contact with any issues (relating to our products) at support@cycliq.com
With that said, you will be asked questions like which model do you have, which firmware do you have installed, how long have you had it etc so we can help you resolve the issue. Two of the first things they will ask is that you re-format the microSD card which is good maintenance every now and then and make sure you are using the latest firmware which is available to download with instructions from our support page on our website http://www.cycliq.com usually one or both of those things sort out most issues. But if not, our friendly and responsive support team will help you out.
BTW we have a mode called “idle mode” that shuts down the unit to conserve battery power if no motion is detected after 15 minutes!
Also note – the most responsive help you will get is at our support page given posts like this on a blog written nearly two years ago don’t get as much attention from us!
All the best
Andrew Hagen
Thanks for response! I am in touch with support.
A forward facing camera sounds good but would only be effective under certain circumstances. After being hit from the side, and the offending car having travelled past you, the direction in which your camera would by then be facing would be anywhere but in the direction in which the car is gong.
Glad to see that the co-inventors have responded here. My only complaint is that I don’t see how the circular flashing light is going to be a visual message to drivers that they are being recorded, especially if they are passing at a high speed on a rural road. If I wanted to do that, I would just slap a GoPro on the bike, that would be much more bulky and visible. Unfortunately, I think the real deterrent value will only come when video footage from the taillight is used to prosecute an at-fault motorist. Nevertheless, I think the rest of the product has been very well-thought out, and so I have supported it on Kickstarter. I just hope the circular flashing light can be turned off in a future firmware update.
Great review, as always. Looking at the seat post mounting options, they thoughtfully include an aero seat post adapter. Do you know of any other aero seat post adapters on the market? I have see many homemade ones that require craft skills and tools (which I don’t posses) or look really janky.
I’m not aware of any others. But it’s funny, I thought the same thing: “Wow, that’s a really nice adapter, why haven’t I seen any others like it?”
I find it a little offensive and confusing the founder Andrew would claim that microusb is “less widely used”. Modern devices all use microusb while miniusb is going away. It’s *possible* that in pure numbers there are more miniusb devices out there, though I doubt it. Even if that was the case, why wouldn’t you want to use the better standard?
Same situation with the straps. With the smallest strap, there looks to be quite a bit of excess. What was the purpose of this? Did the company just order OEM straps and they were stuck with a certain size? What sort of gargantuan seatposts do they think people have that they’d need that much excess?
Hi David – thanks for your comments. We appreciate your thoughts and I’d like to address them if I may?
I’m terribly sorry that my comment (that you said could ‘possibly’ be true) offended and confused you. You see, when we started development of this invention two years ago, we had a number of parameters to consider, manufacturers supply chain, costs, price point, space, weight, functionality, form, function, ease of use and robustness to name a few. We chose miniUSB because as it was more widely used (at the time) and ease of use was a determining factor. Let’s not forget that our own experiences help shape our decisions (given it was our invention we were working on), where both myself & my co-inventor had many miniUSB cables in our houses and no microUSB devices at the time. While in hind sight, it could easily be said that we could or should have implemented microUSB into our device, our very small budget and working on the invention part time precluded us from deploying such things (that perhaps a multi-national company could set their research teams the task of doing).
In relation to the smallest straps, it is probably worth pointing out one of the other criteria we considered when developing them (they are not OEM) – flexibility. You see, not all seat stems/posts are the same size or shape and with that in mind we wanted the straps to work with most seat stems/posts so we made them slightly longer than what we considered necessary for a ‘normal or average’ size seat stem/post. This would mean that they work on all seat stems/posts – even gargantuan sized ones or even seat posts that are not slim or round…we didn’t want people with those to miss out either.
With those two points addressed, if the presence of and rationale of using a miniUSB offends and the amount of excess you think are in the straps causes concern, all I can suggest is that you do not purchase Fly6 because we would like our customers to happy and satisfied. I am not saying this to offend, but we are genuinely concerned with how our customers feel about our product and would hate for you to be anything other than satisfied. I hope my explanation goes some way to helping you understand our perspective on these issues. Feel free to ask any other questions tho!
Regards
Andrew Hagen
How tall is this taillight? I haven’t seen any dimensions, but from the photos it appears to be 11cm tall. That will certainly work for bicycles with sloping top tubes, but it might be a problem on my older bicycle with a straight top tube and therefore not as much exposed seat post. :-(
Hi BikingBrian – it is just over 100mm (10cm) and I think you are correct, older and more upright seat posts don’t suit Fly6 as well however, we have some adjustment spacers to manage differing seat post angles. You definitely need some exposed seat post however some people use the aero spacer where there is less exposed seat post to ‘push out’ Fly6 to good effect!
Hi,
Are the straps long enough to fit around an aero seatpost of a tribike? like that of the BMC Time Machine TM02?
Yes, you can see one of my photos includes that of an aero seat post.
I don’t know if it would work on an aero seat post, but on my Roubaix I ditched the rubber straps that came with my fly-6 and used some extra rubber bands from my Garmin mount. Very clean and very secure
If I have a rear camera, I want it to be a deterrence against errant drivers and make them keep a safety distance when near me. For it to look like a normal rear light from a distance, I don’t see its deterrence effect if drivers don’t know it is a camera.
For the video to be a post-accident evidence, it is useful if I am still alive.
I don’t think the mounting system really needs to be changed so much as added to.
You need some options that will work with all the odd shapes and bends and flat plates that various racks come with.
Two easy options, though not necessarily pretty, would be
1a) For those who have a flat plate instead of cross bars, some sort of thing that would clamp in the middle of both of the bars that the bags mount onto. It could have a pole in the middle pointing upward that the camera could be strapped to.
1b) A pole with a really sticky glue that will stick to paint or annodization. If you can find a glue like that this would be really cheap and easy.
Or maybe a pole with a strap to go around the plate.
2) A pole that would mount to one of the cross bars on racks that have them.
The first would definitely prevent you from mounting anything to the top of the rack, but it’s still better than not having that option.
Just add them as options for the checkout.
The kind folks at Fly Lites have donated Team MAMILS – Middle Aged Men In Lycra a brand new fly6 to help them get to their fundraising target of $50,000 for the Perth Ride to Conquer Cancer
If you want to get your hands on one before all your mates…NOW IS THE TIME!!!
100% OF THE PROCEEDS GO DIRECTLY TO THE HARRY PERKINS INSTITUTE OF MEDICAL RESEARCH
BID NOW!!!! link to bit.ly
My Fly6 has arrived and looks pretty awesome. Need to mount it and try it out, but a big thumbs up on a realistic schedule and delivery that was on target.
This looks like a great camera solution. Currently I mount a Contour Roam2 on my frame below my seat post and sometimes it rubs my leg, but it has a 170° viewing angle which is good for people passing me doing all sorts of badness. The 130° seems to be just fine for most situations though.
However, I am a little bit disappointed by the 15 lumen output of the tail light. I searched widely for a decent tail light that is visible during good the day. The 2W Cygolite Hotshot was the brightest I could find, at over 60 lumen, brightly visible in full daylight.
I wonder if there might be a plan to upgrade the wattage of the light, especially if it is USB rechargeable. I am still considering getting one, as I have a hotshot on my saddle bag and the rear of my helmet anyway.
I would also like to know about brightness. Riding in Sydney can be a risky business at times, and I think a very bright rear light is a must (especially when doing those long TT rides alone). Any plans for a very bright option?
Great product otherwise and I will buy one – possibly run a second flashing light.
If you guys wanted to see some footage from my brands new Fly6 from my commute in central London you can see it below.
link to youtube.com
One request to the owners would be the option of more attachments as two is great but would love the option to buy more, eg one for race bike, one for commuter bike for the station and one for my bike in town and one for my mountain bike
PS Thanks Mr Rainmaker for all the great reviews.
Very nice!
Quick update – we are working on brighter light for future models and we have also just added additional adapter packs to our website for those with more than two bikes. Check them out here: link to fly6.com
Cheers!
Is it possible to have just a steady red taillight, with no flashing?
I have only found the one flashing mode which is fine as I also use a red led on my rucksack
I’ve been looking for a solution like this for my wife and I for some time. We both use very bright flashing rear and front lights, and ride in downtown Austin traffic quite a bit.
I’d like to address the concern of deterrence. We had custom jerseys made for $30(USD) each by a Chinese company we found online. The ones we made were funny, and we get comments EVERY time we wear them.
I know that a fluorescent jersey saying “YOU’RE BEING RECORDED” all over the back would definitely get people’s attention. If it also advertised Fly6, well, I think that might get some questions from other riders and some business going Fly6’s way. Maybe Fly6 would like to think about that as a product offering.
Think once MS launch this product that action camera footage could become alot easier on the eye
link to techcrunch.com
G
Really cool stuff indeed!
Looking for information on lights for running. This seemed to be one of the few lights posted anywhere. Has anyone used the gomotion lifebelt? Any feedback appreciated. Thanks.
Ray –
Quite a few months away from your review (I know). Curious to know if you had any change in opinion of the Fly 6 or Fly 12. In Houston, TX we unfortunately had an incident which may have benefited from the Fly 6. I’m looking to switch from my Hotshot 2.0…
Thanks!
I had bought the Fly6 a couple of weeks ago, but hadn’t put it on my bike(s) yet. Then just 2 Saturdays ago, I got cut off by a truck and wrecked pretty badly. Fortunately, the guy stopped and I’m still waiting for the police report so I can go after his insurance. I wish I had put on the Fly6 so I would have had instant proof that he passed me first.
Anyway, I just put the Fly6 on one of my road bikes and took it to work on my short 3.5 mile commute. The camera and flashing lights works like a charm. Quality is more than good enough to me. No close calls, but still nice to know I’ll now have a video record in case I ever need it.
Two issues:
1) Doh! Remove the plastic tag from the lens! Couldn’t figure out why my video had two red rectangular boxes blocking the view!
2) Right off the bat, I loaded my SD card into my computer, uploaded the videos, then stuck the SD card back into the Fly 6. I turned on the Fly 6 and noticed the dimmer switch had absolutely no effect. I power cycled it many times and the dimmer switch didn’t work at all. I went to remove the SD card by pressing it in, such that it would pop out … and it immediately jammed.
Bummer. I sent Fly 6 customer report a service request.
Well – bad eyes were to problem – coupled with a tiny SD card – even the bike shop couldn’t figure this out right away (he also wears glasses!) – then he thought to put in an SD card and realized my SD card wasn’t in the device in the first place!
I went home and tore apart my work area – that card has just disappeared!
It’s so tiny!!!
Eek, well, at least you’ve solved the problem! If you can’t find it, you should be able to pickup a replacement card at any tech store for about $10-$15. Even many grocery stores carry them now too.
Many of the reviews on Amazon complain that the attachment straps break quickly. Has this been your experience? Thanks.
Nope, I use it every day – no breakages thus far. I suspect if you were to remove the straps constantly it might break, but I’m not sure why you’d do that. That’s the purpose of the camera clip mount thingy, so remove just the camera portion.
Hi Gene – used correctly, they should not break but like any rubber or plastic material, they all have their breaking points. Please watch this video showing you how to correctly mount your Fly6. Follow this guide and you should not break your straps again. link to vimeo.com
Please contact us at support@cycliq.com if you do have any support issues and we will be best placed to help you out with our friendly and responsive support team. Or for more support help you can check out our support page on our website http://www.cycliq.com
Like Ray, I have not ever broken any straps but I bet I could if I put my mind to it!
Regards
Andrew Hagen