I first heard about the iBike Dash a few months ago, while looking at information related to their normal iBike Aero power meters. The iBike Dash represented a bit of a departure from the companies past power meter products. In the past, the iBike wasn’t any sort of i-enabled Apple-esque type of device, but rather simply what they called their product. But had nothing to do with Apple or Apple’s products.
It was designed as a low-cost power meter, an alternative to many of the other higher priced options. Instead of using what’s known in the power meter industry at ‘Direct Force Power Meter’ (DFPM), it would use math and known quantities such as wind speed, weight and exact tilt angles to determine your power.
In the case of the iBike Dash, they’ve ported this whole concept from what used to be a standalone power meter device (the iBike), to being one that is based on your iPhone/iPod Touch – while being paired to a specialized case with a few additional sensors.
While they technically make two versions of the iBike Dash – one with a power meter, and one without, I’m going to focus on the one with power.
It should also be noted that John (CEO) from Velocomp is sending me out the iBike Dash to compliment the iBike Aero he sent out to test. But while at Interbike I did get a chance to get you a bit of a sneak peak at the hardware and software that make it run. So…let’s get kickin’.
the Hardware:
Out of all of the iPhone bike cases I’ve seen to date, there is no case quite like the iBike case – dubbed ‘The Phone Booth’. Without a doubt, this is the most well built case I’ve seen. I’m pretty sure you could run this thing over with a small Japanese car and it’ll still keep on ticking. I’m also fairly sure you could go scuba diving with it should you want to.
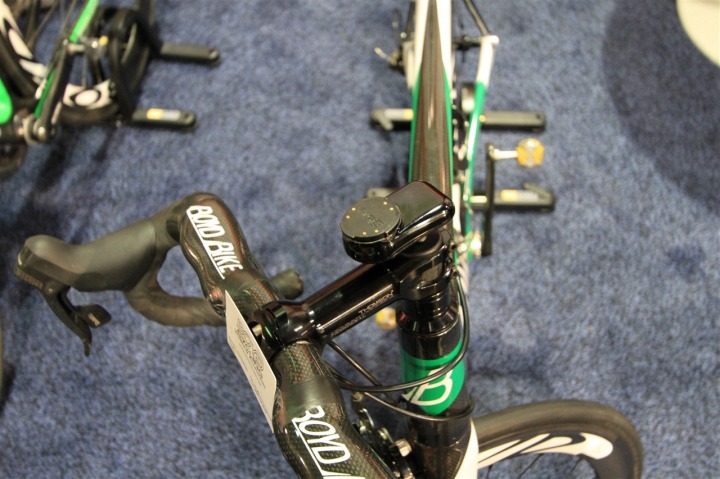
First, you have the stem mount system:
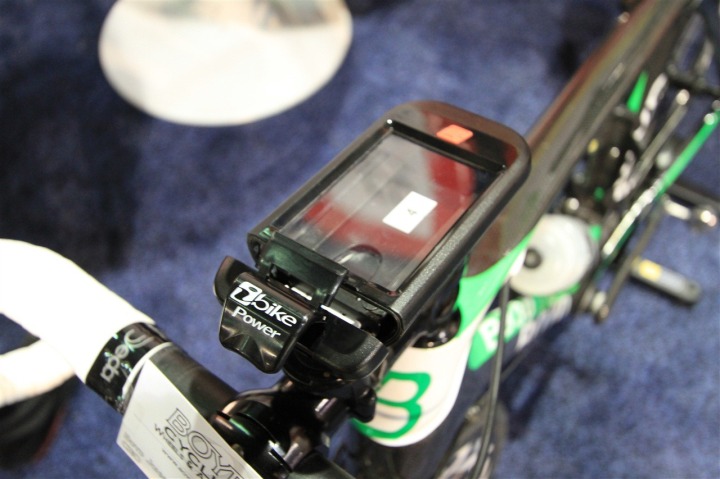
You can see it above with the three pairs of dual-bronze dots. Then, you attach the actual iBike Dash case:
You’ll notice the case opens up on the front, but actually has a really cool locking mechanism built into it, so there’s no worries about the phone falling out the front, or water getting in. And for those familiar with the best YouTube video of all time…no, the front won’t fall off.
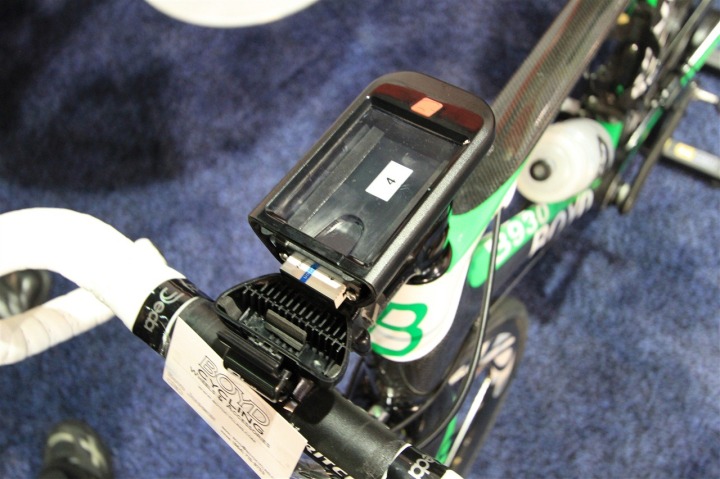
However, one area that the front does allow access to is the user replaceable re-chargeable battery. This is pretty cool in that most cycling devices don’t allow this. Each of the batteries will give you about 4-6 hours of life, in addition to whatever battery time your iDevice itself has (usually 2-4 hours in my experience). And the batteries are pretty cheap too at about $20. You can see the white battery below sticking out the front of the case.
The phone meanwhile, slides in the case via the front as well.
The case fits all of the most recent versions of the iPhone and iPod Touch – and only requires some small foam bumpers below it depending on the exact model of your device. So no worries if you upgrade your device.
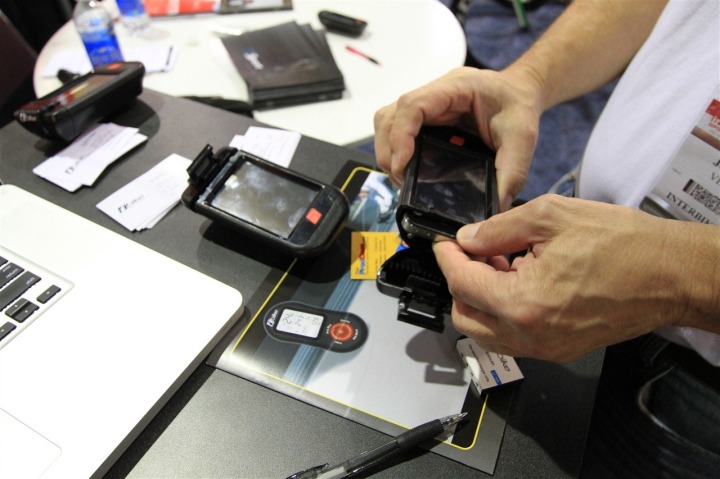
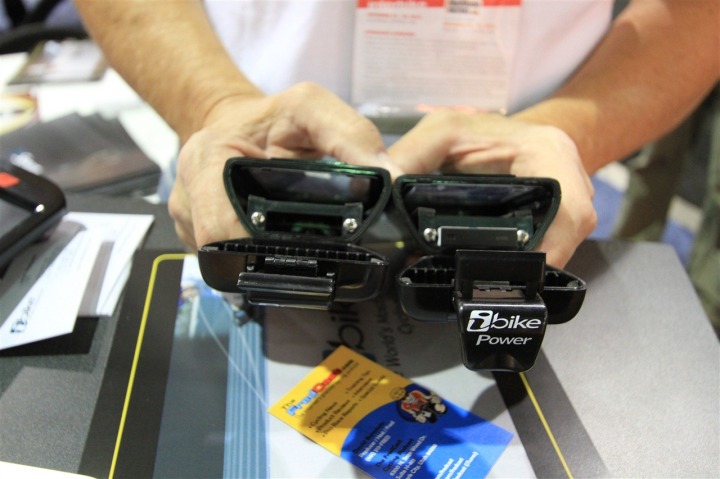
As noted above – there are indeed two versions of the iBike Dash, one with power, and one without – which you can see are nearly identical below…except the one with power has the additional sensors such as the wind sensor:
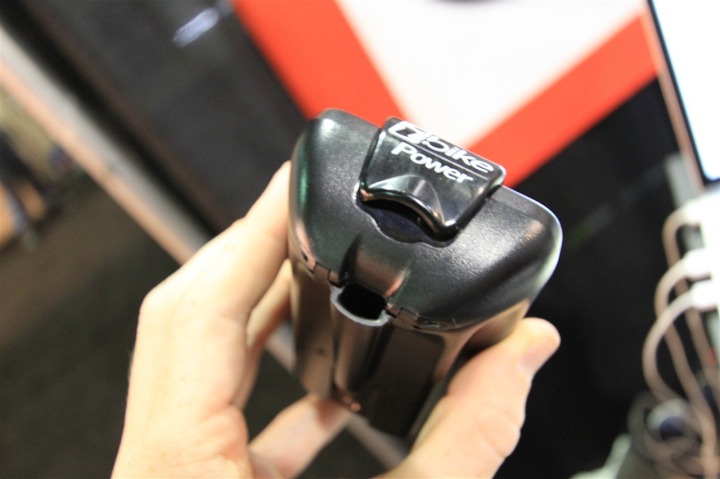
Below is a quick shot of the bottom of the case, with the wind sensor where that lower hole is:
Of course, one major benefit to the iBike Phone Booth (regardless of which version you buy) is the fact that it’s a fully functioning ANT+ receiver, which means that it’ll record all ANT+ data you stream to it, such as heart rate, cadence and speed sensors.
So now that we’ve talked about the hardware, let’s get onto the phone itself.
iPhone App:
Once you have the hardware, you’ll be able to download and use the iBike app that you can find in the Appstore. While you can go out and download the App today, it’s not until you have the iBike Dash Phone Booth that you can do anything with it
So John let me connect my phone to it and we walked through the basic setup from inside the convention center, just as if I was using the device for the first time.
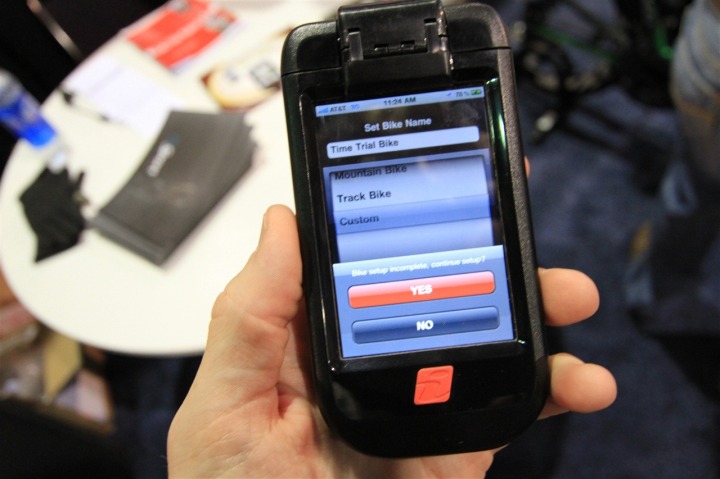
Like the older iBike, the Dash runs through many of the same questions around your bike type, weight of bike, and position you normally ride in.
Once you’re complete with the Q&A portion, it’ll have you do a calibration/tilt test where you mount it on your bike and do the hokey-pokey and turn yourself around. This helps to calibration the tilt sensors that the iBike app uses.
After which…you’re basically good to go!
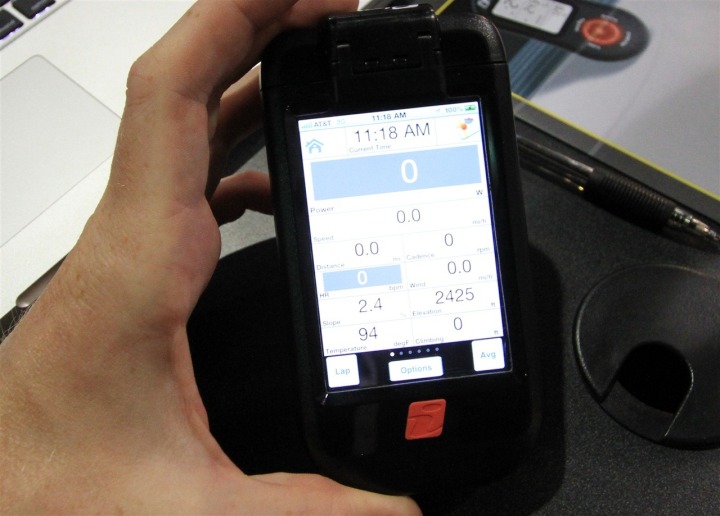
From there, you’ll have the basic ride screen, which covers pretty much all of the normal fields you’d see on a cycling computer, such as speed, distance, cadence, etc..
You can even change the background colors of certain fields if you’d like to.
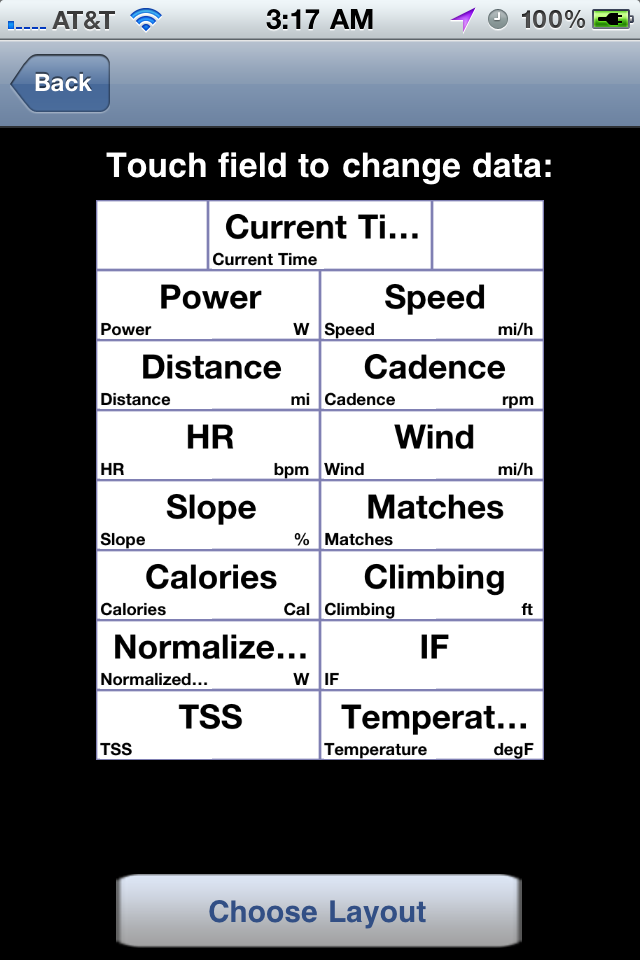
And, in the event you want more data than you can shake a stick at – you can choose up to 15 data fields on a single screen should you wish to:
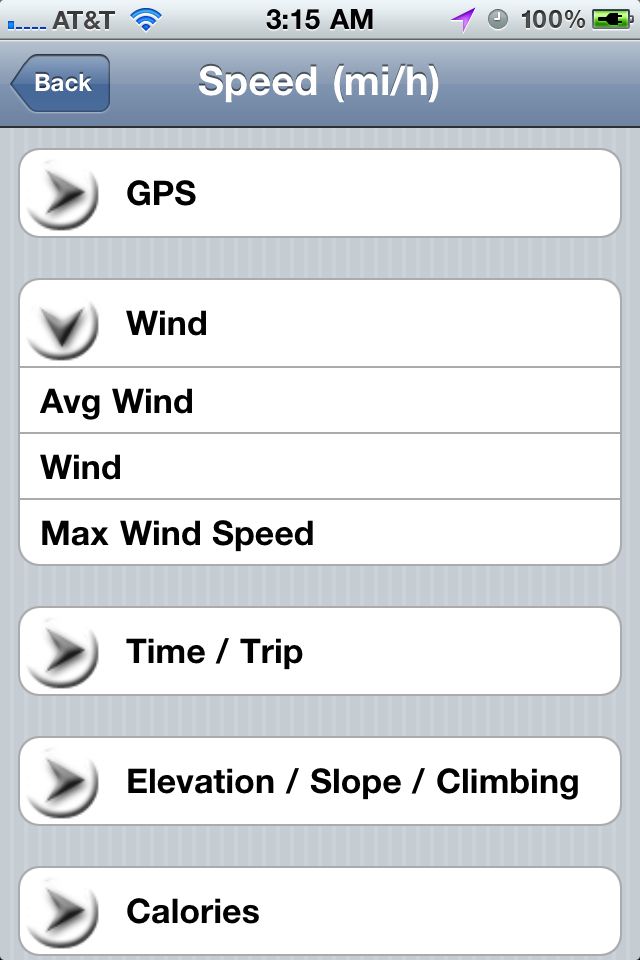
And within that, you have tons of data fields to choose from:
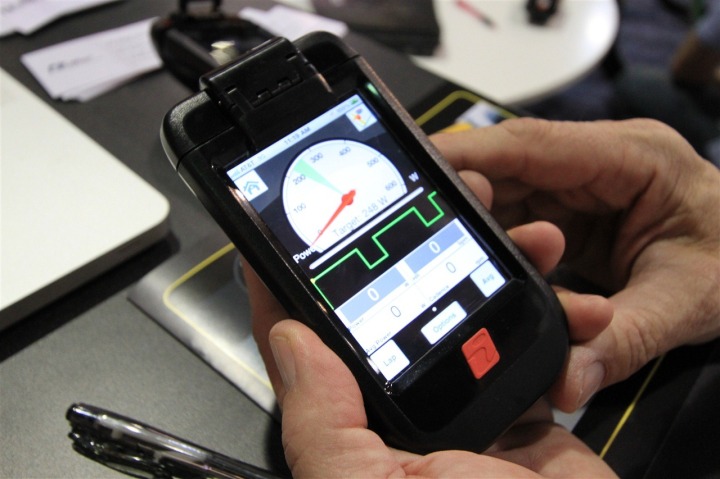
In addition to the typical cycling display screen, you’ve also got a bit of a automotive dashboard view, where your target zone/pace/metric is highlighted within the gauge:
And you can also choose to display a moving map on the screen as well – very similar to how it would look on the iPhone’s own mapping service.
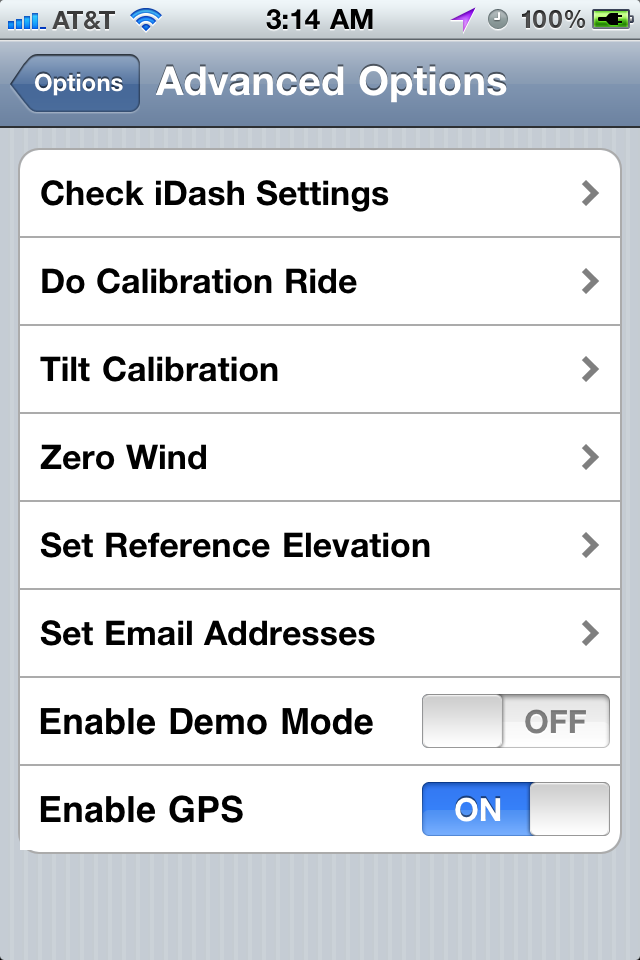
In the configuration panels you can further add additional ANT+ sensors, or also reconfigure any of the tests you did earlier on:
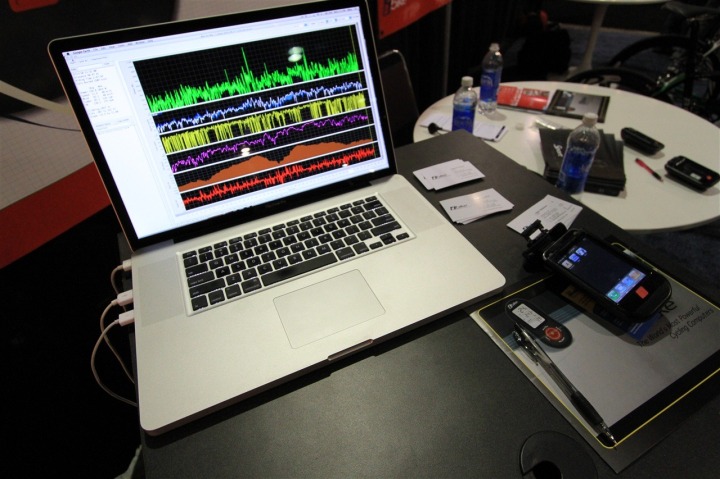
Once you’re done with your workout, the app will automatically e-mail it to you to load into their iBike software suite for detailed ride analysis.
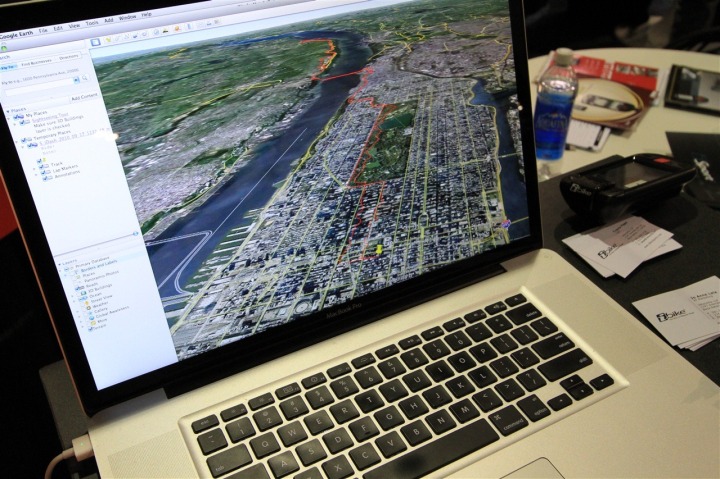
This in turn also allows for quick and easy integration into Google Earth for viewing your ride on a map:
Wrap up-
I’m looking forward to getting hands on outdoors with the iBike dash to see how it holds up outside the convention show floor. Though, by the looks of the very well built case – I’m pretty confident that it won’t have any issues there. I also feel that through their normal iBike device they’ve made good strides in non-DFPM power measurement and this may be a good option for folks looking to get into power.
The only area that has me a bit concerned is the price. While the non-power meter version is priced at $299, the power meter version is $849 – something that’s raised some eyebrows in a few discussions with folks at Interbike. I talked with John from Velocomp a bit about this and asked if he was concerned that the power meter version was edging fairly close to the cost of a conventional DFPM, such as the PowerTap hub with an ANT+ power meter. He countered that by time folks add in the cost of the PowerTap ($750 on Amazon) and an ANT+ head unit device ($250 for Edge 500), that they’re looking at something closer to $1,000.
While that’s true, it’s also true that there are a few other ANT+ iPhone bike cases coming onto the scene that drop that head unit price pretty dramatically.
So I think it’s something that Velocomp (maker of iBike) needs to be aware of going forward, as more and more iPhone based cycling apps with ANT+ integration start popping up.
In the meantime, I look forward to getting on my bike with the iBike Dash and putting together a more comprehensive review.
FOUND THIS POST USEFUL? SUPPORT THE SITE!
Hopefully, you found this post useful. The website is really a labor of love, so please consider becoming a DC RAINMAKER Supporter. This gets you an ad-free experience, and access to our (mostly) bi-monthly behind-the-scenes video series of “Shed Talkin’”.
Support DCRainMaker - Shop on Amazon
Otherwise, perhaps consider using the below link if shopping on Amazon. As an Amazon Associate, I earn from qualifying purchases. It doesn’t cost you anything extra, but your purchases help support this website a lot. It could simply be buying toilet paper, or this pizza oven we use and love.



I hadn’t seen the ‘front fell off video’ in a long time…good stuff
its really interesting to see power meters slowly creeping down in price range, well, at least some of them.
really enjoyed all the interbike stuff…hope you’re feelin better!
Another excellent chunk of Interbike coverage.
On thing I’m not clear on:
The non-power meter version includes Ant+ – correct?
So, does that mean than any iPhone app that supports Ant+ data will work with this case? If so, at £200, with the extended battery life, I’m tempted, rather than wait for the Pedalbrain which I’m starting think may just have been a figment of my imagination.
Do you have more time to test on a mountain bike. I’m looking to purchase this iBike Dash with the Christmas $200 discount price. Do You recommend it?
Any updates on this?
1) Accuracy on Trainer
2) Vs. DFPMs
3) Final cost to get it working. (aka anything other then the $799 price tag?)
4) Battery life reality
5) Any other nuances we should know about?
I guess consistency more then anything else (#1&2) but still.
If it works just as well should we not just save money and by this rather then something else…aka we still have a phone out of it right :)
Thanks!
Avery
Did you ever write a review for the iBike Aero? If so, I can’t find it. If not, could you write one?
I haven’t written one on the iBike Aero, nor the dash. I don’t have the Dash, but I do have an Aero still to write-up something on. I’ll probably wait to see if anything new is introduced in September at Interbike/Eurobike before writing something up.
Thanks for dropping by!
I had the dashboard plus power for less than two months and the plastic bracket broke as I hit a manhole cover and the unit went flying across the road. Ibike refused to fix, repare or replace. Ibike’s warranty is 1 month but only if the unit is undamaged so if it fails due to poor design then its on you. Do not buy this especially if you covet your Iphone.
Me too – I’ve had mine for 6 weeks and the top latch thing hinges have disintegrated. There’s just not enough meat. Mine was new-old stock so no warranty (but it only cost $30 NZ)
So to repair – its too small to try and fix in place, driving the pins out resulted in more splitting and damage to the plastic. Next plan is to epoxy a replacement clasp on, because you can’t drill through the case; it touches the phone inside as-is.