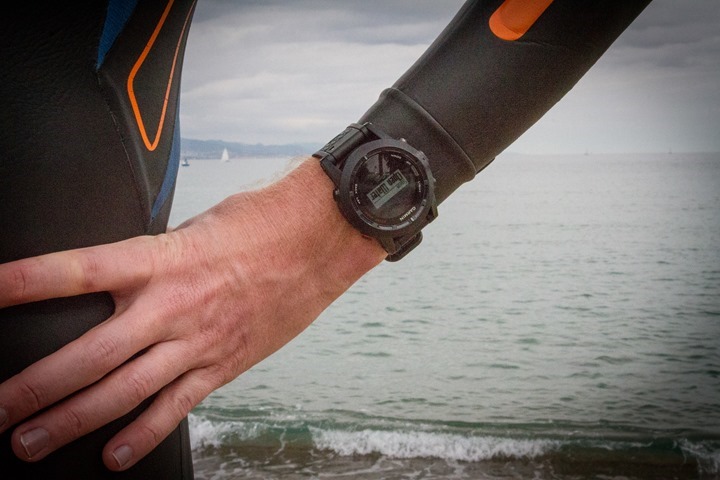
It is closing on nearly two years since Garmin initially announced the first generation Fenix in June 2012. Since then the watch has transformed from what was originally seen as a hiking focused unit, to more of an ultra-runner’s unit, to finally settling in on a full-fledged multisport watch as seen now in the recently announced Fenix2.
I’ve spent the last six or so weeks with the unit, putting it through daily activities across a wide variety of sports. Last week, the Fenix2 started hitting retail outlets as the firmware moved into the production state. In the past week alone however, even further unannounced additional features have been added. Nonetheless, it’s time for my full in-depth review.
To be clear, Garmin sent me over a Fenix2 to start testing with until retail availability. Like always, I’ll be shipping that back to them in Olathe, KS, in the next few days and going out and getting my own via regular retail channels. That’s just the way I roll.
Lastly, at the end of the day keep in mind I’m just like any other regular athlete out there. I write these reviews because I’m inherently a curious person with a technology background, and thus I try and be as complete as I can. But, if I’ve missed something or if you spot something that doesn’t quite jive – just let me know and I’ll be happy to get it all sorted out. Also, because the technology world constantly changes, I try and go back and update these reviews as new features and functionality are added – or if bugs are fixed. So – with that intro, let’s get into things
Unboxing:
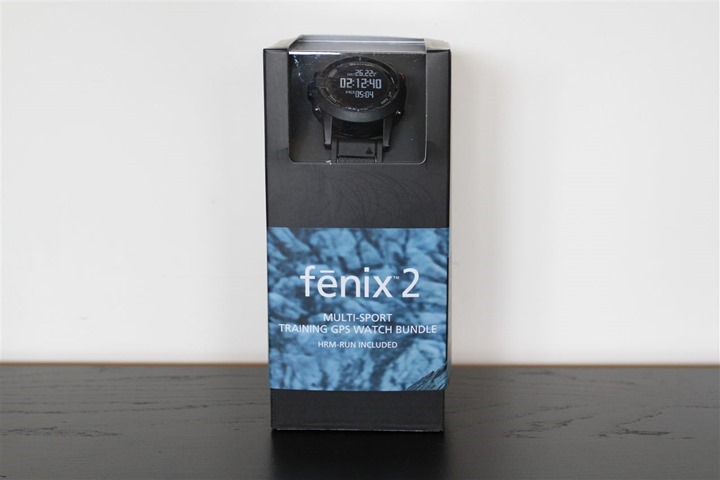
The Fenix2 comes boxed in two variations: One with just the watch, and one with a heart rate strap. Specifically, the HRM-RUN. I’ll dive more into the HRM-RUN later on, but it’s an important distinction compared to previous ANT+ enabled straps, as far as enabling advanced functionality on the Fenix2.
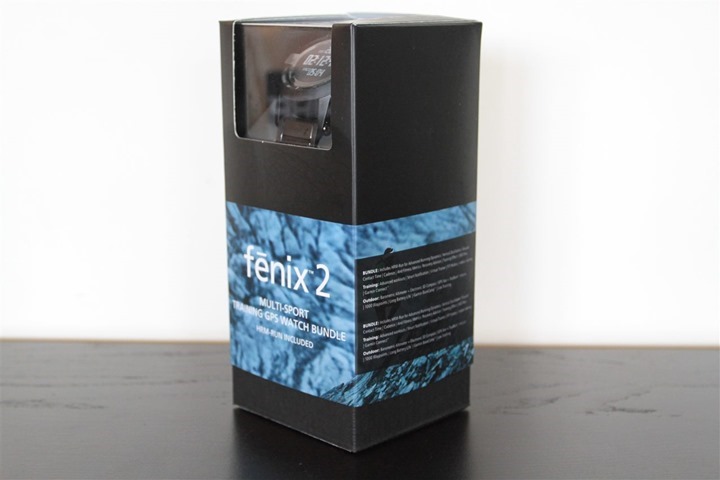
Inside the box splits into three pieces, two of which contain the goods. The third just sits there and looks pretty.
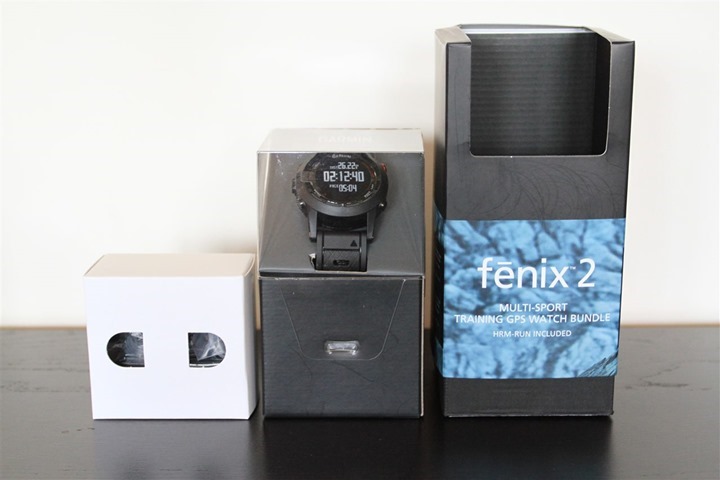
If you dump out the contents of those two boxes to the left, you’ll see the below. Note that the non-bundle version does not contain the heart rate strap (the two left pieces).
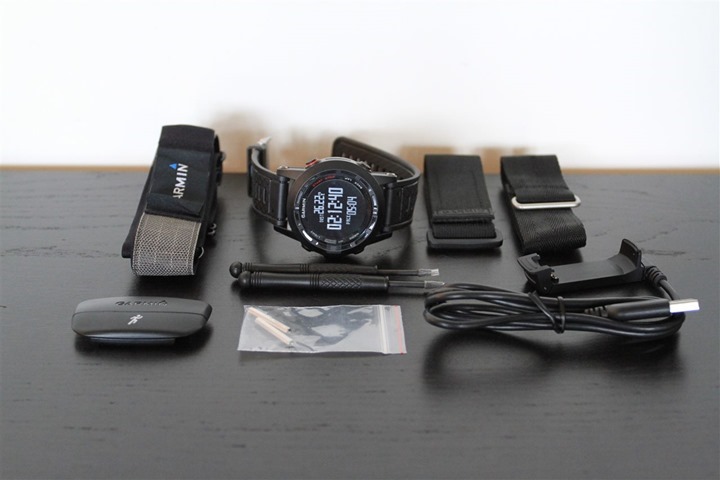
I’ll go ahead and walk through each of the components in the box.
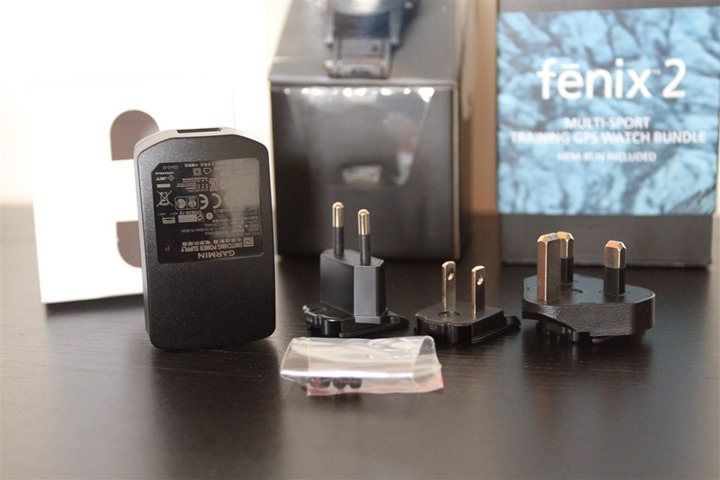
First up, the power adapters. Note that some readers have asked what the difference is between the US and European editions are. It’s simple: It’s just the power adapter for the USB power block. That’s it. You can still use your Fenix2 with any USB port in the world, and you can still use the power adapter with a 99 cent adapter in any outlet in the world. So don’t fret too much there.
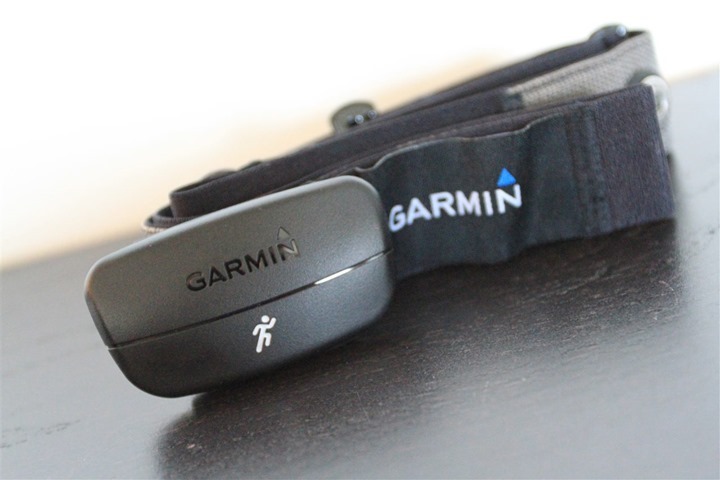
Next we’ve got the HRM-RUN heart rate strap. This ANT+ capable strap transmits your heart rate strap to the Fenix2 (as well as any ANT+ device in range that’s been paired with it). In that way, the HRM-RUN is just like any other ANT+ strap. However, it also has a secondary private channel that carries with it additional information only accessible to Garmin devices, that constitute the Running Dynamics pieces. So while you can use the Fenix2 with any ANT+ strap, you won’t get some of the Running Dynamics pieces without it. Also, it’s $40 cheaper to buy the bundle than the two separately (usually, it’s a wash price-wise).
Next, Garmin decided to toss in a fabric strap. This can be used with the screws and pieces seen below to replace the plastic strap. This is useful because it goes quite a bit larger, enabling you to place it over ski coats and the like.
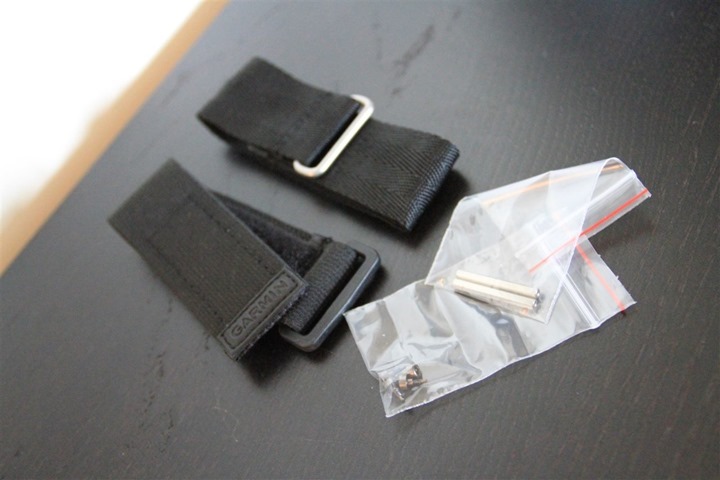
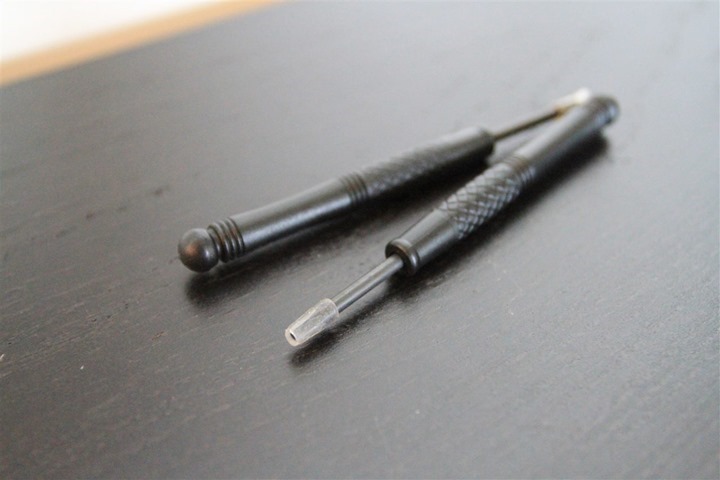
You’ll use these two little incredibly sharp screwdrivers to remove the pins. It’s a two hand job. Ok, I guess that came out wrong.
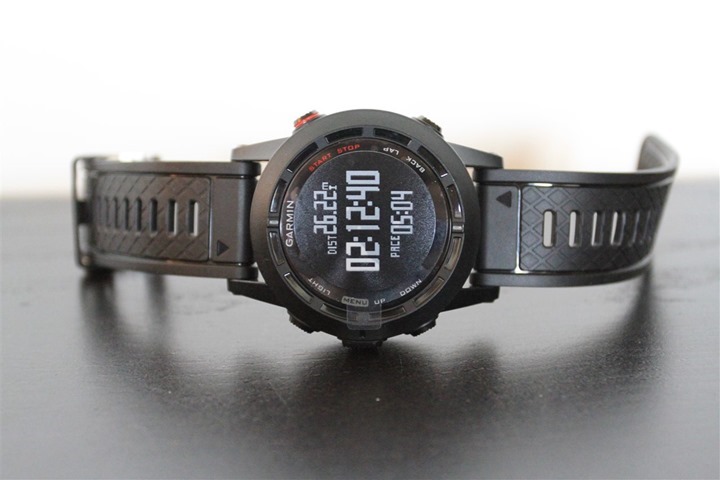
Finally, we get to the watch itself. If you’re a past Fenix/Tactix user, you’ll notice a few changes up front. First, the buttons have been changed around. This (in my opinion) makes the flow much cleaner, and much easier to navigate. It also mirrors the Garmin Forerunner line. Second, you’ll notice the display is ‘inverted’, which means its white text on black background. This is non-changeable.
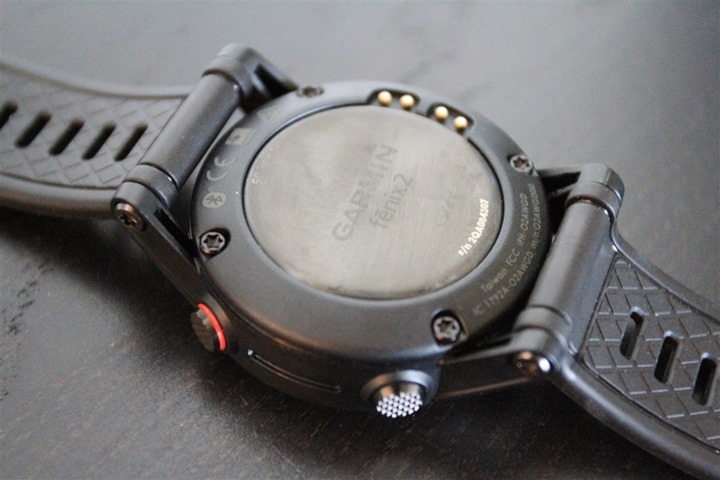
On the back, you’ll find the charging pins. The unit connects to a USB charger I’ll show you in a second. The reason the Fenix2 (and most other well waterproofed watches) use contacts like these to charge versus using a standard micro-USB or mini-USB port is for waterproofing purposes.
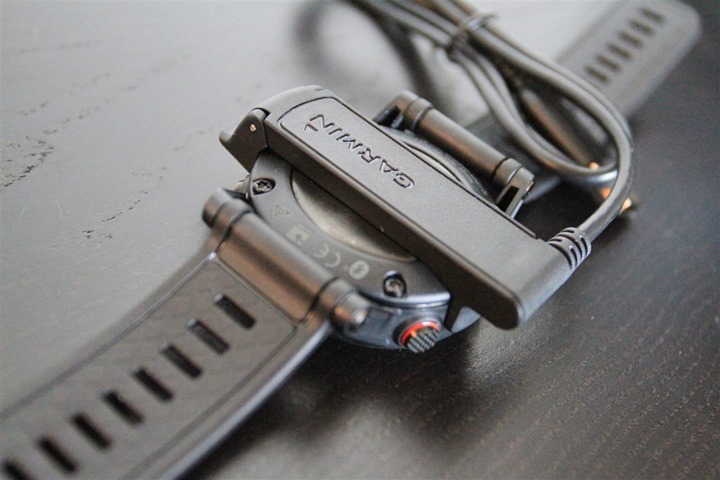
Here’s the USB charging cable. The cable can be used both to charge the unit, as well as to transfer workouts/tracks/routes/waypoints/maps/etc… Garmin provides apps for PC and Mac, but the device enumerates as a standard USB mass storage device, so that functionality will work fine on other operating systems like Linux.
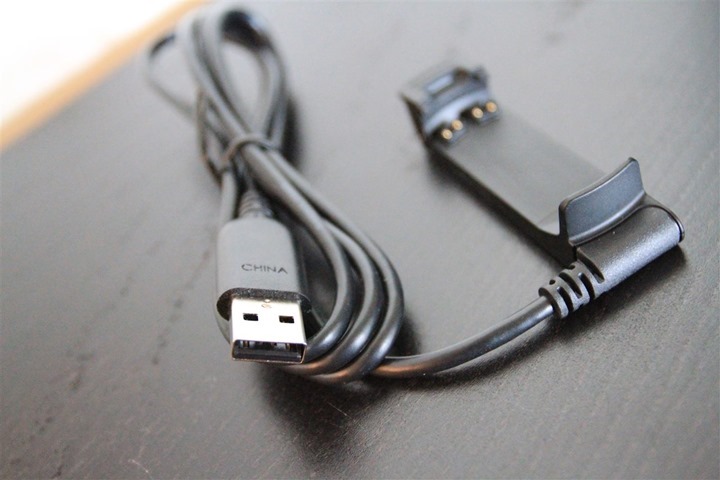
The clip snaps onto the back, thus it would be able to pass the ‘ceiling fan’ test, which tests whether or not the charging clip is strongly enough attached to the Fenix2 to tie one end to a ceiling fan and turn it on. Aside from being fun, the more practical implication of this is that you can charge it on the go, without worrying about a finicky connection.
With everything unboxed, let’s see how it stacks up against other units.
Size & Weight Comparisons:
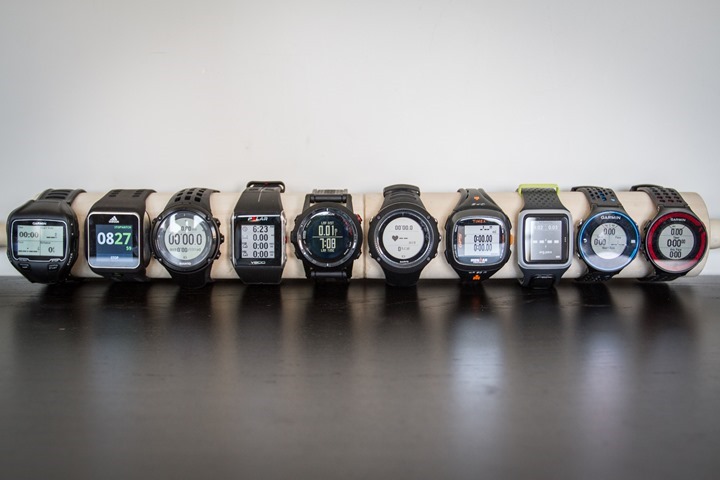
As always, I’ve combined all the competitive units in the running and triathlon segment together for you to get a feel for how they compare size-wise. Roughly speaking, the bigger ones are on the left side – and those are the ones we’re mostly comparing between.
Below, from left to right: Adidas Smart Run GPS, Suunto Ambit 2, Polar V800, Garmin Fenix2, Suunto Ambit 2R.
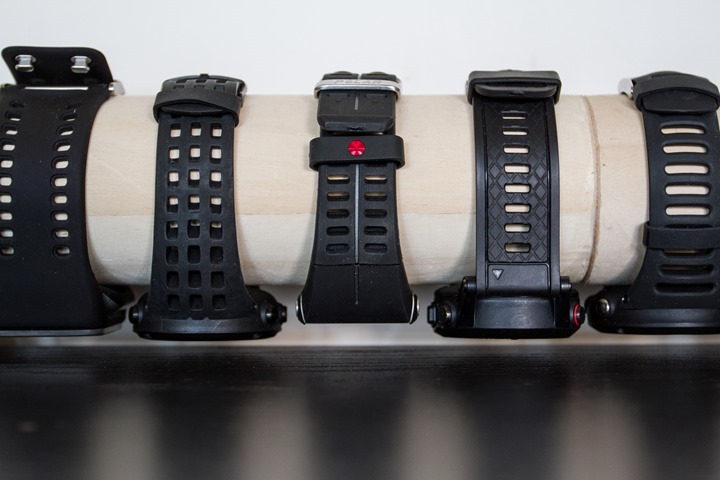
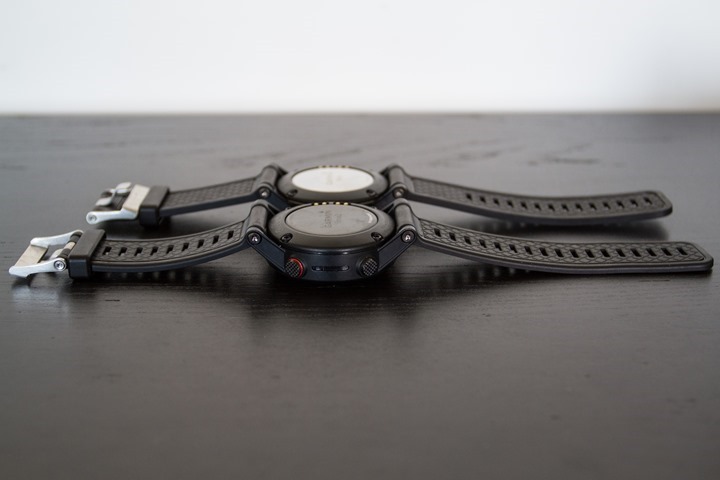
Next, I’ve flipped it over so you can see the depth of the units themselves.
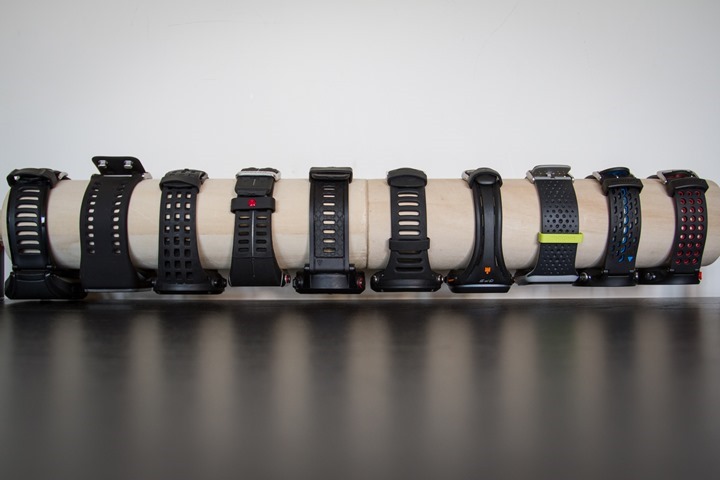
If you look at the Fenix1 and Fenix2, you’ll see they are virtually identical. After all, they are basically twins, just not identical twins. On the visible side, the button layout changed. On the internal guts side, the unit received a slight change in the accelerometer to enable the swimming tracking scenarios, that wouldn’t have been fully possible with the same level of accuracy with the accelerometer that’s contained in the Fenix1/Tactix units.
And remember, these watches are part of a longer line of siblings that share nearly identical physical hardware, but change in software – from the Quatix for marine use, to the D2 for pilots.
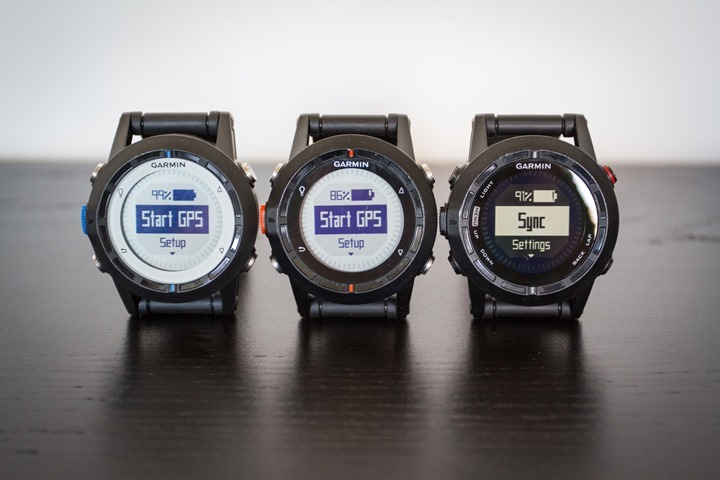
For those that haven’t followed along on the Fenix journey, the Fenix1 actually has received substantial updates over the last 4-5 months. In fact, outside of multisport mode, power meter support (cycling), and swimming support – the Fenix1 gains almost all the features of the Fenix2. Even things like mobile phone uploads and satellite pre-caching. These features were introduced in beta recently, and will ultimately be brought to full production status on those units as well. However, neither the Fenix1 nor the Tactix will get the Fenix2-only features like swimming, multisport or power meter support. Expect to see Garmin cease manufacturing of those units by summer.
One minor little tidbit that I thought was interesting – the Fenix2 strap is slightly longer than the Fenix1 strap:
Next, while you’ll see the watch on my wrist throughout the review, I did briefly want to include what it looks like on a smaller female wrist – in this case, my wife. She’s tiny, and her wrist size is 14cm (or 5.5 inches).
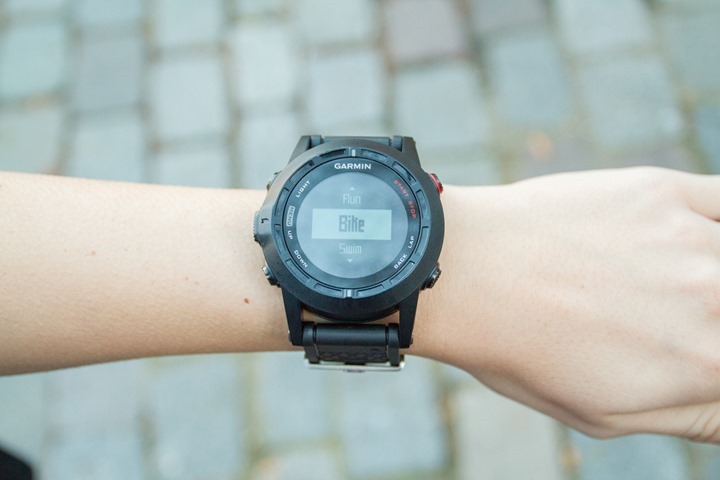
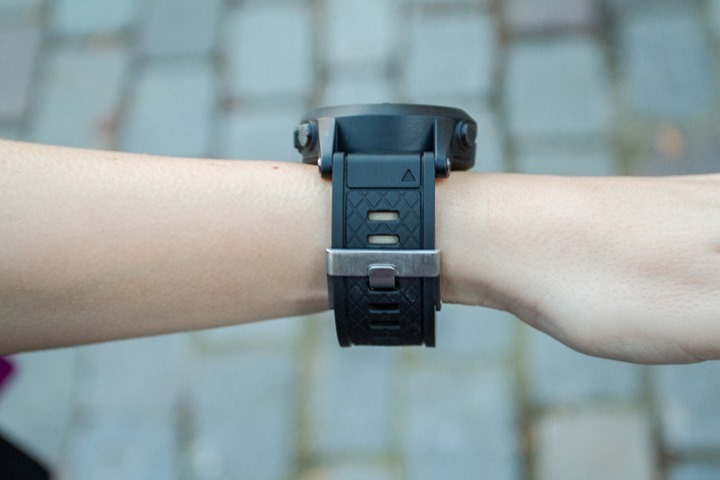
She found it heavy for her, but I pretty much said the same thing when I wore it initially. She hasn’t spent any time running with it though, nor getting used to it.
Finally, when it comes to weights, here’s a lineup of the devices you’re most likely to compare:
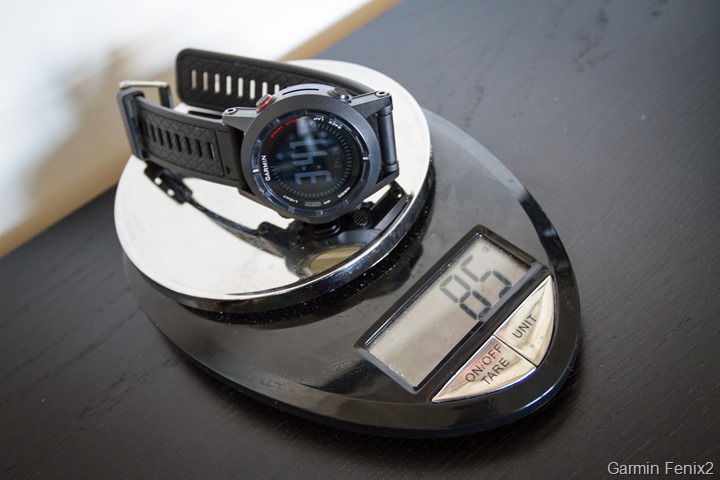
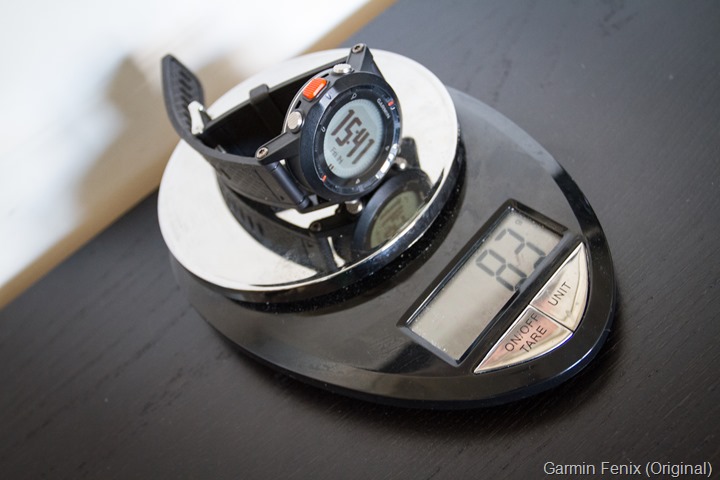
The key difference in weight between the Fenix1 and Fenix2 really comes from the change to the back plate on the unit.
And for fun, here’s two more units you’re likely to compare:
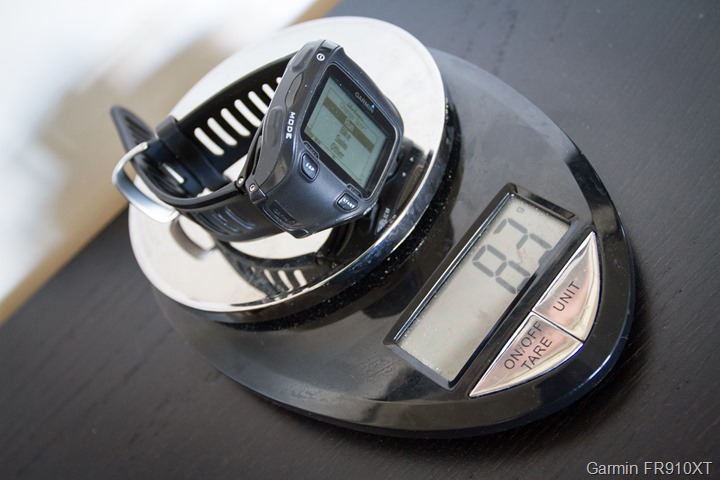
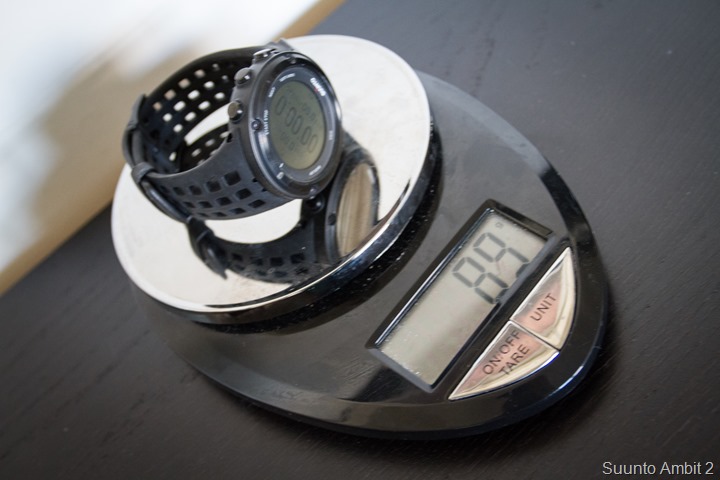
As you can see, weight-wise they’re all basically in the same camp. Note that for the FR910XT, I had the quick-release kit on there, which likely adds a tiny bit of weight.
With comparisons done, let’s head onto actually using the product.
Running:
Without question, running is one of the most fundamental features of the Fenix2. And in that respect, the Fenix2 has come a long way in the running feature category since the initial release of the original Fenix. So while it’s easy to compare the initial review of the Fenix1 to the Fenix2, in general, all of features discussed in the first two chunks of the running section (Basics & Features/Functionality) are on both units. Where the features become Fenix2-only is within the Running Dynamics portion, and then the subsequent recovery/VO2Max/etc… pieces (separate sections). Don’t worry, I call those out specifically.
The Basics of Running with the Fenix2:
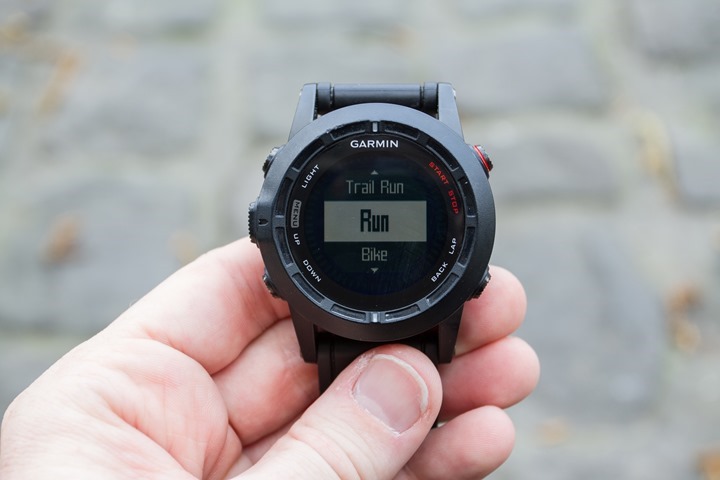
To start any activity, you’ll put the watch on and tap the red button in the upper right. This brings you to the sport selection menu. Don’t worry, you can lock the screen by simply holding down the upper left button (light), to prevent accidental sport triggering.
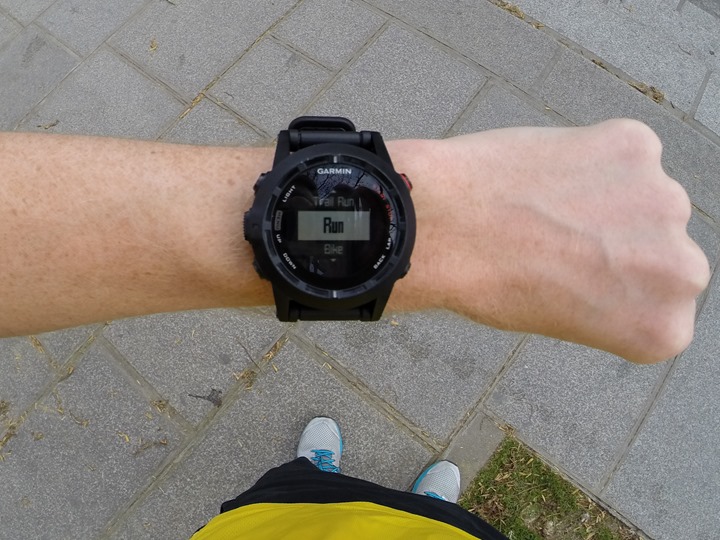
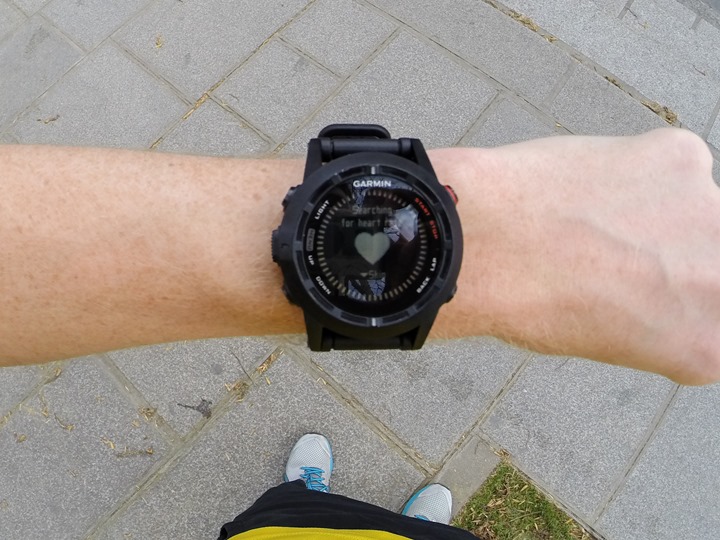
Once you’ve selected the sport, in this case running, the unit will search for any paired sensors – such as a heart rate strap. It’ll iterate through each one until complete, and then move onto satellite reception.
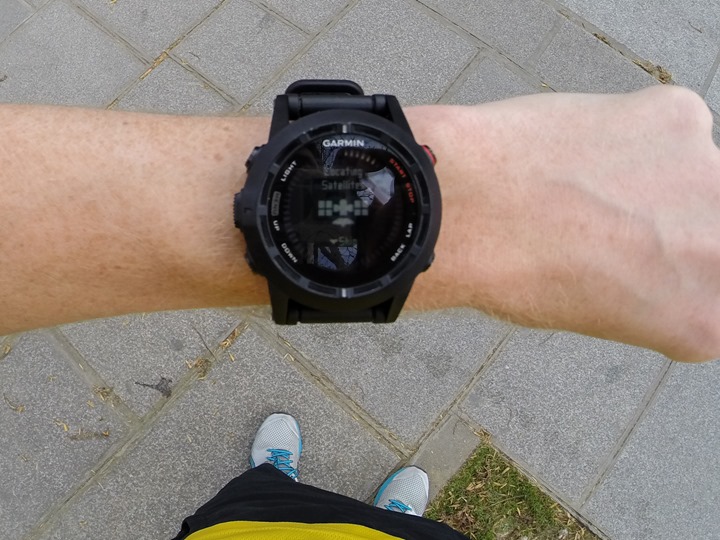
The Fenix2 automatically caches the satellite location data based on a download from Garmin Connect that occurs both via USB with Garmin Express, or via Bluetooth Smart and the Garmin Connect Mobile app. This satellite caching data helps to allow the unit to very quickly find satellites. In general, if I move to a new location on the globe and have up to date satellite cache data, it is in general taking me about 15-45 seconds. For example, two days ago in Mexico City, after walking out of the hotel and across the street, that’s how long it took. Whether or not the 27-story building was impacting things is unclear to me. If I haven’t moved to a new location and just walk outside my house and start the unit, it tends to find satellites in about 2-5 seconds (as it did about an hour later in a test in the same general area).
Once you’ve got satellite reception, you’re good to go, and can press the red button to start the activity recording. During activities, the red button is the start/pause button, and the lower right button is for creating a lap. Meanwhile, the bottom left buttons are for changing the view.
While running the unit will show you any data fields you’ve configured (see the Data Field section of the review). But in general most folks will use fields like pace, distance, heart rate, and time. For me, I prefer the lap variations of those. So I’ve got Lap Pace, Lap Time, Lap Distance, and then Heart Rate.
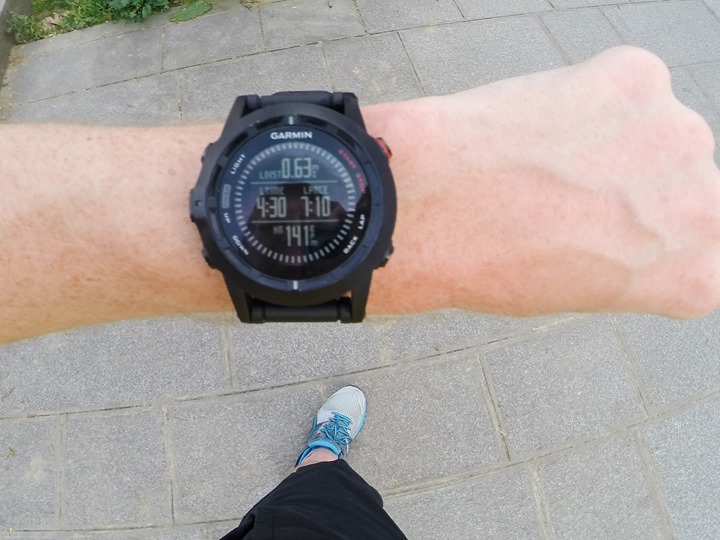
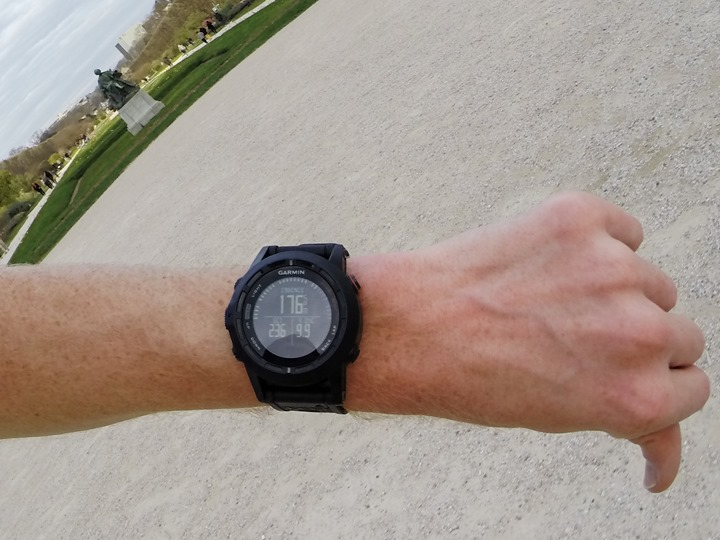
But, I can simply tap the up/down buttons and change to a different page, such as this one showing the Running Dynamics page:
Or this one showing my total run time and distance:
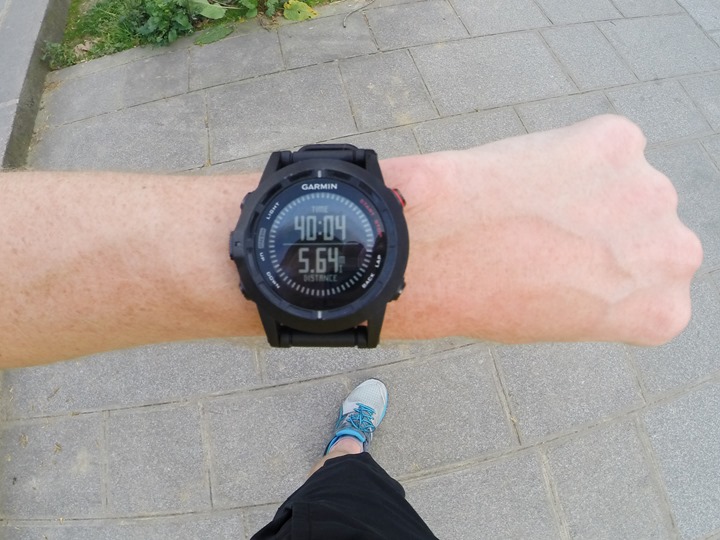
The unit will use GPS when outdoors to track your distance. In the event of a tunnel where GPS signal is lost, the unit will switch to using the internal accelerometer to measure distance and pace, and then upon exiting the tunnel it’ll switch back to GPS.
When you’ve completed your run, simply tap the red button again, which puts the unit into a paused state. At this point a menu is given for you to decide your next step.
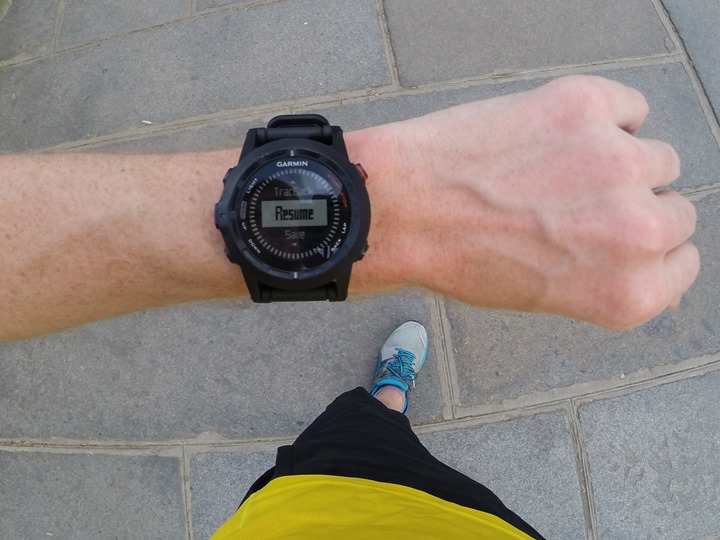
You could resume it (if you plan to start running again), or you can save it. You can also discard it, as well as use the ‘Resume Later’ option, which is my favorite option for long activities.
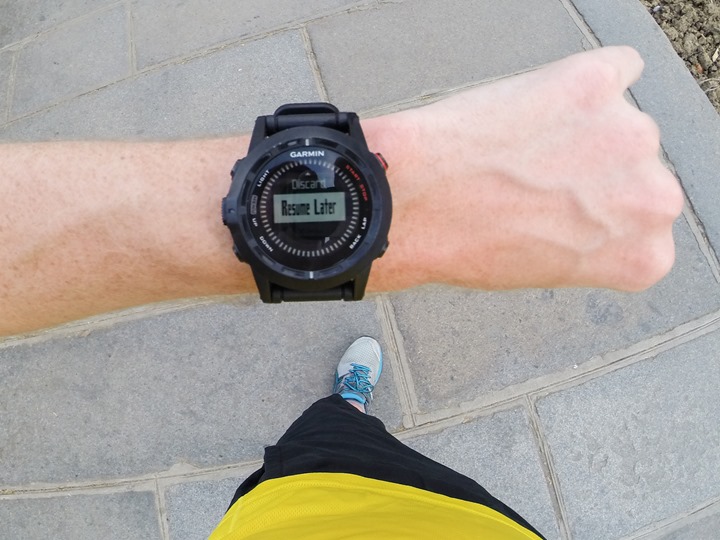
With the resume later option, it’ll turn off the GPS to save battery, but will keep the activity without ending it. This is ideal for multi-day hikes, or places where battery life conservation is critical. Also of note is that if you were to run out of battery, the unit will automatically put the file into the ‘Resume Later’ state. To access it, simply tap the red button and you’ll see the option to resume/save/discard/etc…
Running Features and Functionality
I’m going to run through (no pun intended) a number of features the Fenix2 has. This isn’t really exhaustive, since there are so many smaller features that it’d be hard to include every single item. In general, these features are actually available across most sport profiles, but I’m just putting them in the running section for simplicity’s sake.
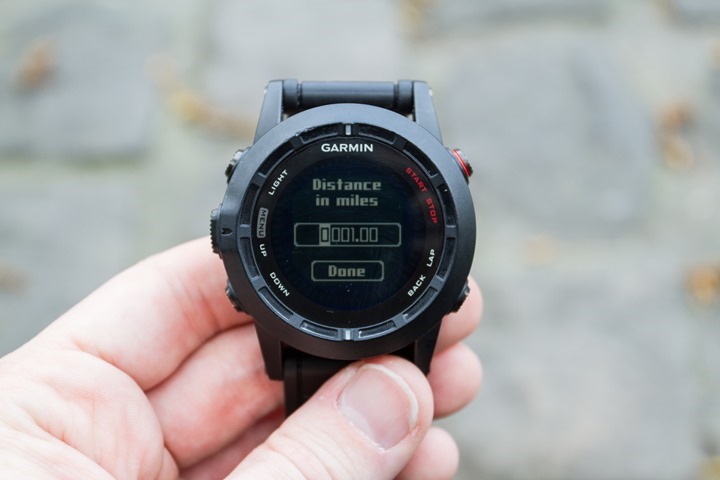
Auto Lap: Perhaps my favorite feature, auto lap allows you to automatically create splits based on a predefined distance – such as every 1-mile. I tend to use this on long runs where I’d like to more easily compare splits over the course of the run. On the flip side, I turn it off for interval runs, where I’m manually controlling my splits (or, having the automated interval or workout function do it for me). You cannot specify auto lap based on time, nor by position. It’s distance only, but in either kilometers or miles.
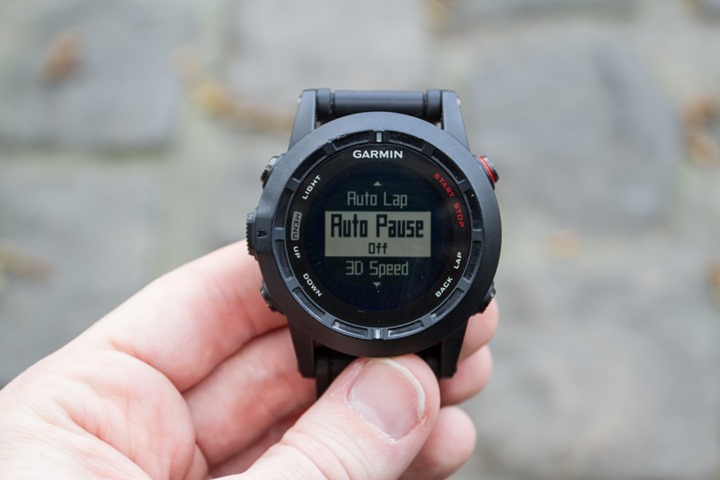
Auto Pause: This is useful for city running where you may stop frequently at stop lights. The unit automatically pauses the recording when you come to a stop, and then will automatically resume it when you start running again. The auto pause on the Fenix2 isn’t configurable, so whether or not the trigger point in pace is right for you might vary. Despite living smack dab in one of the biggest cities in the world, I personally tend not to use it, as I mostly just run a different direction when I hit a stoplight. I don’t much like stopping mid-run, as it simply lengthens the time I’ve gotta wait till I can eat cookies or something.
Virtual Partner: Virtual Partner allows you to specify a target pace that in turn acts like a virtual running friend. The Virtual Partner does not stray from the pace (even for hills), so it’s best used for flatter courses. As part of the Virtual Partner feature, the unit will show you how far ahead or behind the Virtual Partner you are – both in distance and in time.
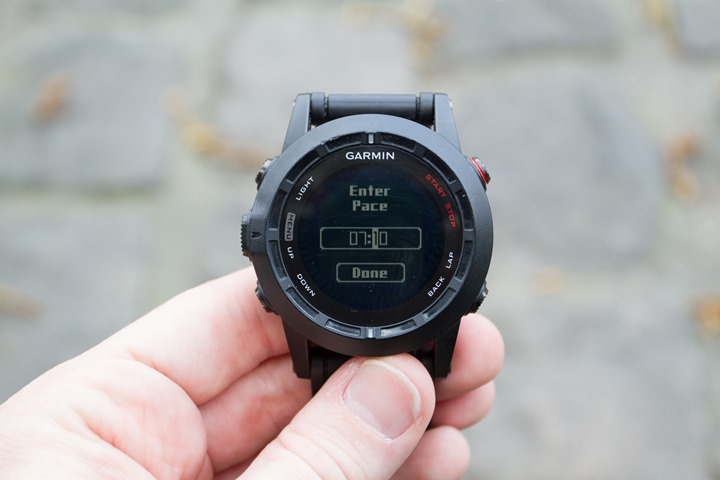
Note that you’ll enable the Virtual Partner through the menus, but you’ll need to also add the Virtual Partner screen as a data page to your sport profile (just as if you were configuring other data fields/pages).
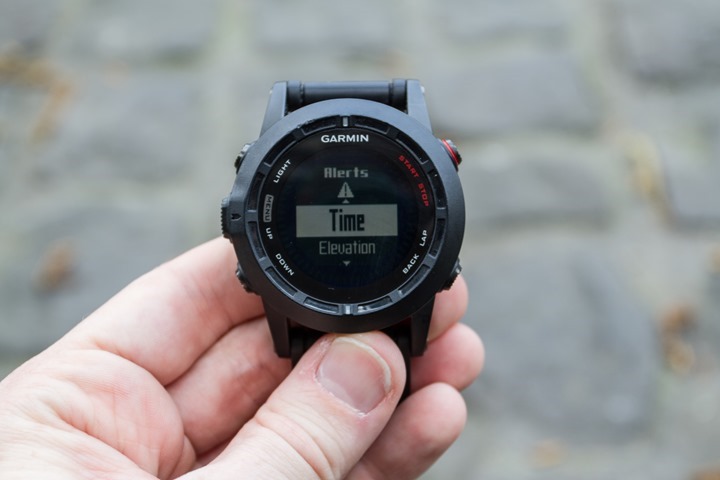
Alerts: Alerts allow you to set high/low thresholds for various events. For example, you can create an alert when you run 10 miles. Or an alert when your heart rate goes above or below a given threshold. Alerts can be defined for proximity, distance, time, elevation, navigational arrival, speed, pace, heart rate, cadence, and battery. While alerts might seem appealing (and they can be in certain scenarios), for most athletic pacing and or training efforts, it’s usually better to use custom workouts (see later section). That’s a much more refined way of doing it, whereas alerts are very basic.
Running Dynamics:
Running Dynamics is Garmin’s term for a number of new metrics that were added to Garmin’s top-tier running watch, the FR620 earlier this fall, and have now found their way to the Fenix2. These metrics attempt to capture various running efficiency data.
There are as of today three specific pieces of information that’s being captured:
Cadence: Total steps per minute – this has previously been available on the footpod, but this brings it internal to the HR strap (and inside the Fenix2 itself).
Vertical Oscillation: This is measuring the ‘bounce’ in a runner’s torso within each step. This is vertical motion, measured in centimeters.
Ground Contact Time: How much time your foot spends touching the ground, measured in milliseconds
Cadence has long been available on Garmin devices with the footpod, but the FR220/FR620 added it to the unit itself, using internal accelerometers. Then, Garmin extended that into the Fenix1 and Tactix watches, and now, it’s also in the Fenix2.
The other two, Vertical Oscillation (VO) and Ground Contact Time (GCT) are new to the FR620 and Fenix2, and not available on other units (nor coming to other units, such as the FR910XT). To see these metrics, you’ll need to ensure the Running Dynamics page is enabled on your Fenix2. This is done via the data pages settings in the running profile. Once that’s done, you’ll see this screen:
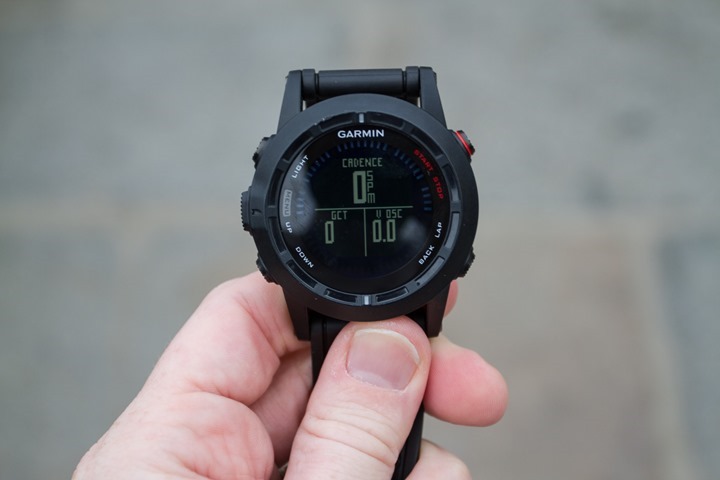
While running, the unit shows values for each of the three running dynamics pieces. Meanwhile, the edge of the screen will turn into a little needle, indicating whether you are at a low/high value for that particular parameter (i.e cadence).
You can change the upper value by holding down the menu button for a second, which allows you to select a different primary value.
This data is then recorded on Garmin Connect for you to analyze later. It is interesting in terms of correlation of fatigue to your values, or the impact of intervals or other varying workouts. For example, here’s a long run:

And then here’s an interval workout:

Like many new metrics captured by sports technology devices these days, there remains to be a clear-cut reason on what to do with these metrics (VO/GCT). Sport scientists don’t actually have any hard data or studies to clarify how best to use them. Thus, while it’s ‘geeky-fun’ to look at the data, there isn’t anything clear-cut as far as training guidance that either Garmin or anyone else will tell you to do with these.
Cadence is a bit more clear-cut given it’s been around for years, and there’s plenty of documentation on ideal cadence ranges to get the elastic recoil effect that high performance runners aim for. But when it comes to the other two metrics, VO/GCT, it’s still the wild west a bit. Note, do not confuse VO with VO2, as they are two totally different things. Speaking of which, now’s a great time to discuss VO2Max.
Race Predictor, Recovery Advisor, VO2Max Estimates, and Training Effect:
Like the FR620, the Fenix2 carries with it a number of new training progress functions. These functions aim to give you feedback on rest, recovery, and estimates on where you might find yourself on race day. To start, the quick list:
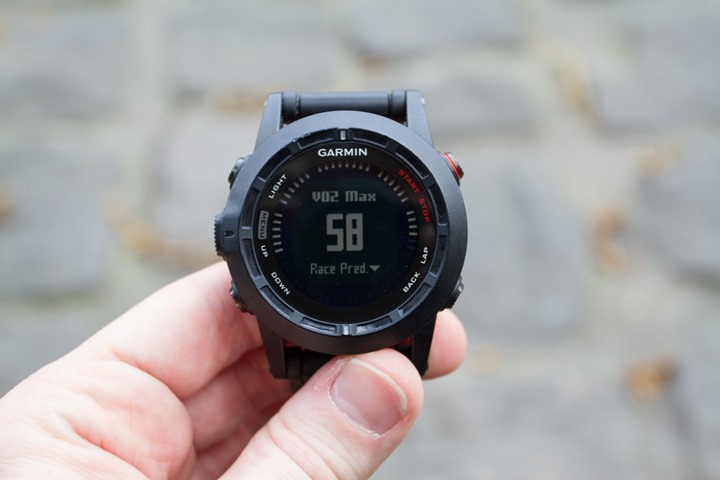
VO2Max Estimation: This utilizes information from the heart rate strap and heart rate variability (HRV) to determine a VO2Max estimation. This is then displayed following each run.
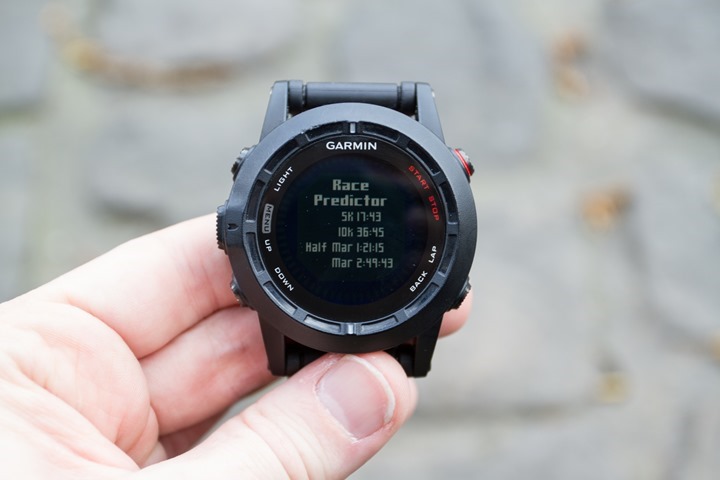
Race Predictor: Race Predictor uses simple lookup tables to take your VO2Max combined with age/gender and determine ‘best possible’ race times.
Recovery Advisor: Recovery advisor gives you the estimated time until your next hard workout. This counter is always available on the watch to see how much time is left.
Recovery Check: This status is provided about 6-10 minutes into the workout, and tells you how recovered you are from a previous workout.
Training Effect: Training Effect provides a score of a given workout and how impactful that workout was on your body.
All of these metrics depend on the heart rate strap, which is analyzing heart rate variation (HRV) data using algorithms by FirstBeat, a Finnish company that specializes in heart rate and calorie metrics.
The VO2Max piece is likely the piece that fascinates most athletes, primarily due to the ones-upsmanship game that people want to play on who has a higher VO2Max value. Ultimately though, there’s actually little that you can do to influence this number, as it’s largely genetic. And in that same vein, while an untrained person would see immediate and sharp increases in VO2Max over a short period, a well trained athlete won’t. And in fact, the more that athlete trains – the less likely this number is to fluctuate. Effectively, you plateau from a VO2Max standpoint. After all, if you could keep training and increase the number – we’d see everyone with a VO2Max in the 90’s, or beyond. Ultimately there are only a handful of people on this earth anywhere near that.
Which isn’t to say that your training or your race results will hit a plateau. As there are many things that impact your race day results. Looking at those results in the next feature – ‘Race Predictor’. This feature does a very simple lookup of your VO2Max estimation and compares it to tables of records of people of the same age and gender, and then gives you the race estimates. In reality, this should really be called “Race Potential”, which would line up with what it really is. It does not take into account any training you’ve done from a mileage standpoint, nor a pace standpoint. It’s purely based on the VO2Max value meshed with data from the Cooper Institute.
Next we have the ‘Recovery Check’. This check is done about 6-10 minutes into your run, and gives you feedback on how recovered you are, such as ‘Fair’. Ultimately however though, I’ve only ever seen ‘Fair’ or ‘Good’. In part, the challenge here is twofold. First is the science of it. For that, I think in general Garmin/FirstBeat probably have that figured out. The second part is the delicacy of it. Meaning that if you return a message such as ‘Terrible’, people get offended. No really, they do. I had people complain in the FR620 review because of seeing lower status on both the Recovery Check and VO2Max. Personally, I put that in the category of “Life’s not fair”.
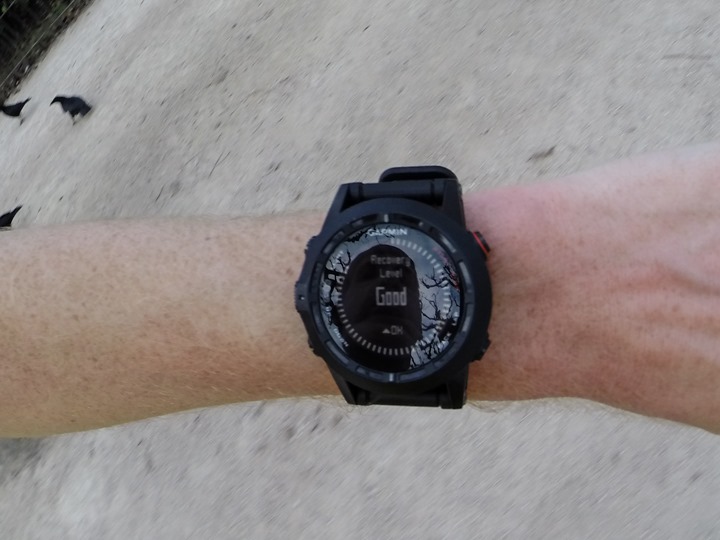
Following along the recovery trail, we’ve got ’Recovery Advisor’. This value is a post-workout value that lets you know how long you should wait until your next hard workout. Now listen triathletes, read the previous sentence again. Which parts did I put in italics (hint: hard workout). Which isn’t to say that you can’t have a bike workout, or a swim workout, or even an easy running workout. It’s simply focusing on running, because that’s the only thing that the Recovery Advisor tracks today. It doesn’t take into account anything else.
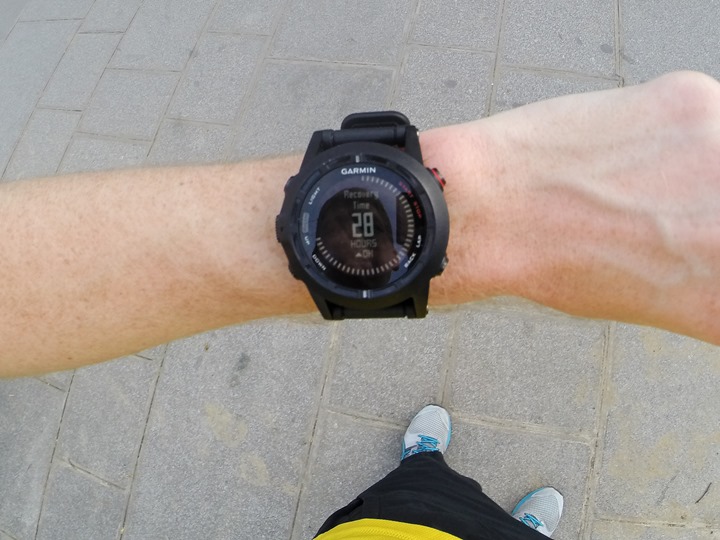
In general, I find that the Recovery Advisor is a bit cautious, but actually not too far off the mark for what my schedule would have in it recovery-wise. Remember that your muscles only get stronger when you allow them recover, not when you workout hard every single day (go ahead, you can Google it).
Finally, we’ve got ‘Training Effect’. Training Effect is designed to give you a rough estimate of how ‘impactful’ that workout was. This helps you to structure an overall workout schedule with varying types of workouts that help to put in place a more cohesive training schedule. You’ll see it listed as TE on your summary screen:
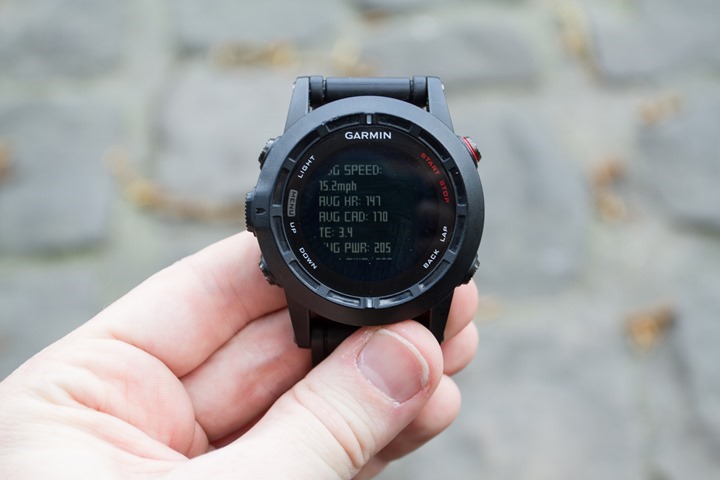
Below, the table of those levels, from the Fenix2 manual. Note that these values take a few runs to calibrate, so don’t freak out if it says your 20-minute easy run was disastrously high.

Now, as I alluded to above – all of these features are run-specific, except training effect. They aren’t included on any of the other sports profiles at this time – just like the FR620. So keep that in mind from a training standpoint. If you run 20 miles on Saturday, then go ride 112 miles on Sunday plus a swim in there somewhere, by time you get to Sunday evening, the unit is really only aware of the 20-mile run from a recovery standpoint.
Treadmill Usage:
Finally, the Fenix2 supports the ability to run indoors on a treadmill – either with or without a footpod. In the case of without a footpod the unit will use its internal accelerometer to determine pace and cadence. It does this by ‘learning’ your pace and cadence while outdoors on GPS runs. It does this over time, across different pace ranges. So it’s not a one size fits all approach. Nor should you immediately open your Fenix box and go straight to a treadmill and expect accurate data. The more miles you have outside, the better.
Thus, in order to really put it through its paces, I’ve been running for weeks outdoor across pace ranges from 4:30/mile up to about 10:00/mile (+ some at walking paces). Hundreds of miles worth of data. In order to keep things as consistent as possible, I was the only one who wore the watch, and I always wore it on the same wrist. Thus, in theory, it’d be the most perfect data set possible.
So this week while in Mexico City I hit up the treadmill at the gym to test things out. Like most of my treadmill tests, I find a simple pace ladder or pyramid the most effective way to test accuracy. And thus, the results:

Looking at the paces, I had done a ladder starting at 5:30/KM (~8:50/mile), and going down to 3:30/KM (~5:40/mile) every 60 seconds, in 15-second/KM increments.
Above, is the Fenix2 pace using the internal accelerometer, and below with a standard footpod. In this case, you can see my increases in pace each minute (below), whereas above it’s a bit muddled. It appears there’s some smoothing added, likely to filter out things like touching the treadmill. I actually consider this a good thing, so I’m not complaining too much there.

The paces tracked very well in my ‘primary’ running zone (of about 6:30-7:30/mile), and tracked ‘fairly well’ outside of that, perhaps 5% off at the high/low end. In this case, the Fenix2 internal pace seemed to top off at around 5:55/mile, so a bit off, but again, in the ballpark.
This is a vast improvement over what I’ve seen both in other Garmin products (FR620 at release) as well as even earlier versions of the Fenix on a treadmill. In talking with them, they’ve spent a fair bit of time in this area. The data looks rather clean. It’s notable that while I didn’t do much with my left arm (where the unit was) as far as touching the treadmill, I did occasionally wipe sweat off without any impact to pace. Also of note was that for this test I actually did NOT wear the HRM-RUN strap, so everything was inbox.
Ultimately, for pace on a treadmill, I’d give the unit a “B+” rating currently. It’s not perfect, and does require a bit of outside running to fill in the pace tables for calibration, but it’s pretty close. And quite a bit better than what I’ve seen previously, which I would have given more of a “D” rating.
Now, the next piece is cadence. I had a look at this a few times recently with the Garmin FR220 and FR620, both of which can measure cadence internally. With the Fenix2, like the FR620, it comes from one of three sources: The internal accelerometer in the watch, the accelerometer in the HRM-RUN, and a separate ANT+ footpod.
Each measurement place has minor pros and cons to it. For example, on your wrist you’ll be prone to see small drops/spikes when you take a sip from a water bottle, or when you change the treadmill’s speed, as you’re impacting the motion detection there.
In my case, I’ve done a lot of comparison of data – and ultimately for cadence I see all three methods producing near identical results. As I noted, the only variation I see is in a scenario without the HRM-RUN using just the internal accelerometer and doing something with your arms that impedes measurement. But given that’s likely only a brief moment compared to your entire run, I’d really look to skip the footpod if your focus is cadence.
Swimming:
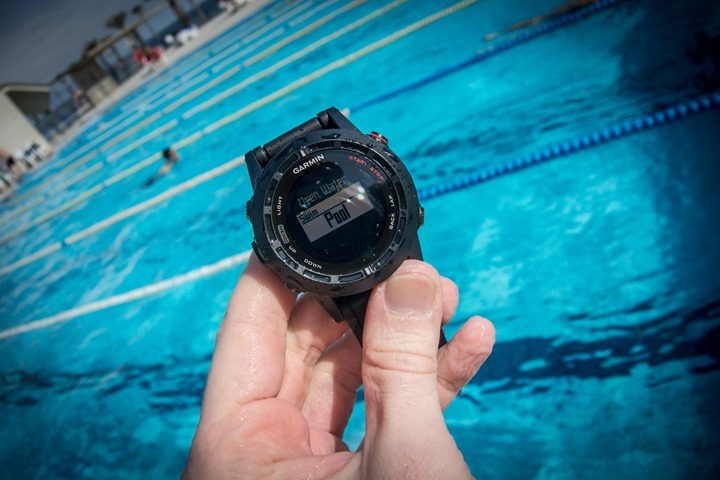
Probably the most significant addition to the Fenix2 is its ability to support swim tracking – both in a pool as well as in openwater. The unit utilizes much of the same functionality as found within the Garmin FR910XT for swim tracking. To enable swim mode, you’ll press the red button and go to Swim. At which point, you’ll choose either Openwater or Pool.
Pool Usage:
Pool should be any pool, be it indoors or outdoors. When in pool mode the unit uses internal accelerometers (not GPS) to determine your stroke and distance information. It does this by knowing the pool length, and then measures each time you push off the wall at either end of the pool. As such, inputting in the correct pool size is critical, which is why it’s the next question the unit will ask you:
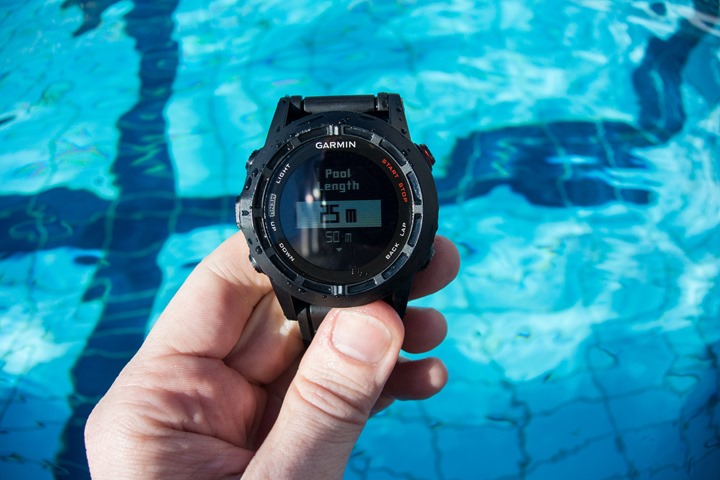
The Fenix2 offers a few common pool sizes – like 25y/m, and 50m. But it also allows you to create custom sizes. Within this menu you can select any size between 18M/20Y and 150Y/M.
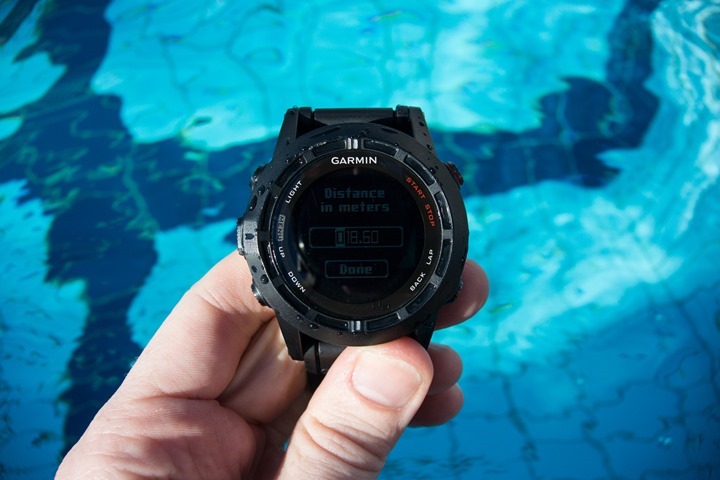
With that set, it’s into the pool we go. You’ll press the red button to start tracking. Because the unit is using accelerometers, it’s important to keep activities strictly swim-focused while the unit is recording. For example, if you stray to flirt with the life guards, pause the unit. Especially if there’s a lot of arm flailing going on. Same for jumping out and making a quick escape to the bathroom.
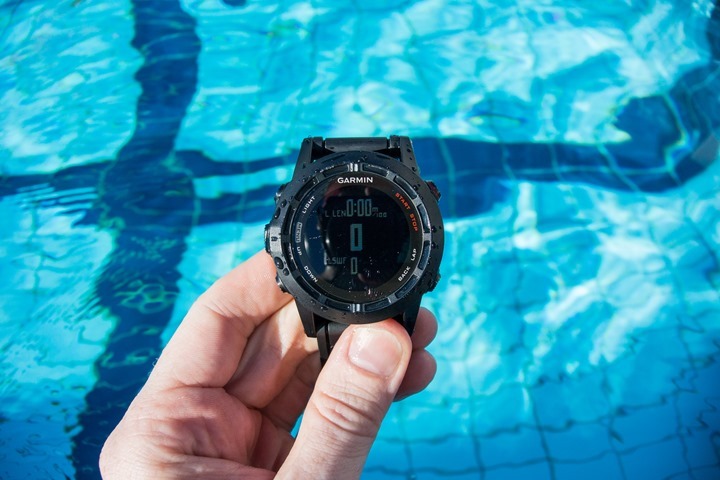
The unit has a number of swim related metrics it can display (see full listing in ‘Data Fields’ section later). The core one most folks tend to use is swim pace, which is typically given in time: 100y or 100m depending on the pool length. For example, you might have a pace of 1:30/100y.
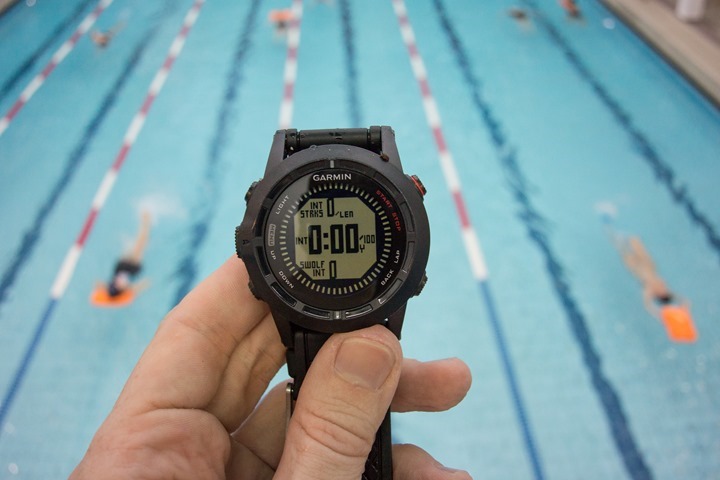
In addition, the unit will track lengths (or straight distance, if you prefer), as well as time and splits. In this case, a ‘lap’ is really more like an interval, as it’s the time since you last pressed the button ‘Lap’.
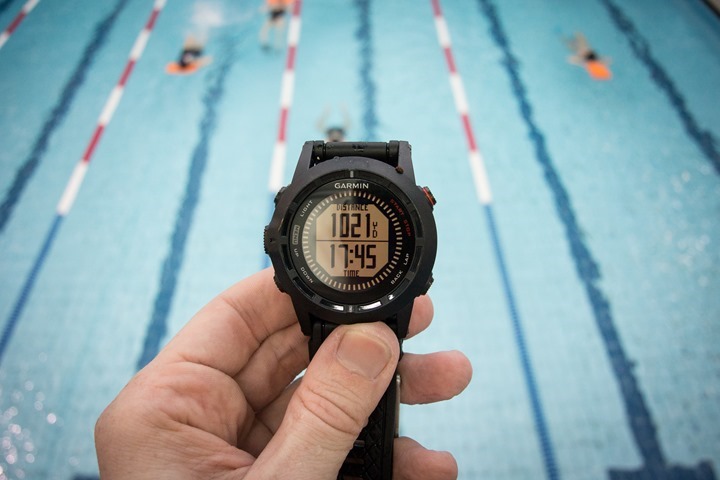
You can create these laps to separate out different chunks of the workout. For example, I would create a split/lap for my warm-up, and then another one for each segment of the workout (such as 10×100). The lap button is used when you want to enter a rest break. This will automatically create a rest on the unit visible later on Garmin Connect between the intervals:

When on Garmin Connect, the unit will show your different sets, including paces for each one. You can dive down into per-length splits if you want as well. It’ll also attempt to identify the stroke. In my case, I keep my stroke attempts to purely freestyle, so I can’t really comment on the accuracy of other stroke types.
Garmin Connect (as well as the unit) will also show metrics like SWOLF, which is literally derived from SWIM + GOLF, and assigns a score to the number of stokes for each length. In my case, my pool is a bit messed up (dozen plus people per lane), so my SWOLF scores vary quite a bit depending on how many backstrokers I get stuck behind on any given length.

Ultimately though I’m able to very easily and accurately track swimming with near 100% accuracy across many workouts. The most important tip I can give on getting accurate results is to remember that everything the watch measures is based on motion. Thus, making a crisp and firm push-off the wall each length is important (you can do either flip or open turns, it tracks both fine). Additionally, stopping mid-length in the pool will confuse it. Try and avoid that (seriously, people have e-mailed in to complain that other units don’t track their mid-pool stops).
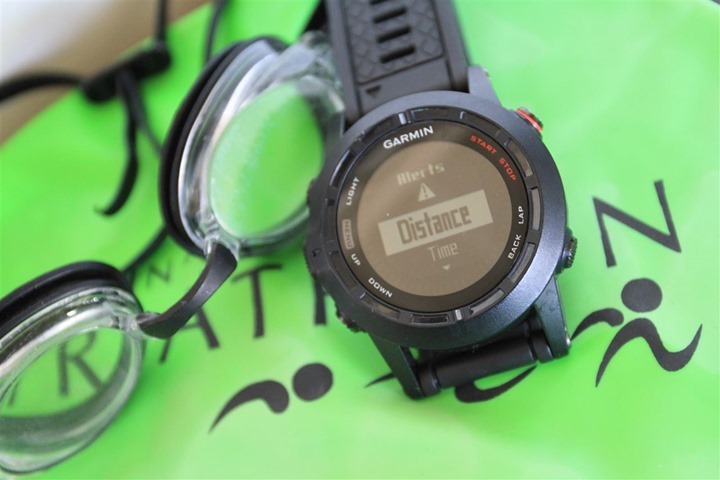
Now, since my initial post exactly 30 days ago on the Fenix2, there’s been a lot of feedback around adding in the FR910XT’s ‘Swim Alerts’ (which enable alerts on things like time or distance while swimming), as well as adding in the Garmin Swim’s ‘Drill mode’. I’m happy to report that the Fenix team has heard your feedback, and both will indeed be coming to the Fenix2. Here’s a shot on a recent beta firmware showing the Swim Alert piece just starting to be coded in:
Finally, note that no Garmin watches support the creation of pre-defined workouts for swimming on Garmin Connect. Meaning unlike running or cycling, you can’t create a workout on Garmin Connect and then transfer it to your unit to iterate through.
Openwater Usage:
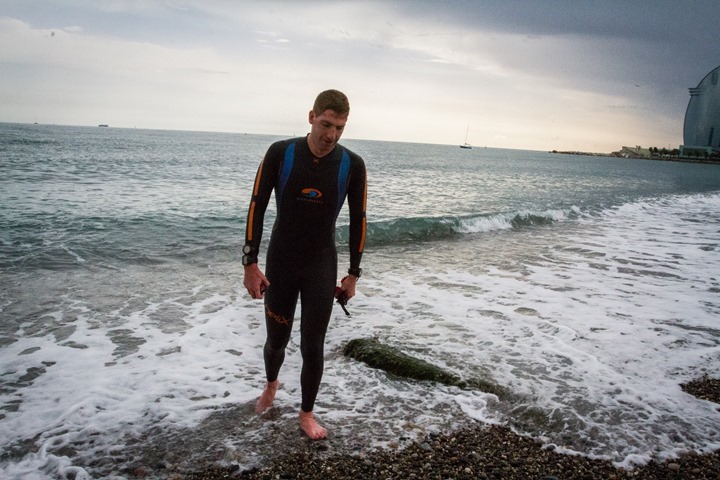
Next, is openwater swimming (OWS). This mode is for any outdoor body of water that’s not a pool. For example, the ocean, a lake, or a river. Generally speaking, the body of water should be non-frozen for a successful swim.
In this mode, the unit uses both the GPS as well as the accelerometer. It uses the GPS portion to track distance, and uses the accelerometer to track stroke information. It merges the two together for certain data fields. In an openwater swim scenario, the GPS is constantly losing GPS signal each stroke (as it goes underwater) and then trying to regain it each stroke (above the water). As such, the unit gets rather messy data to work with. Data that might be off +/- 3-meters or 100-meters. So instead of giving you a precise path, it gives more of an estimation.
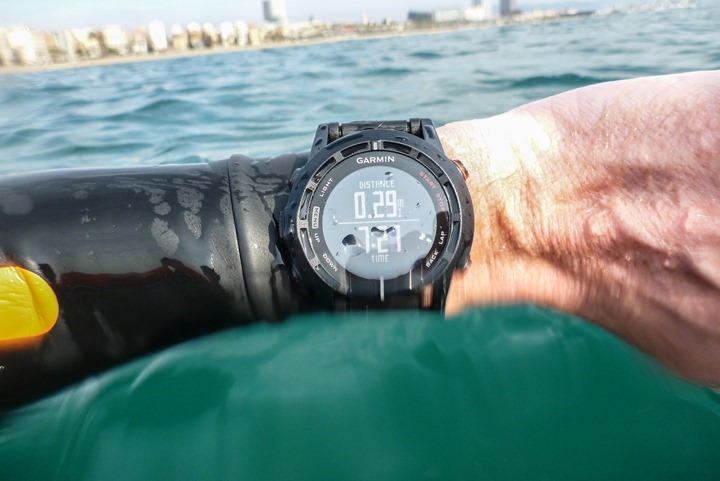
It looks at the general splatter of the direction of points and attempts to determine where you’re going and the distance associated with it.
While doing so, it’ll give you details such as pace and stroke rate as well as time and other common distance fields. You can create laps if you’d like (such as at a buoy or turning point).
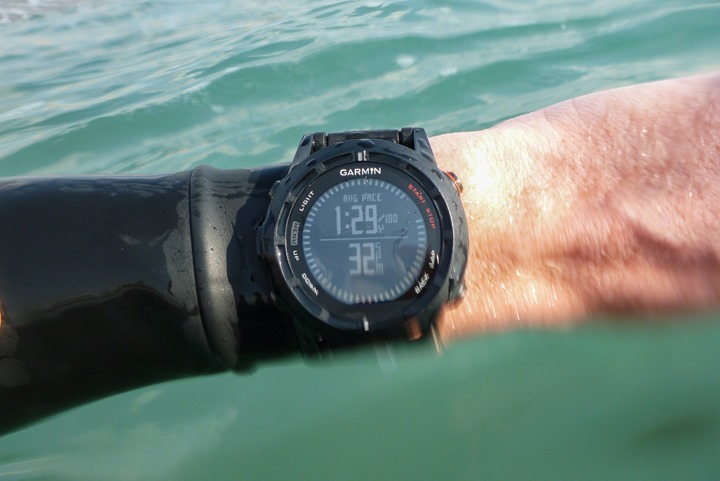
Because it’s still sorta winter in Europe, my time with openwater swim mode has been slightly limited. I’ve had a couple of swims with the unit, but the most recent one has been a few weeks back in firmware. Thus my testing is limited, and I’ve been told the algorithms have been further refined since then.

Still, the results were generally positive. For my tests I wore four units. I used a Garmin FR910XT, Suunto Ambit 2, and then the Fenix2. I then added a Garmin FR620 as a ‘reference’ distance onto a little swim buoy floating behind me. This keeps the unit above the water at all times and records a perfect track of where I actually went to compare against the units on my wrist.
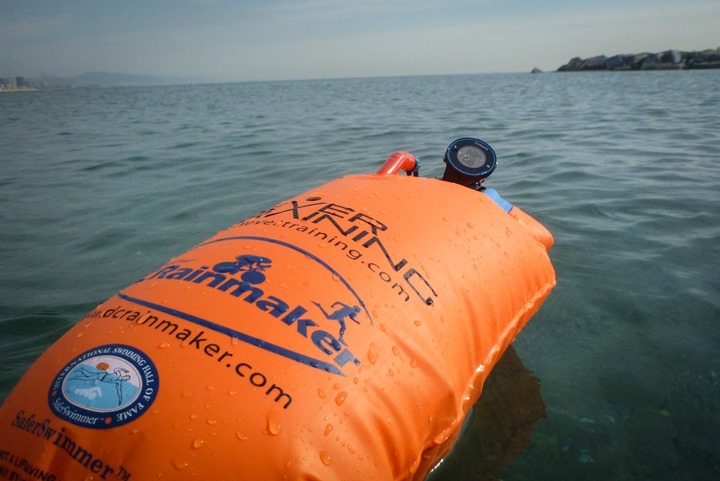
Below, you can see the results of this:
Suunto Ambit2: .52mi
Garmin Fenix2: .68mi
Garmin FR910XT: .62mi
Garmin FR620 (REFERENCE): .58mi
Overall, the results are roughly about what I’d expect (sorry, it’s fuzzy, it looked much clearer in the camera lens when I came out of the water).
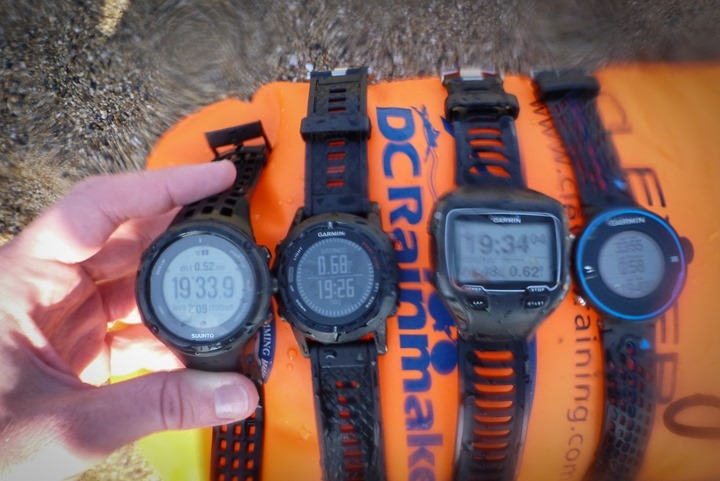
In general, I look for about 10% error rate with openwater swim units, though at shorter distances it’s harder to assign a number as it usually starts to get closer the more you swim. Sometimes it’s spot-on scary, but sometimes it’s a bit further away. Thus, if using the unit on your wrist and then doing a race, don’t be upset when the distance don’t match. In all likelihood, the swim course wasn’t measured correctly…and your unit didn’t measure it correctly on top of that. It’s actually quite rare for most non-Ironman triathlon swim courses to be accurate.
When it comes to data afterwards on Garmin Connect, you’ll get maps of where you went (which are smoothed), as well as some basic information like stroke rate and distance/pace:

One strength of the Fenix unit is the much strengthened wrist strap. I’ve often stated that I’d be hesitant to use some devices on the market in the swim start of a triathlon due to the band being somewhat fragile. And ultimately, people have lost other units to the bottom due to such. In the case of the Fenix2 however, I’d be reasonably impressed if you could snap it off. The pins are beastly, and screwed in from both directions. I think it would basically take getting run over by a boat to pull it off. I suppose we’ll see by the end of the summer.
Cycling:
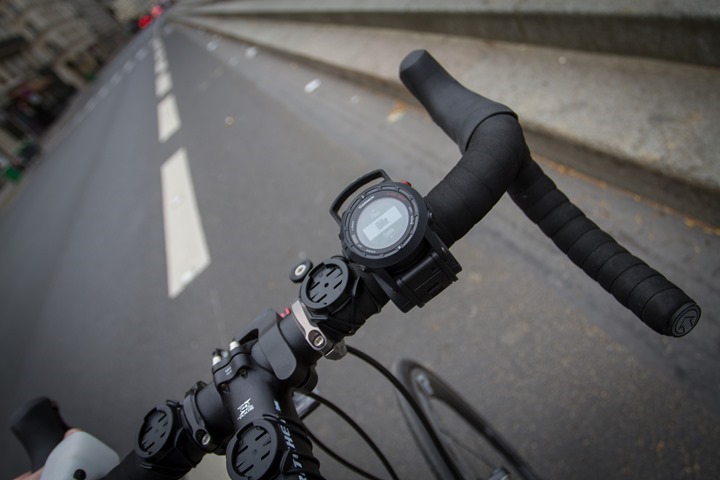
The Fenix2 greatly extends the Fenix/Tactx cycling support, primarily in the area of power meter capabilities. As part of adding full triathlon support, the cycling mode was further beefed up to include full ANT+ power meter compatibility, including the support of the latest left/right and related metrics for power meters from Garmin, ROTOR and others.
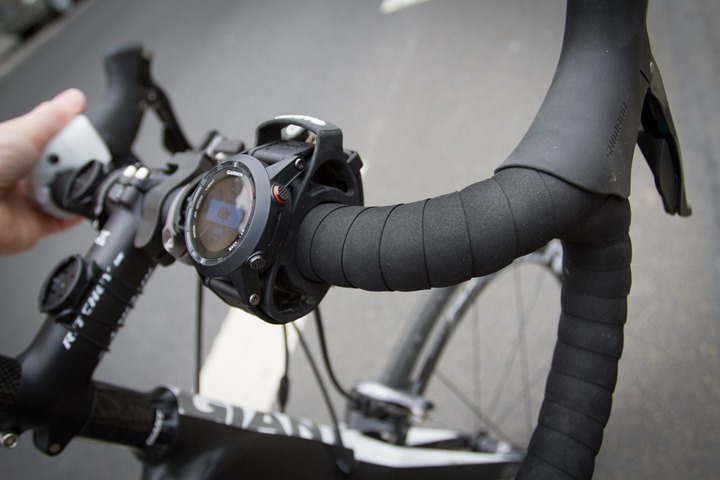
From a logistical standpoint, you can wear the Fenix2 either on your wrist, or on a bike mount for your bar. Garmin sells a simple rubber one for $9 that fits the bill. You can find a similar ones branded by other companies that all basically do the same thing. For triathlon bikes, you can use a solution like the profile designs one seen here, or, some of the newer Barfly options (Universal Mount).
When it comes to sensors, you can pair any ANT+ speed/cadence sensor, including both speed-only and cadence-only (as well as speed/cadence combo sensors). This is done through the sensors menu:
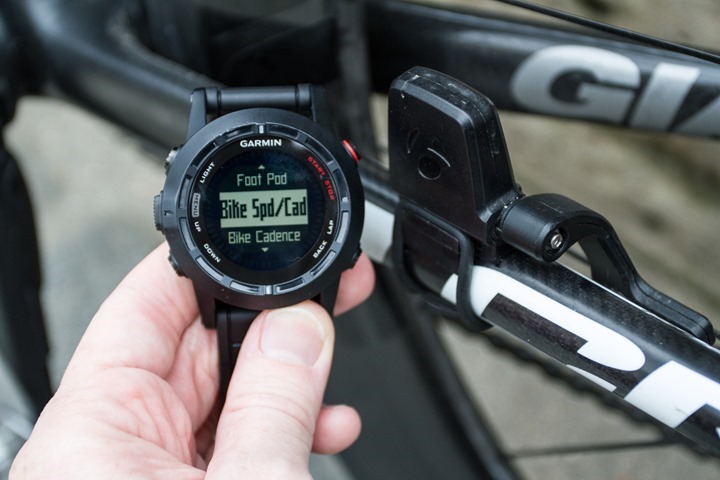
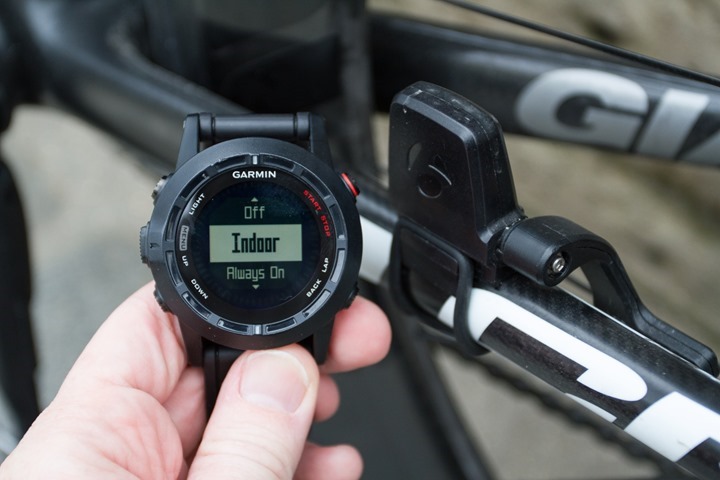
It’s in this area they you’ll define wheel size for usage either indoors or outdoors. You’ll also see an option as to when to utilize the speed/cadence sensor. This is somewhat interesting as this option isn’t found on most of the other Garmin cycling devices.
When it comes to power meter support, you can pair your ANT+ power via the sensors menu.
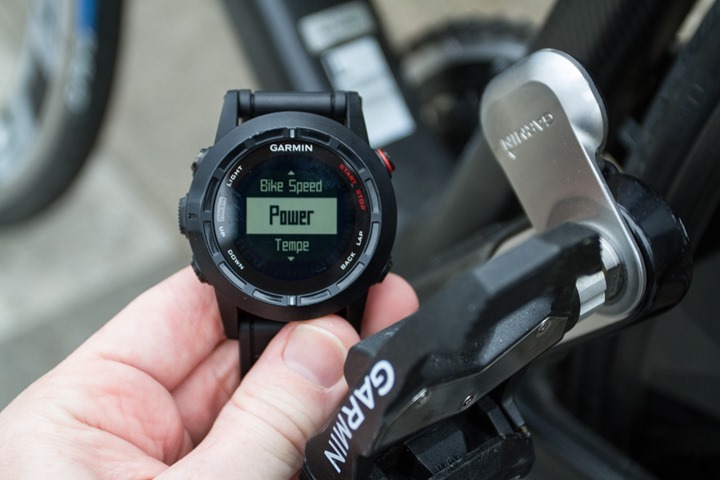
In doing so, you’ll also be able to set options including crank length (critical for Garmin Vector):
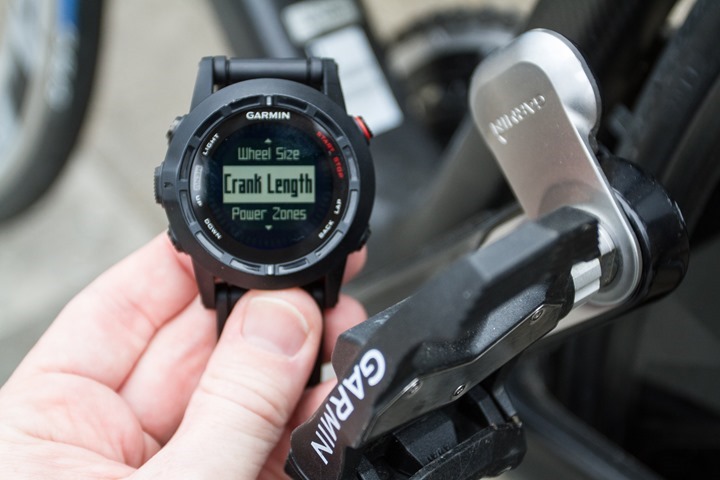
You can trigger calibration (zero offset) via this menu sub-area as well.
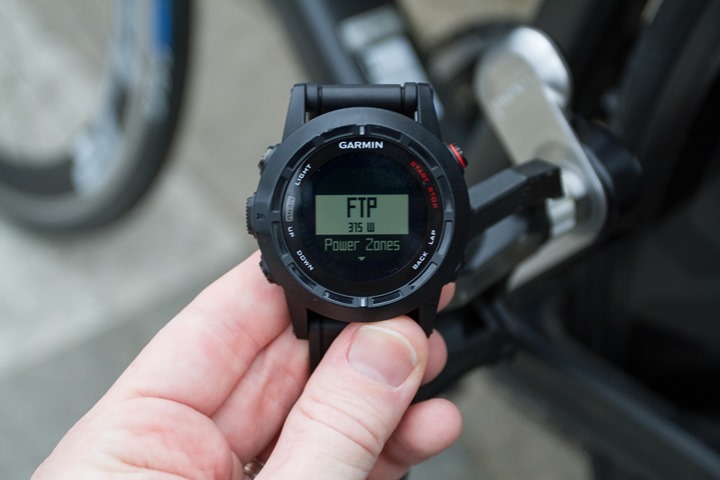
Within the power meter section you’ve also got the option to setup your power zones, as well as your FTP (Functional Threshold Power). Setting the FTP on the device is critical to getting the same Training Peaks values on the device as you’ll get on Garmin Connect and Training Peaks. For example, if I set my device to an FTP of 315w, but then I set Garmin Connect to 275w, I’ll see differences when I upload.
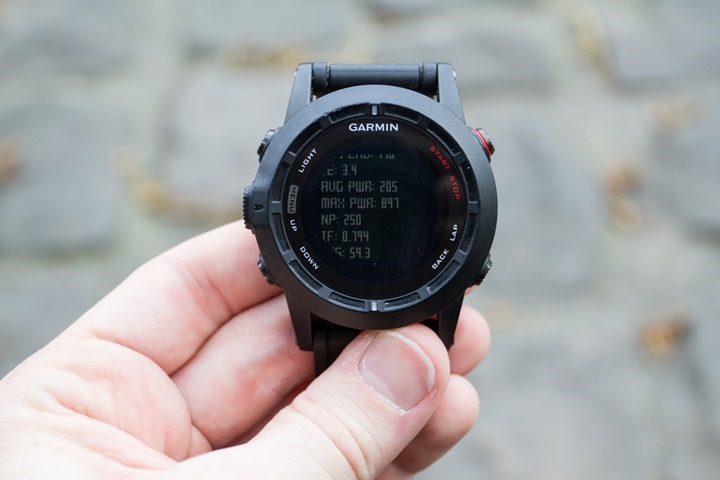
Speaking of which, the unit supports all of the power-meter driven Training Peaks values of TSS/NP/IF (Training Stress Score, Normalized Power, Intensity Factor):
When it comes to on-bike display, the unit allows you to select up to four fields to display concurrently on a single page. And just about as many pages as you’d like.
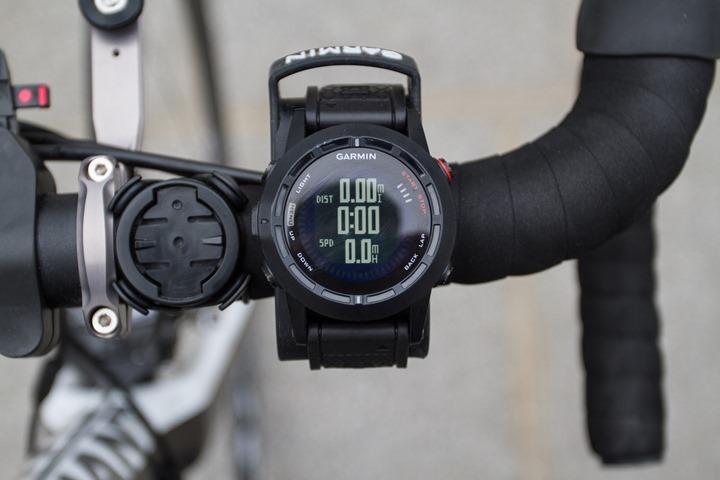
I cover all these later on in the ‘Data Fields’ section. These data fields include the left/right power meters:
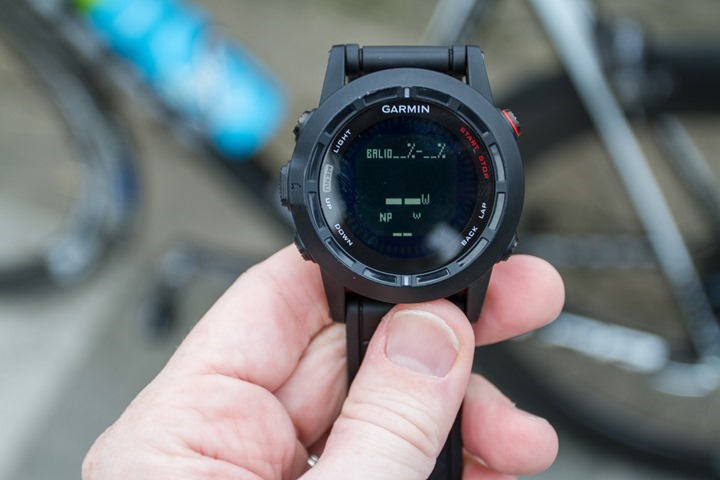
Indoors on a trainer, you can go into indoor mode for cycling, and thus disable the GPS and get speed/distance data from an ANT+ speed/cadence sensor:
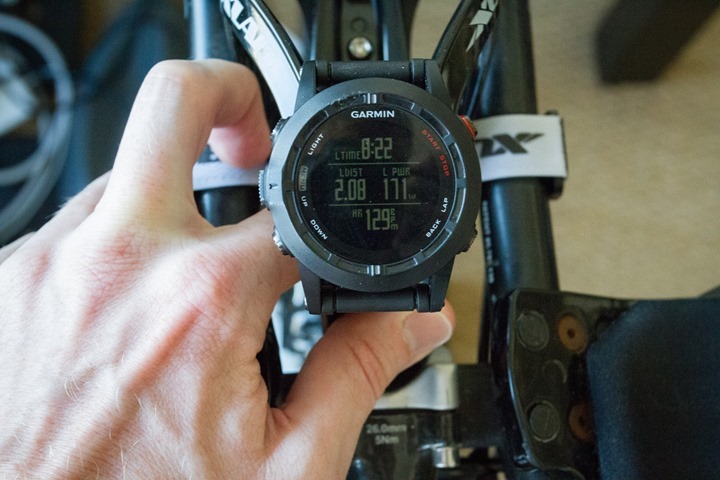
Afterwards, on Garmin Connect, your data is available for you to view. Or, you can take the .FIT file and upload it to any 3rd party site – such as Strava, Training Peaks, or Sport Tracks.

Finally, it should be noted that the singular omission from the Fenix2 is the lack of bike profiles. Meaning, you can’t have a road bike and a triathlon bike. You’d have to re-pair the sensors for each one individually. And unfortunately, there isn’t any mechanism to manually enter in the ANT+ ID’s like other Garmin Edge/Forerunner units. So you’ll have to ensure no other cyclists are around when you make the switch and re-search for sensors.
Multisport Mode:
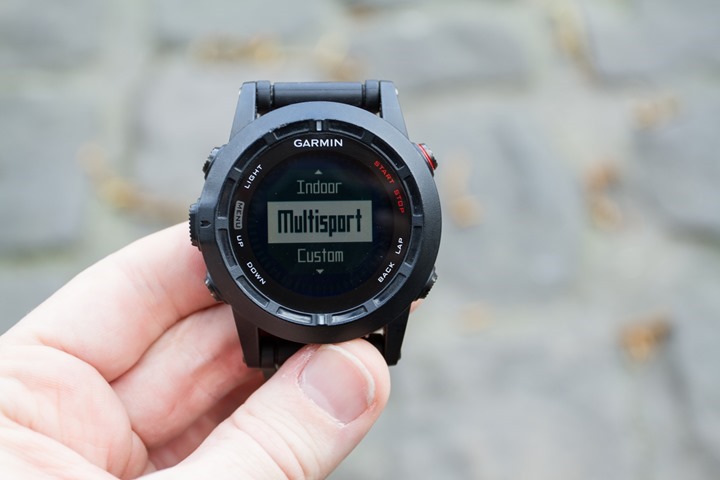
The core differentiator when it comes to a ‘multisport watch’ and a watch that happens to do multiple sports is the ability to have a multisport mode. This is essentially a fancy term for ‘triathlon mode’, without making the duathletes feel insulted. What it means though is that in a race (or training) you can seamlessly transition from Swim to Bike to Run (or, back to Swim) – all as a single cohesive activity.
The Fenix2, like the Garmin FR910XT/FR310XT/FR305, contains a multisport mode. Within this mode you can take any of the different sport profiles (or your custom profiles) and mash together a multisport event. Note however that at this time you cannot add a pool swim to multisport mode.
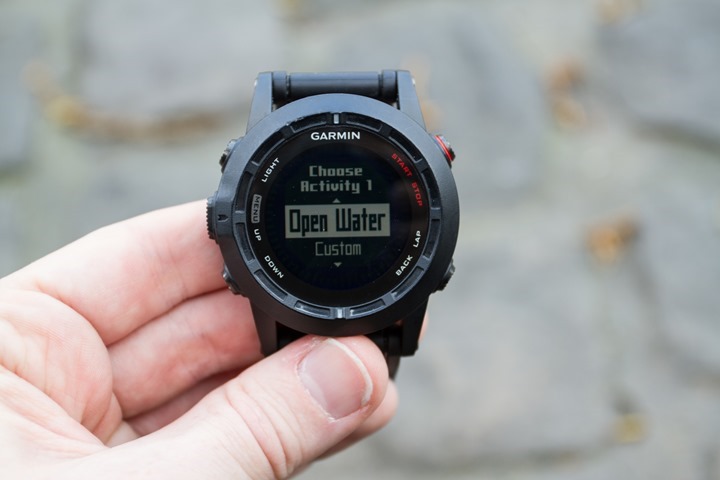
For example, the traditional swim/bike/run threesome:
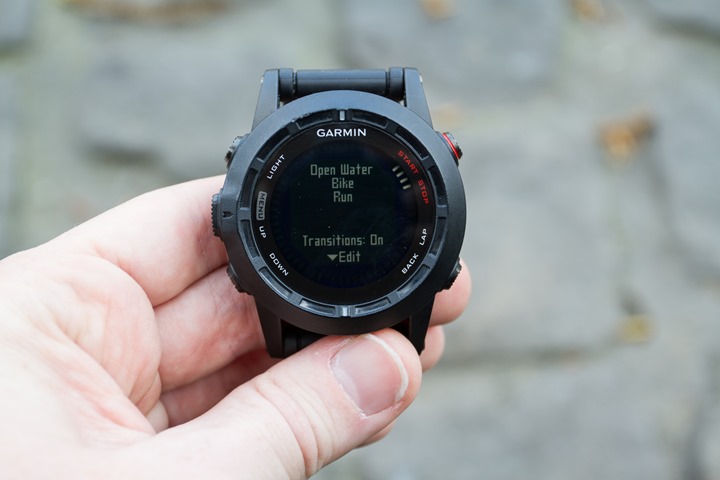
When in multisport mode, if you switch from swim to bike, then all your normal bike pages are displayed. And then the same when you go from bike to run, then showing all your run pages.
You can specify whether or not to include transition times in this. Note that as it stands today, upon uploading to Garmin Connect each of the sports are broken out individually into separate activities.
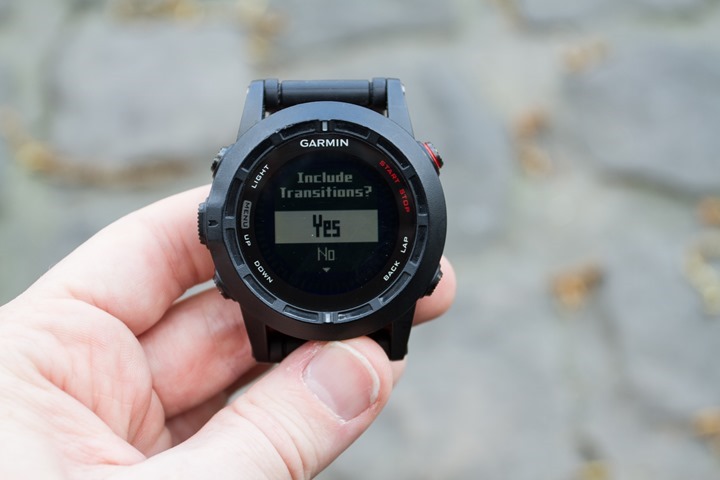
So the real benefit of using multisport mode is the quick transitions from sport to sport, and that it’ll show total time (such as in a race) from the first sport leg until that point.
Battery Life:
Of course, for many endurance athletes, the next question that follows is what does battery life look like. The unit supports multiple battery modes. At one end you’ve got 1-second recording with constant GPS on. This is the mode that most athletes will want to be in, as it updates most frequently (every second). This is especially true of anyone using a power meter, where 1-second data is critical for accurate analysis.
In 1-second mode (with GPS on and ANT+ sensors enabled), Garmin states about 16 hours with “good satellite reception”.
I’ve done two tests thus far that pushes the battery boundaries. For both tests, I use the ANT+ simulator to simulate sensors being used. In this case, I went with the ANT+ HR strap, but there’s no difference in battery consumption between one and multiple ANT+ sensors, it’s all the same. Next, I completed two scenarios with the watch. For the first, I placed the GPS inside, where I’ve got a GPS repeater hooked up outside a window. It’s not super-great satellite, but it does the trick.
For this first test, I hit just over 15hrs of battery life (15:07:40). The fact that I had less than ideal GPS coverage no doubt reduced my total time. The unit automatically went into standby at 13% of battery. The activity was saved, and I was able to resume it upon adding more battery.

For the second test, I put the GPS on top of my roof, and then connected a lanyard to it, as I was somewhat concerned the pigeons wouldn’t take it (seriously, these pigeons are vicious). I changed though from using a HR simulator to the Tempe ANT+ accessory. The reason for this was I was having some minor difficulties in ensuring clean ANT+ signal on the roof the entire time, which would adversely impact battery life. I validated with Garmin that the battery burn profile between the Tempe ANT+ accessory (which I could leave next to the unit) and an ANT+ HR strap is identical from the Fenix2 standpoint.
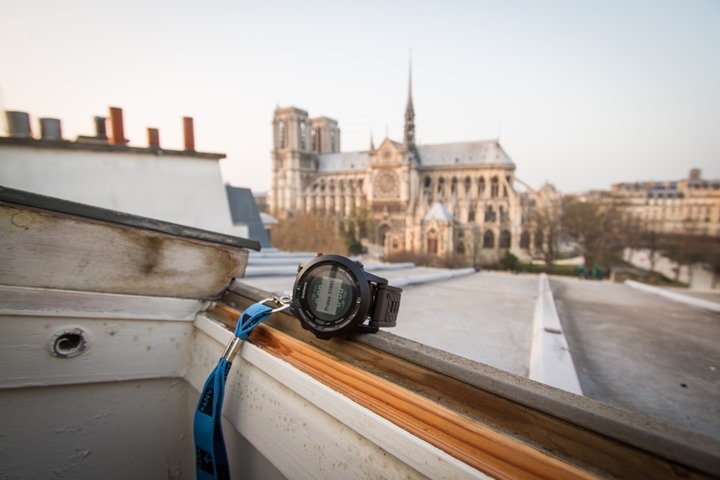
For this test, I just left it up there all night long, and the battery lasted about the same – 15:00:10. The unit automatically went into standby at 13% of battery. The activity was saved, and I was able to resume it upon adding more battery. For those curious, you’ll see a tiny shift in elevation as the pressure changes. In my case – about 5ft in total.

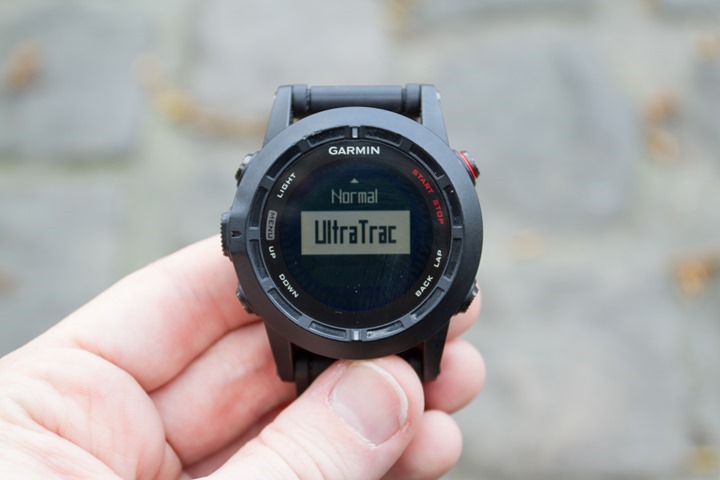
So both of those modes are likely suitable for the vast majority of iron-distance athletes. If you need to increase battery-life for an Ironman to cover the maximum allotted time of 17hrs, you could reduce the GPS sampling rate for one of the sports. I’d recommend lowering the rate for running, since the reality is that you’re walking the run if you’re finishing in 17-hours (simple math makes this a fact), and thus, it’s of less importance to have 100% up to the second data. Though, you’d be losing any heart rate sensor data – since that isn’t enabled in UltraTrac mode.
Next, there’s the ultra-long battery mode, which gets the unit up to 55 hours of recording time. In this mode, the unit samples GPS every 60-seconds. This means that it only gets a GPS fix every minute, and records it then. As such, this is not really ideal for running events, but is generally perfectly suitable for walking/hiking events.
To understand why this is the case, I’ve gone out and wore two Fenix units. One with 60-second sampling, and one with 1-second sampling. Then, I simply did a quick wander around the neighborhood and some of the curved little streets. Here’s the results:

Above, is normal GPS mode, which samples every second. Whereas below is UltraTrac mode, which samples every 60-seconds on GPS by default. Note this has nothing to do with recording rates. It’s purely how often the GPS is enabled/polled. You can configure UltraTrac for any polling interval you’d like – such as 20s, but how that impacts battery life isn’t fully clear. However, be clear that in UltraTrac mode sensors are not enabled – so there is no ANT+ data.
In the normal mode above you can see my wanderings around the streets (and people/cars/busses). However, below, you only see it picking up points every minute, cutting off entire sections of the route. As a result, the distance was substantially less as well (.42mi vs .55mi).

Finally, for those who really need even more battery – you can combine the Fenix2 with a portable battery charger, or solar charger. This works with any device that simply provides a charge (but not a computer, which switches the modes).
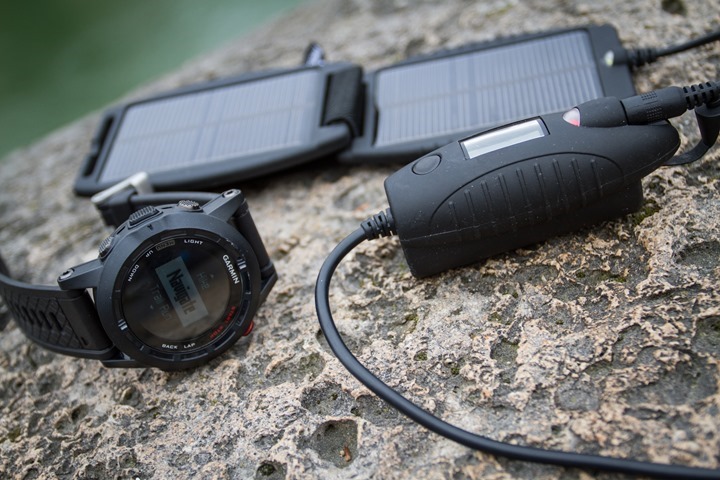
I’ve used both the little USB portable battery pack seen above, as well as the solar chargers sold by Garmin (made by PowerMonkey) at the end of the review.
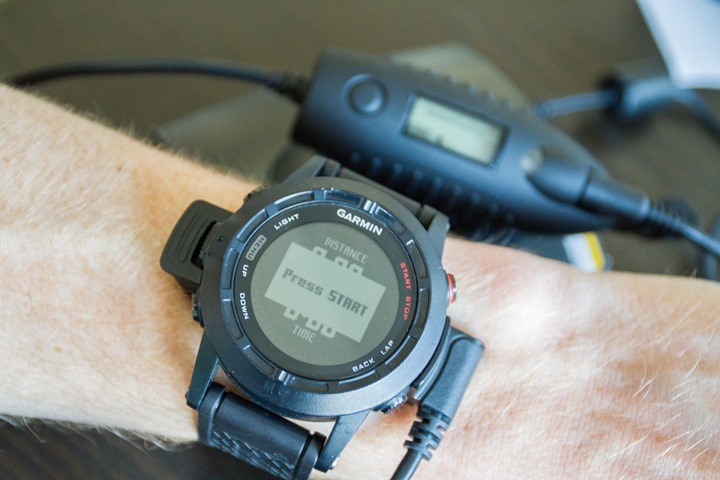
Note that you can indeed wear the unit while using the charging clip with the battery pack. One option would be to put the solar charger (or small USB charger) in a CamelBak/similar and then just run the cable down to your wrist. The other option (and probably what I’d do), would be to temporarily stick the watch + charger in my backpack for 45 minutes or so to let it charge. It’d still be running/recording, just would keep you from getting tangled in cables.
Custom Workout & Interval Support:
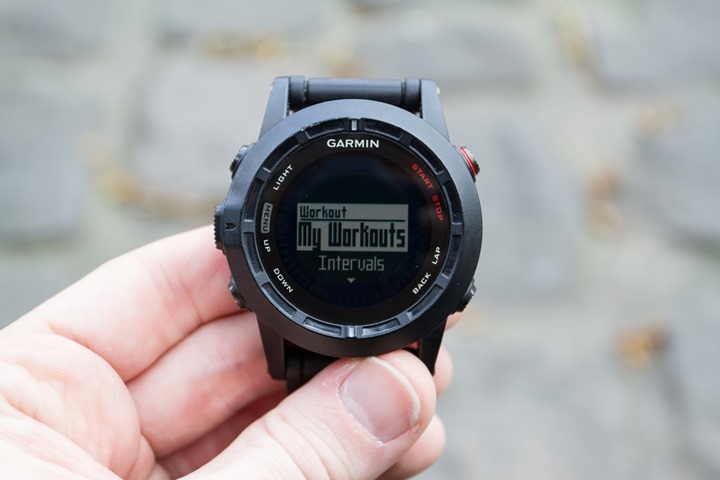
The Fenix2 supports both the creation of custom workouts using a variety of parameters, as well as the use of simple interval workouts.
Starting with simple interval workouts, the Fenix2 can be setup on the fly from the watch itself to run you through a straight forward interval workout. To do so, you’ll start from the Workout Menu, and then go into Intervals:
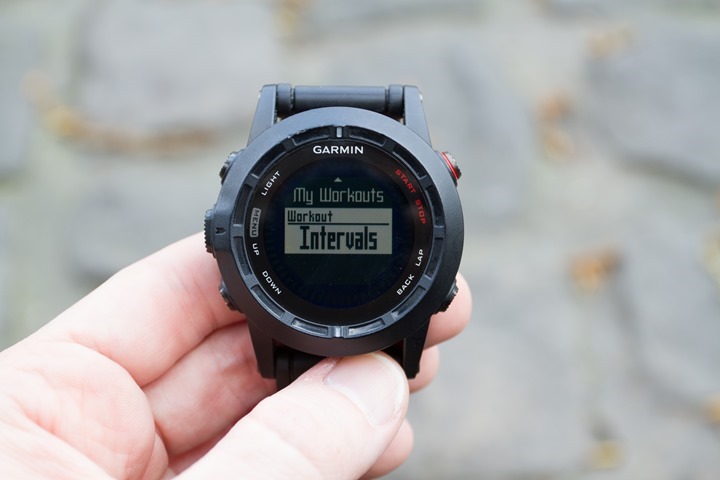
From there you can simply start with the last interval workout you setup, or you can edit the workout. When you edit the workout you can define the work period (the part where you run hard), the rest period (the part where you lie on the ground gasping for breath), the repeats (how much pain), and then both a warm-up and cool-down.
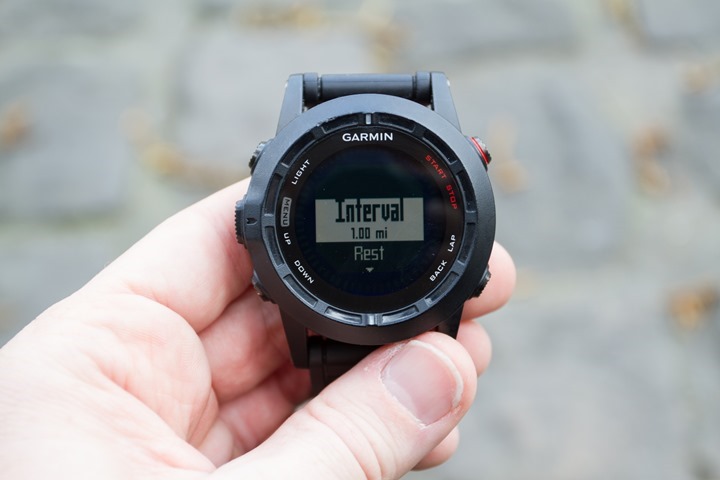
For the work interval period, you can define it as either distance (miles/kilometers) or time, or, specify it simply as ‘open’, which means until you hit the lap button.
For the rest interval period, you’ve got the same options: Distance, time, and open. The unit will combine the work + rest interval period together, and repeat them as many times as you’ve specified in the ‘repeat’ option.
Finally, for both warm-up and cool-down you can specify to turn it on or off. There isn’t a pre-defined time with basic interval mode, it’s just until you hit the button again.
While in the workout the unit will walk you through each step and give you a countdown as you approach the next step. It’ll automatically create laps for each segment of the workout, which can be reviewed later on Garmin Connect or any 3rd party app.
Next, we’ve got the much more advanced custom workout creation mode. Within this mode, you can create an almost unlimited workout as far as complexity goes, with a slew of different steps and targets. For example, you can specify cadence, pace, or heart rate targets, as well as durations including both time and distance. Or, just until you’ve pressed the lap button to advance.
It’s easiest to create these workouts on Garmin Connect using a computer, and then transfer them to the watch using either your phone or a USB cable. Here’s an example of a variation on an interval workout I created on Garmin Connect:

Once you’ve transferred the workout to the unit it’ll be available both on the unit as well as Garmin Connect forever. So you can always come back and edit it later if need be.
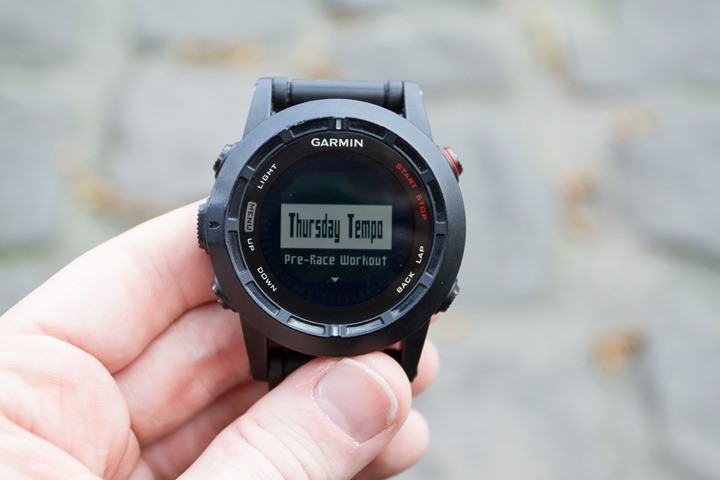
Note that you can’t edit the custom workouts on the unit itself, only from Garmin Connect. But that’s reasonable, since it would be a bit of a mess to do so on the unit anyway.
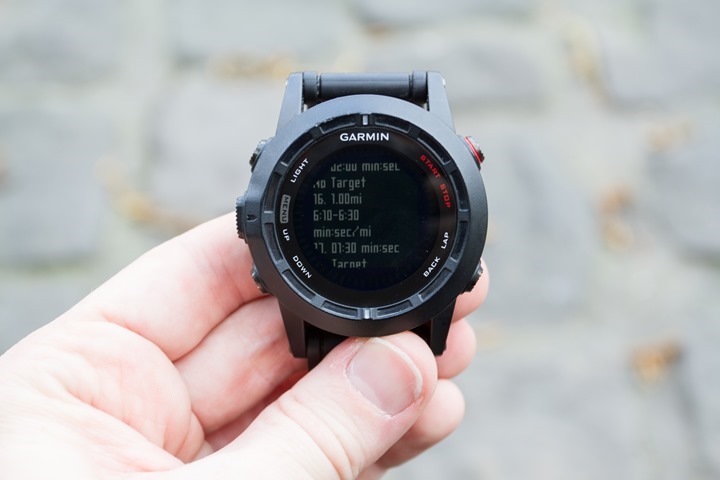
While in workout mode, the unit will walk you through each of the steps and the targets. Now, at present there’s a bit of an odd bug where no matter what I define the step as (such as ‘Interval’ or ‘Rest’), it just spits it out as ‘Run’ on the screen. Garmin is working on fixing this. For my workout though, it still listed the targets (i.e. pace/cadence/HR), as well as times and distances. Given I roughly knew the workout structure, I was able to easily figure out when I had to run, versus when I got to be lazy.
Note that workouts cannot be combined with multisport mode.
Finally, it’s worth noting that in addition to both interval mode as well as custom workouts, you can define basic ‘Alerts’ which are triggered when you hit certain criteria. These alerts can be configured for any sport profile, based on the following attributes: Proximity, Distance, Time, Elevation, Navigational Arrival, Speed, Pace, Heart Rate, Cadence, and Battery.
Generally speaking, you can configure a minimum threshold, and a maximum threshold for most of the categories (such as heart rate). The unit will beep and buzz when you go under/over those thresholds.
Mobile Connectivity (Live Tracking, Uploading, Text/E-mail Notifications, etc…):
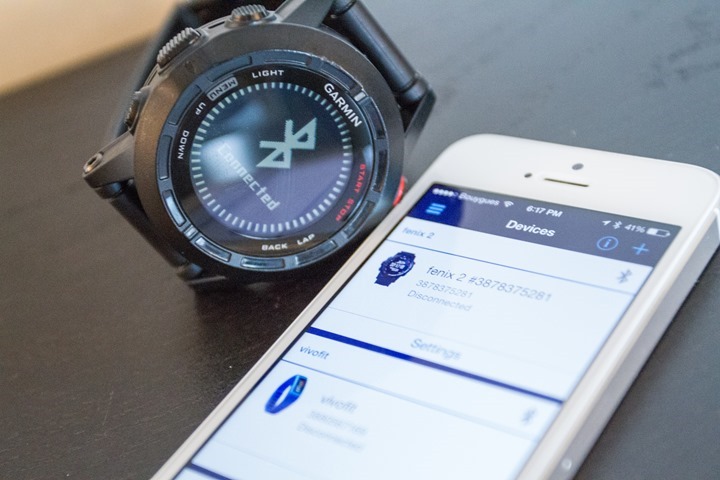
The Fenix2 builds slightly upon the mobile connectivity that was introduced in later beta firmware with the Fenix1 and Tactix units – which enables Bluetooth Smart connectivity to mobile devices for a variety of purposes. This connectivity includes the ability to upload workouts, enable Live Tracking, as well as turn the Fenix2 into a smart watch with notifications from any phone app on your device.
As it stands today, mobile connectivity on the Fenix2 stems from three difference places:
Garmin Connect Mobile (App): Upload of completed workouts, download of scheduled workouts, Live Tracking, Transfer of courses
Garmin Basecamp (App): Creation of waypoints, viewing of tracks
Native OS notification functionality: Configuration of Fenix2 as a smart watch for notification alerts from any app (e-mail/text/phone/Instagram/etc…)
I’m going to briefly run through each one and the functionality. Before that, it’s important to note that while the Fenix2 does contain Bluetooth connectivity, it requires a Bluetooth 4.0 or higher capable phone. This is any iPhone 4S or higher, or any Android phone with Android operating system 4.3, as well as Bluetooth 4.0 on it.
When it comes to Bluetooth on the Fenix2, there’s a few modes you can configure it for. These include leaving it on 24×7, enabling it only during an activity, enabling it only outside an activity, and enabling it briefly for sync only. Because the Fenix2 wasn’t designed battery-wise for Bluetooth to remain on 24×7, you’ll likely want to focus on using it only to sync data, or for the period you’d want to use it for. But more on that in a minute.
Garmin Connect Mobile:
Garmin Connect Mobile (GCM) is Garmin’s primary application for fitness focused devices to connect to phones, and integrate with Garmin Connect (the online site). The app recently went through a bit of a refresh about a month ago, which has increased the stability quite a bit after largely stagnating for a number months.
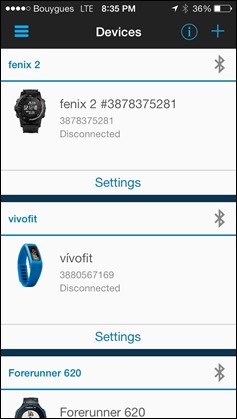
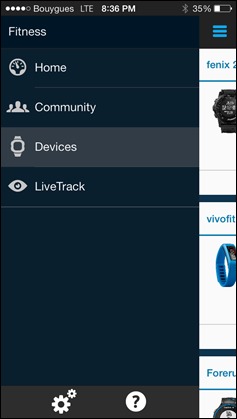
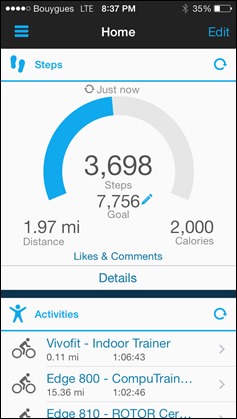
On the application itself, it’s roughly divided into four sections: Home, Community, Devices and LiveTrack. Home is where you’ve got a bit of a dashboard into your overall Garmin Connect stats – dependent on which devices you’re using. You can see some of these below:
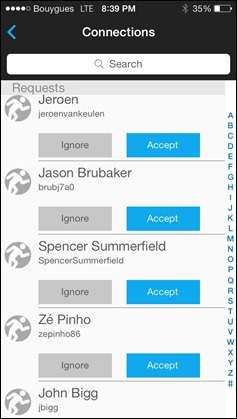
Next, there’s ‘Community’. This is where you can look at people you follow and the most recent activities. This is similar to how other social media communities work. You can follow people, have them follow you, and restrict what they see.
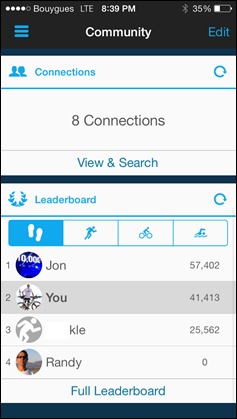
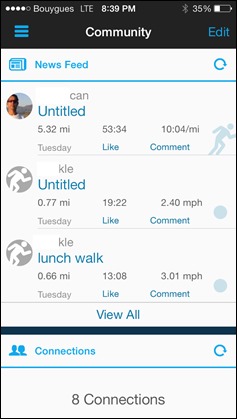
Then we’ve got ‘Devices’. After we’ve paired up the Fenix2 to the phone, you’ll see it listed in the device settings. It’s here we can also click on settings and configure whether to automatically upload completed activities to Garmin Connect. Beyond this, there’s really not much more to configure specific to the Fenix2 itself:
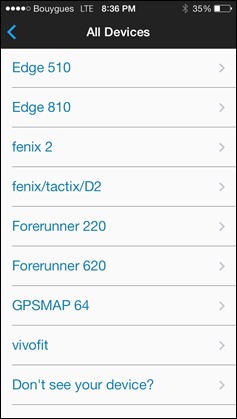
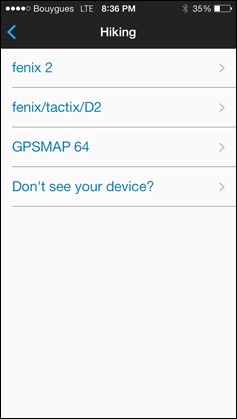
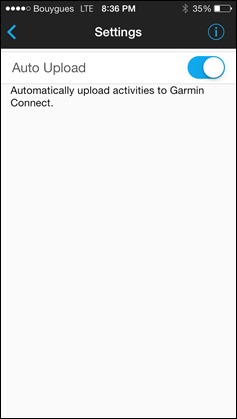
With that, let’s head over to ‘Live Tracking’. This is where you can setup a live tracking session that allows others to follow your activity live. This includes your location information, speed/pace information, as well as some basic splits.
When you setup a live tracking session, you can invite people who will receive a link to a site to track your activity. Additionally, you can configure it to share on Facebook or Twitter. Finally, you’ll see an option for ‘Extend Sharing’, this means that the ability to see your activity will last 24 hours, otherwise, it’ll end as soon as you end the activity. I recommend always setting this to ‘enabled’, otherwise your friends and family who joined late won’t be able to see anything. Further, if you have a loved one following along they may become concerned when the page abruptly ends with no further information.
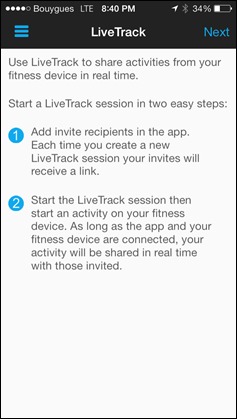
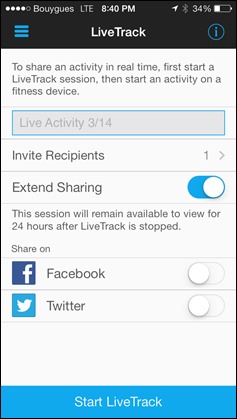
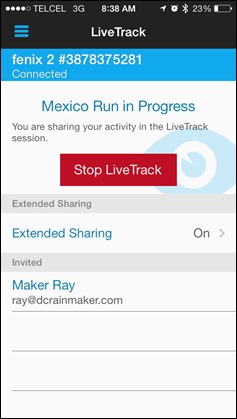
Once you’ve configured your settings, you’ll go ahead and click ‘Start LiveTrack’, which will enable the session. Note that this won’t actually start the activity. It simply starts monitoring. Folks can see a blue dot on a map of where you are, even before you start. It’s at this point that the e-mail notifications/Tweets/Facebook posts go out.
After those have been sent, people can then click on the link which takes them to a page on Garmin’s site which shows them your current progress.
They can change from metric to statute, as well as zoom in on the map, switch it to satellite view and see some basic splits.
Note that in the case of the Fenix2/Tactix/Fenix1, you cannot concurrently stream ANT+ metrics like heart rate, power, or cycling cadence. This because the chipset used in these watches does not allow both ANT+ and Bluetooth Smart to be used at the same time.
Said differently: If you want to display/capture/record heart rate data (or any other ANT+ data sensor), you cannot enable Live Tracking of that session. It’s one or the other. It’s a physical hardware limitation that will not change with a software update. Note that this is different from the Garmin FR220/FR620 & Edge 510/810, which do enable you to stream those metrics at the same time.
Once your activity is complete, you can save it on your watch and have it automatically transfer. You do not need to enable Live Tracking to do so. In fact, I rarely do, but I do use the upload functionality. When you finish the activity you’ll see an option that says ‘Sync’.
When this option is selected, it’ll temporarily enable Bluetooth Smart on the watch and connect to your mobile phone to the Garmin Connect app to upload the workout. This is perfect for folks (like me) who want to use ANT+ sensor data during a workout, but still want to briefly use Bluetooth Smart to upload the data afterwards via phone.
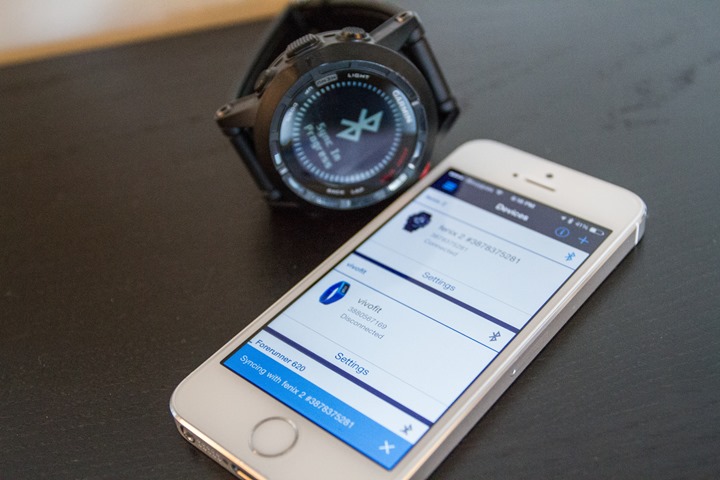
Now, the only catch here is that in my testing the upload process from the unit to the phone is incredibly slow. For example, a 40 minute run (with HRM-RUN ANT+ data), it took approximately 20-30 minutes. [Note/Update: Other users are reporting much faster times, in the order of a minute or less, perhaps it’s just me. Update 2: In the latest version, I’ve got my 2hr 30min run down to 8 minutes to upload…progress.]
In addition to uploading completed workouts, you can also transfer scheduled workouts to the Fenix2, as well as transfer pre-created courses. Both of these must be created first on Garmin Connect – and then sent to the Fenix2 from the app.
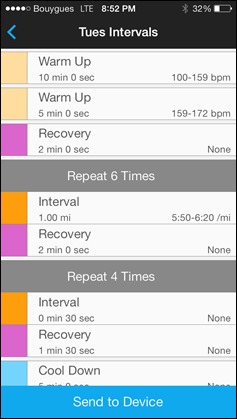
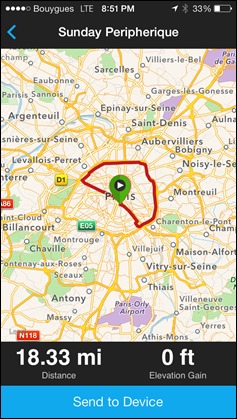
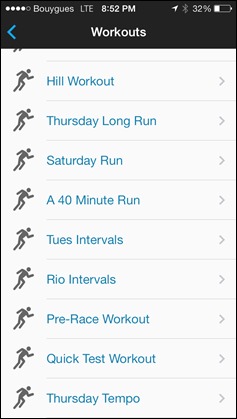
Lastly, by connecting to the Garmin Connect Mobile app, you’ll update the Fenix2’s satellite cache information, which allows it to quickly find satellites in a matter of seconds.
Garmin Basecamp:
Garmin Basecamp allows you to quickly create waypoints using online maps from your phone, and transfer those waypoints to the Fenix2 (or Fenix1/Tactix). In addition, it allows you to look at tracks (saved courses) on your Fenix, as well as look at saved waypoints that have already been created on your unit. Finally, it allows you to look at adventures from ‘Garmin Adventures’, which combine tracks (like hikes) with photos.
To start, you’ll need to kick your Fenix into Bluetooth enabled mode. Then, you can search/scan from within the app to find the unit. You’ll also want to sign into your Garmin Connect account, which enables you to save some items up to the ‘cloud’.
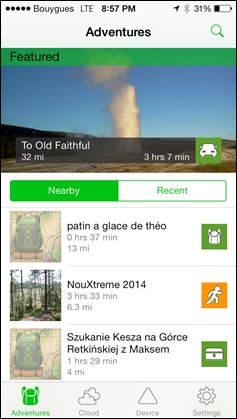
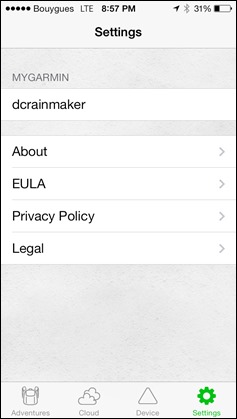
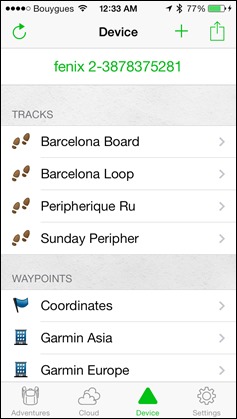
Next, we’ll start with creation of an adhoc waypoint. In this case I can choose to create a waypoint based on my exact location right now. From there I can select an icon, choose a name, and also give it a description. I can then push this immediately to the device, or save it for later use.
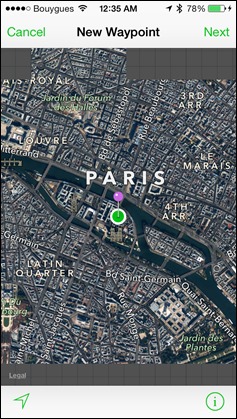
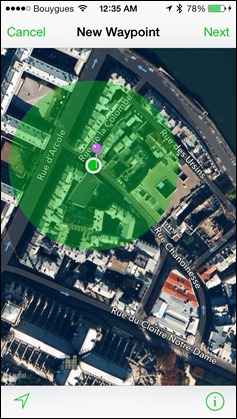
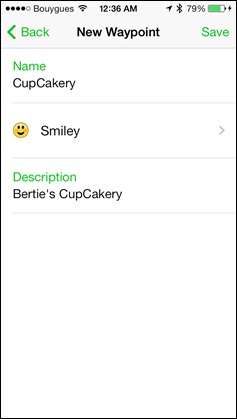
I can also create a waypoint in another location – such as a few miles away, and repeat/do the same process there.
From the app I can pull up existing tracks on my device. These are what Garmin Connect calls courses, and aren’t completed activities, but rather routes to follow. Within this I can look at the track, zoom in, change the map type and even edit the name. But I can’t edit the actual track itself. It’s a look but don’t touch sort of thing.
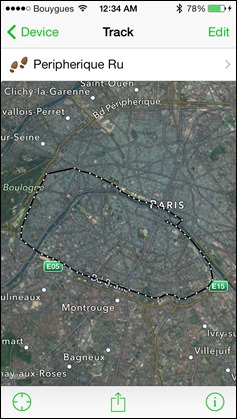
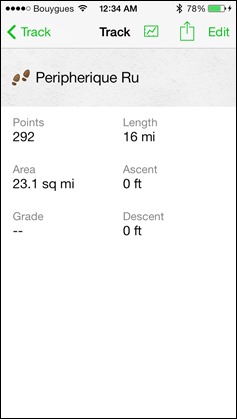
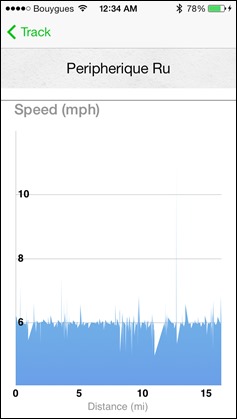
Finally, we’ve got Garmin Adventures. This has been targeted at the hiking/outdoor segment, but allows you to combine a track/route with photos and other information for someone to follow. Sorta like giving someone instructions with a photo book. The app will automatically show you nearby Adventures, but you can also search other adventures. You can pull up the photos from the adventure on the phone as well as any of the waypoints along the way.
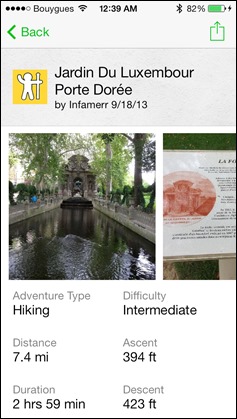
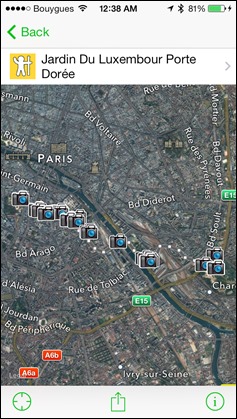
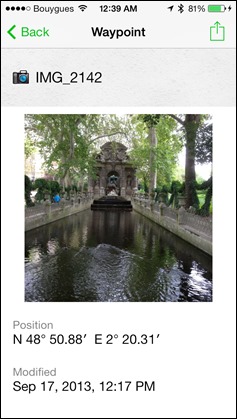
Once you’ve found an adventure you like, you can go ahead and transfer it to your device. Once on the device, it’ll follow/navigate it like any other track (as discussed in the navigation section earlier).
Ultimately, the Garmin Adventures are ‘interesting’, but I’ve got the same complaint I did nearly two years ago: Why on earth isn’t it integrated into Garmin Connect? It sits there like the bastard step child never really getting the attention it deserves. I can only hope with the Garmin Connect overhaul there’s plans to pull it in, and integrate it. In the mobile connected world, Garmin is leaving so much on the table here. They could easily tie this into the phone app to allow folks to take photos, create an adventure and then send those to Garmin devices. Tons of potential…none realized.
Smart Watch Mobile Notifications:
Finally, in addition to fitness focused functionality, you can configure the Fenix2 to display notifications from applications and OS services on your mobile device. This includes everything from text message alerts, to e-mail alerts, to notifications that a friend has commented on a Facebook post.
You’ll simply pair the watch to your phone via the Bluetooth menu. Once you’ve done that, you can enable the notifications prompt within the Fenix2:
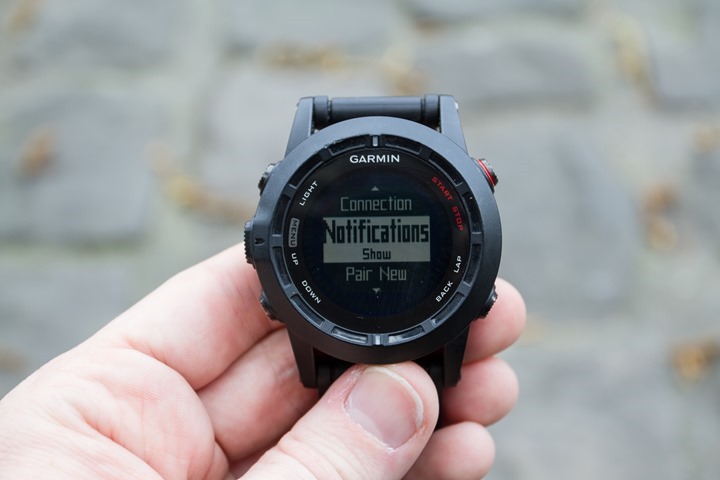
Apps then use the notification center to surface notifications to the Fenix2. As noted before, this can be any application that you’ve enabled. A notification can then trigger an audible alert, or a vibration alert.
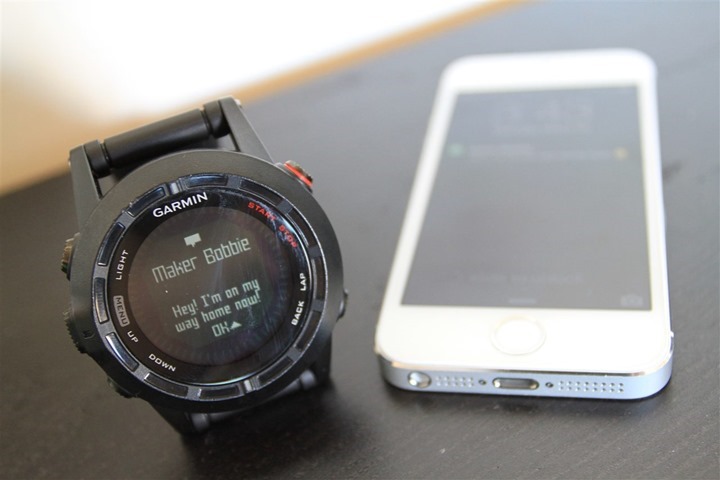
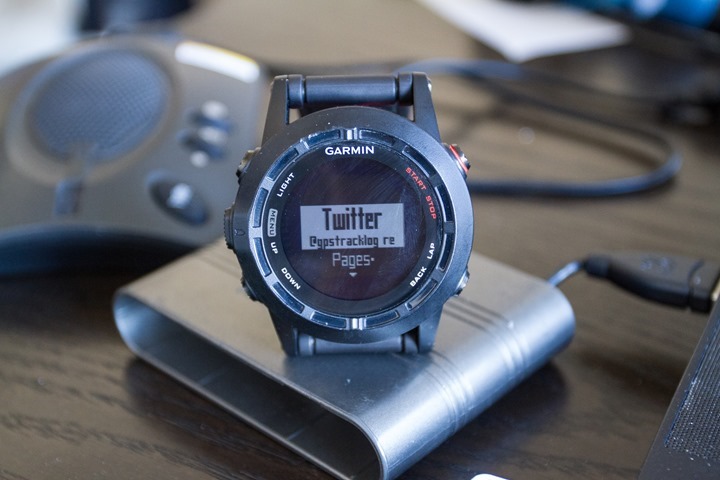
The only challenge with this functionality is that the Fenix2 wasn’t really originally designed like a traditional low-power smart watch, from a Bluetooth notifications standpoint. As such, the battery life here is about 24 hours in this mode. So you’re basically charging it every day if you choose to leave Bluetooth enabled-on constantly. For most folks, I’d recommend against this.
Android Notes: As of today, all of these functions in the mobile action are limited to iOS devices and do not yet work on Android. Garmin is currently planning these to be enabled on Android devices in in a few different pieces:
– Garmin Connect Mobile Fitness Features: Live Track, EPO (Satellite Pre-Caching), Activity Upload, Course Download, Workout Download – ASAP, could be any day, or any week.
– Smart Watch Notifications: This is the notifications piece for things like text messages. This is slated for “Q2 2014”, so anytime between April and June.
– Basecamp functionality: You won’t likely see a specific separate Basecamp app on Android, but rather, see those features surface into an existing app. Which, is something I’ve somewhat argued for, for some time. The timeframe for this is also more Q2.
Garmin Connect Website:
As previously noted, Garmin Connect is Garmin’s activity tracking log and website. It’s where all data from the Fenix2 ultimately gets funneled to. While in the previous section I talked about the mobile uploads, I want to briefly talk about the new Garmin Express desktop app. This app aims to quickly upload your completed workouts to Garmin Connect, as well as keep your device up to date. The app had some initial first week teething pains back a few weeks ago, but seems largely functional when it comes to the Fenix2.
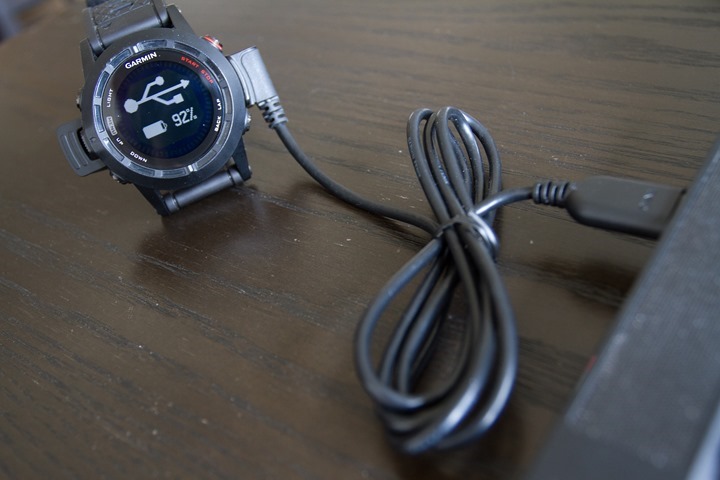
While the device is plugged in it’ll show you if you have any updates pending to install, as well as if any items were recently sync’d (or still to sync). When the device isn’t plugged in, it’ll remind you to update the device – a way of ensuring the unit is kept up to date.

It’s from here that you can associate it to your Garmin Connect account, look at how full the storage is, and also transfer additional languages to it.

While Garmin Express takes care of the ‘dirty work’ of uploading the files to Garmin Connect, you can still easily access the raw .FIT or .GPX files should you wish to. For example, if you wanted to upload them to Strava or Training Peaks. These are accessible just like any other USB thumb drive’s data would be, via the ‘Activity’ folder under ‘Garmin’. These files work with pretty much any 3rd party application out there without issue.

Now that we’ve got the data up to Garmin Connect, I’ll give you a super-quick rundown. I say quick, because I’ve been sprinkling parts of it throughout the review already in the relevant sections. Further, as it stands today Garmin is part-way through a large overhaul of the platform, so showing you how it looks today will likely literally change next week. In any case, here goes.
To start, you’ve got your main dashboard. This is where you can see an overview of various activities and connections you’ve made (like social networks).
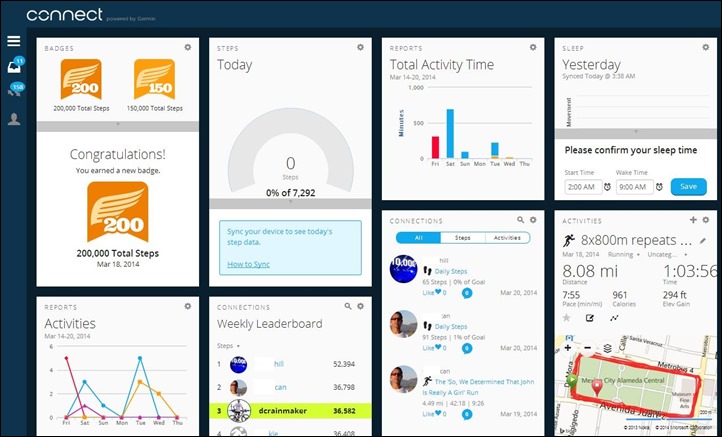
Then diving into a given activity you’ll get an overview of all your stats for that particular run/bike/hike/swim. Along the left is summary information, whereas the right is graphs/charts, and maps.

You can click on any given chart to expand it, which allows you to also snip certain sections to zoom in on.

Down lower along the left you’ve got your laps/splits (either via auto-lap or via manual lap button pressing), as well as details from the Running Dynamics components.

Finally, towards the bottom you’ll see the device that was used, along with the firmware, as well as whether or not elevation correction was turned on. In the case of the Fenix2, it will rarely make sense to turn on elevation correction, since it comes from a barometric altimeter. However, at the moment there’s a bug with GC2 that doesn’t enable you to turn it off (nor, does it enable you to turn it on for devices that should need it). There’s also a visible bug in the temperature, which appears to be showing Celsius but with a Fahrenheit label (well, actually, a Fahrenheit label and a random question mark…so even it knows it’s confused).

Despite it’s bugginess in the current migration from GC1 to GC2, Garmin Connect generally does a good job at showing you the main stats on a run, ride, or swim. You can change mapping platforms between Google and Bing, so that you can find and see maps that make the most sense for your area. You can also export data from here, though I wouldn’t recommend doing that, as some of the data (such as Running Dynamics) isn’t included. Rather, I’d take the raw file off of the Fenix2 instead.
Garmin VIRB integration:
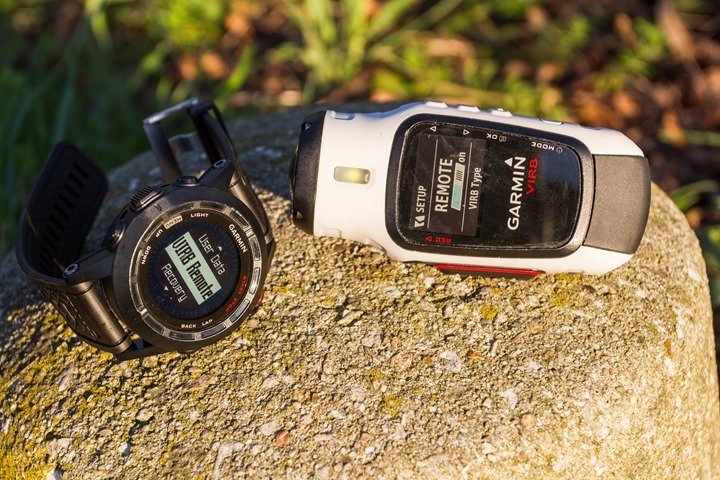
The Fenix2 follows in the footsteps of the original Fenix and includes the ability to control the Garmin VIRB & VIRB Elite action cameras. The Fenix controls the devices via ANT+, thus, the mode is not compatible with Bluetooth Smart enabled. You can access the VIRB control via the Menu button, which allows you to search for a VIRB and control it.
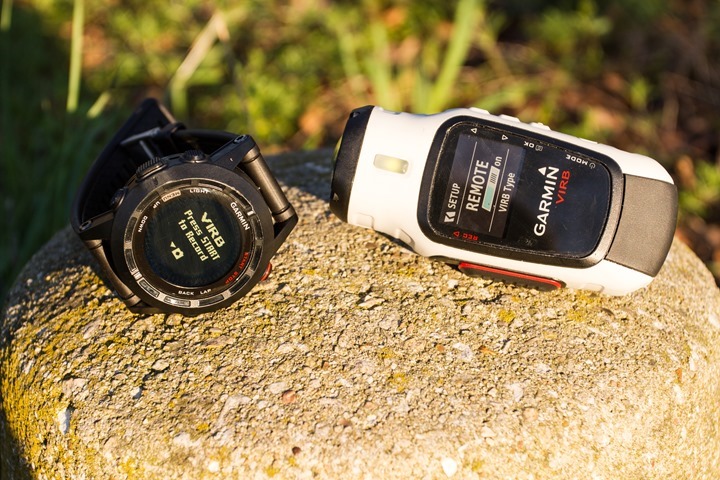
Note that you’ll need to set the VIRB to be remotely controlled. Once you’ve done so, you’ll have to basic options from the Fenix2. First is that you can take a photo. To do so, you’ll simply tap the left hand down button, which triggers the camera about .5 to 1.0 seconds later. The VIRB will follow any of the photo settings you’ve previously defined (i.e. burst mode, etc…).
You can also start and stop video recording from the Fenix2. To do that, you’ll press the start (red) button. Once the unit starts, it’ll display a counter showing you the recording time. You’ll also see the camera light turn to red.
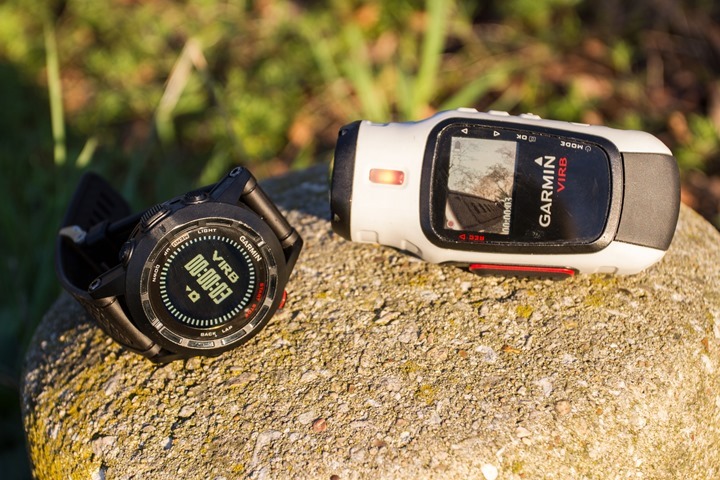
The feature is particularly handy on a bike, especially if you don’t have a Garmin Edge unit (which can also control the VIRB) to trigger the camera. I only wish we’d see VIRB control also implemented on some of the other Garmin high-end running watches, such as the FR620. It would only seem like an easy and logical move to increase adoption of the Garmin VIRB.
Ski-Board Mode:
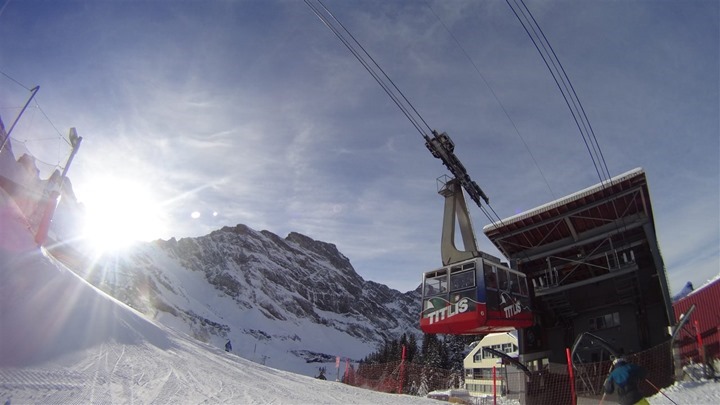
The Fenix2 includes a new mode called ‘Ski-Board’, which automatically calculates and tracks skiing/snowboarding runs based on when you board a chairlift.
I previewed this when it first came out last year for the Fenix1 (and before it had a trendy name), but since then Garmin has been chugging away adding a number of features in this area. Unfortunately, I wasn’t able to fit in a skiing trip in the last 6 or so weeks, thus, I haven’t had a chance to test it (but one reader did this weekend and noted it worked flawlessly). Nonetheless, here’s the low-down on the core features, which is known as ‘Ski-Board’ mode in the menu.
Ski Mode Run Detection: Each time you get off the lift and start to ski, it’ll automatically create a new lap within the unit. In addition, there is a run counter, which shows you how many runs you’ve completed.
3D Speed and Distance: As I covered in my post last year, this mode takes into account the horizontal and vertical components within the speed and distance calculations – basically accounting for the drop in vertical.
Ski Mode Auto Pause: This will automatically pause the time and distance of the track file when you are sitting on a ski lift.
Ski Pages Know When On Lift: While on the lift, the unit will automatically switch to showing you stats about your last run, rather than just stats about the chair lift.
Beyond these core features they’ve also added in more ski-specific data fields, such as total vertical drop and run-specific details around max speed, vertical drop, etc….
As you noticed at the very beginning of this post, the unit includes a fabric extender strap – which is specifically designed to fit over bulkier winter jackets, typically worn while skiing or snowboarding (unless you’re in Dubai of course). Hopefully I’ll be able to sneak in a quick getaway at some point to get some skiing in, though, at the moment my travel schedule doesn’t look good for cold-weather locales.
Navigation & Trail functionality:
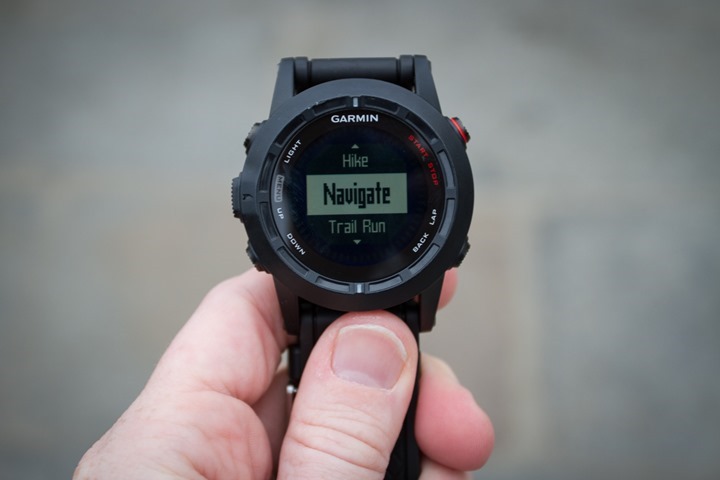
When the Fenix lineup was originally introduced nearly two summers ago, it was built as though it was a hiking/navigation watch, ideally suited for multi-day treks on non-paved terrain. In fact, the team building the Fenix isn’t even part of the Fitness division at Garmin, but rather, part of the Outdoor division – which traditionally focuses on ruggedized handheld units. Of course, over time the Fenix has grown to be more fitness-minded, adding in the swim/bike/run components we see now in the Fenix2. But at its core, the Fenix2 hasn’t removed any of the navigation/hiking/trekking features that it started with or picked up along the way.
Waypoints/POI’s:
The Fenix enables you to navigate to predefined or ad-hoc waypoints, which are simply recorded locations. When you navigate to a waypoint, the unit takes the most direct route – like the crow would fly (assuming the crow isn’t drunk). It’s not like a car GPS that navigates based on known streets/trails (more on that in a bit). This is just point to point.
You can create waypoints either offline (using a computer), or via your phone, or directly on the unit itself. On the unit itself you can either program in coordinates, or if you’re staying at the spot you want to save for later reference, you can create that as a waypoint then. To create waypoints using a computer you’ll use either Garmin Basecamp or Garmin MapSource. To create waypoints using a phone, you’ll use Garmin Basecamp mobile. I cover how the mobile piece works later in the mobile section.
Once you’ve placed the waypoint on the device you can pull it up via “Navigate | Waypoints”. Or, if you want to navigate to a set of coordinates, then “Navigate | Coordinates”.
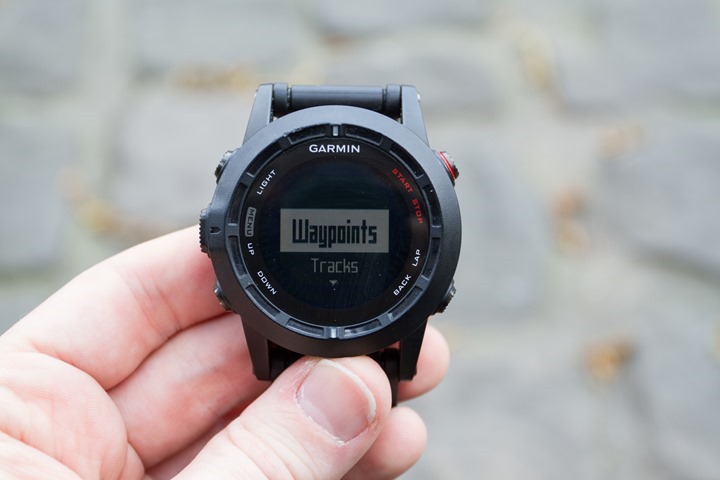
Once you do this, you’ll see a list of saved waypoints that you can select. After selecting a given point, you can pull up additional information about it as previously defined, or you can navigate to it.
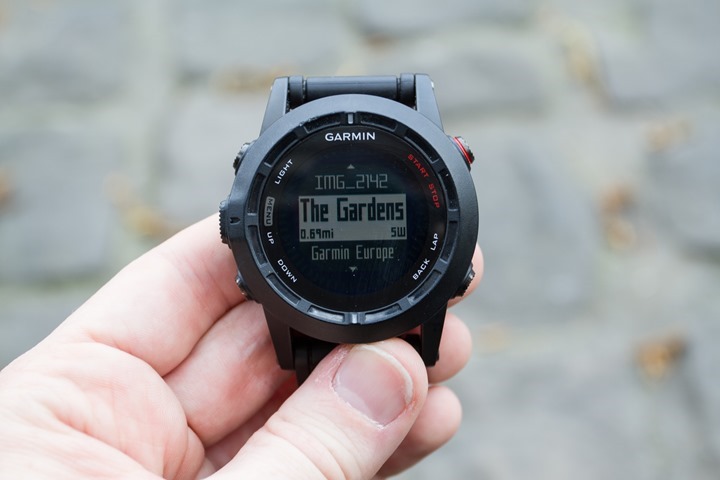
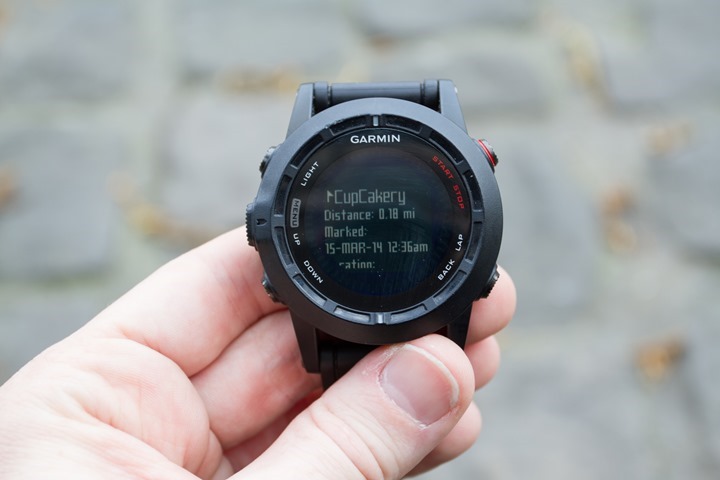
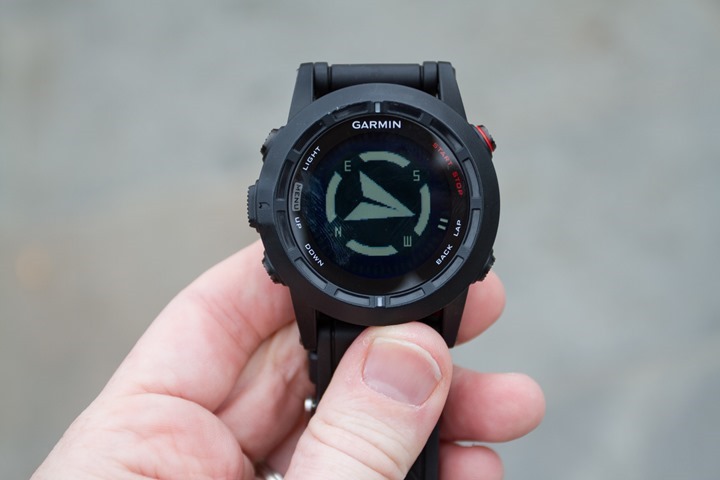
When navigating to a waypoint you’ll be given a compass that you can use to follow the dots along the edge to the location. Further, you can also engage the map as well (more on that in a bit).
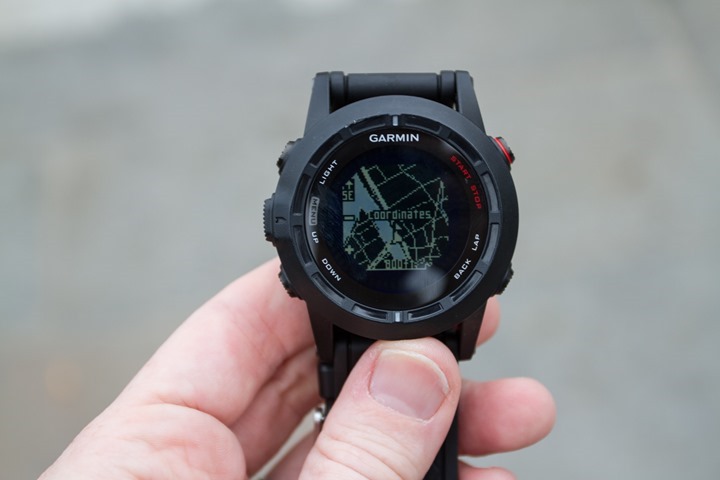
Note that the compass in the unit is a magnetic compass, and thus would orient itself based on the direction it’s being held. This is different from a digital compass, which requires you to actually make forward progress to determine the direction you’re going.
Routes:
In addition to navigating straight to a waypoint, you can also navigate along routes. Routes are simply breadcrumb trails that you’ve loaded onto the device to follow. Routes can be breadcrumb style, or a combination of direct-to-waypoint courses. You can load these routes via a number of methods, from phone to a multitude of Garmin desktop-based apps. For this section, I’m going to stick with the desktop app side of things. However, down in the mobile section I talk more about those options there.
In order to create the routes, I generally use Garmin Connect (web site). While I could use Garmin Basecamp (desktop app), or Garmin MapSource (desktop app), or 3rd party options, I find that Garmin Connect is the quickest and simplest. Further, unlike Basecamp/Mapsource, I can use Google/Bing maps and satellite imagery, which makes it much easier. While Garmin Connect is in a bit of a transition phase right now, you’re ultimately looking for the ‘Courses’ option, and then select to create a new course.

Once you do that you can simply connect the dots, choosing to follow roads or not. Obviously, if off-road on trails, you’ll probably not want to follow roads.

Once you’re done, you’ll simply select to ‘Send to device’, and then select the Fenix2. Alternatively, you could save the route/tracks (I’d do that anyway), and then transfer it from your phone directly – no USB required. No matter which way you choose, once you get it on the device it’ll all look the same. To access it, you’ll go to ‘Navigate’ and then choose the option to “Navigate | Tracks”, which enumerates up any courses sent to it from Garmin Connect.
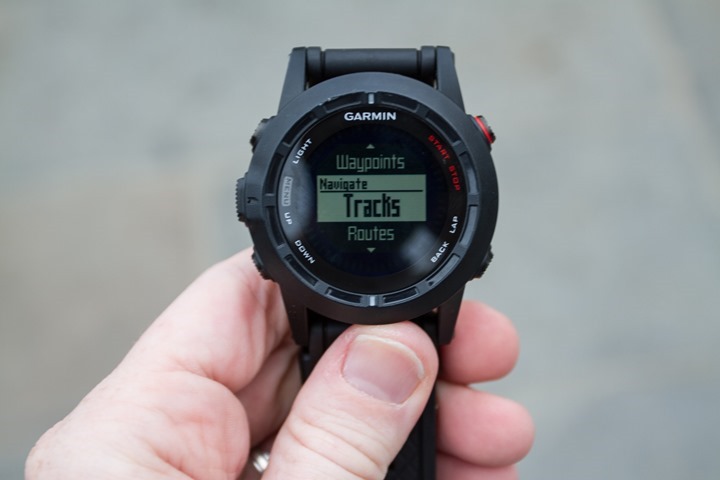
From there you can select one of the saved tracks. When you do so, you’ll be brought to an overview page where you can get details on the track, including a map of where it is, as well as navigate to it.
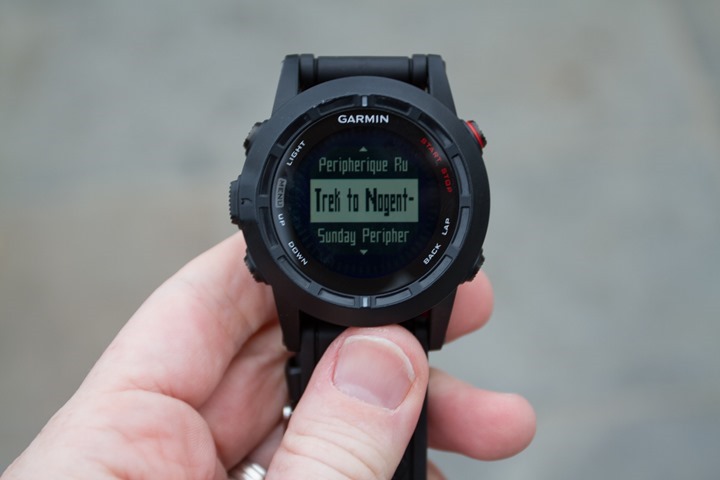
When you navigate along a given track you can customize different pages to show various navigational metrics, such as your ETA or distance remaining.
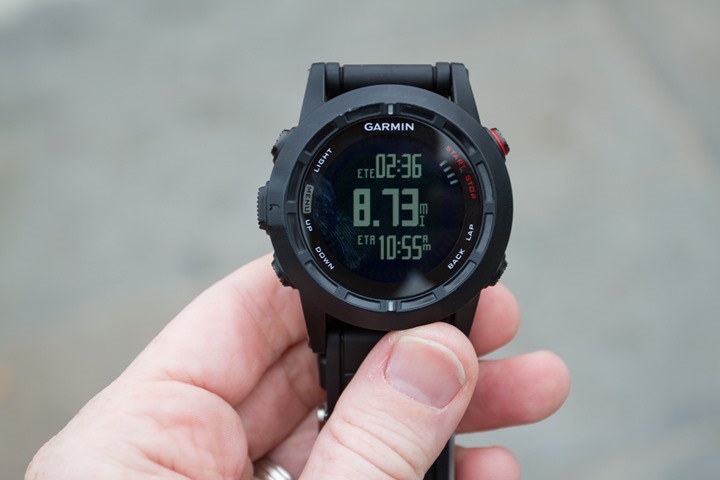
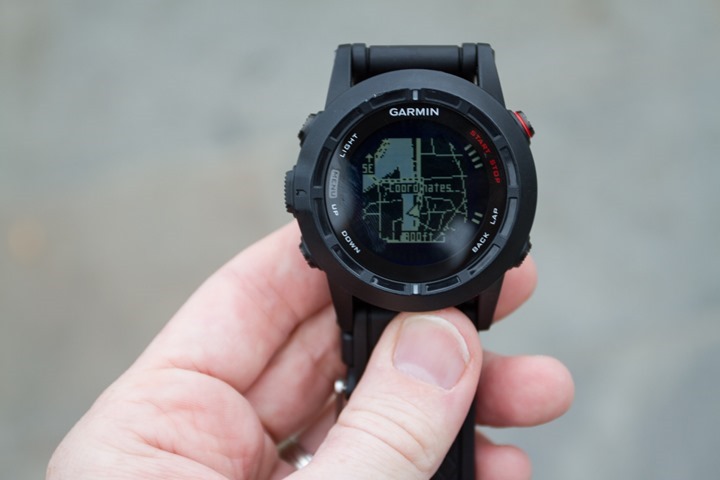
The map screen will show a dashed line for the route, which you can see below going upwards and then across the river:
Meanwhile, on the compass, the two dots along the edge will indicate the direction of your next waypoint. You’ll simply line these up with the marker at the top of the screen near the word ‘Garmin’ to head in the right direction.
Basic Maps
Finally, the Fenix2 retains the Fenix lineup’s ability to load a basic map onto it. This feature was rarely (if ever) advertised, and even less information about how to accomplish it. My goal here isn’t to provide a full technical overview of how to do so. There are other, more capable, instruction sets out there already. Rather, just to make you aware that you can do it.
The maps are available freely from 3rd party sources, though, you could technically load a paid map from Garmin. Given the data quality though that the Fenix2 is able to present, I’m not 100% clear on the value of buying maps for the unit (versus using free ones). At a high level, these are the steps to get the maps onto the Fenix2:
1) Install Garmin MapSource application (PC)
2) Download applicable maps from free 3rd party site
3) Use 7-Zip (or similar tool) to unzip maps to a temporary directory (i.e. DesktopMaps)
4) Open temporary directory, use Maps Installer (see Step #2 for instructions).
5) Open Garmin MapSource application
6) Zoom in, and select tile area of interest, click Transfer > Send to Device
7) On the Fenix2: Add the ‘Maps’ data page to your data fields, via settings menu
Again, these are the high level steps, and this isn’t meant to be a tutorial or troubleshooting locale for loading maps onto the Fenix2. The Fenix2 has the same amount of space as the Fenix1, about 25MB. In general, map sizes are 1-3MB at these resolutions. For my entire region (Paris) of a diameter of about 50-miles, it was about 1MB.
In any case, once loaded onto the Fenix2 you’ll be able to access them after adding the ‘Maps’ data page to any of your sport profiles. Once done, the maps page will show up, with the Etch-a-Sketch style map visible:
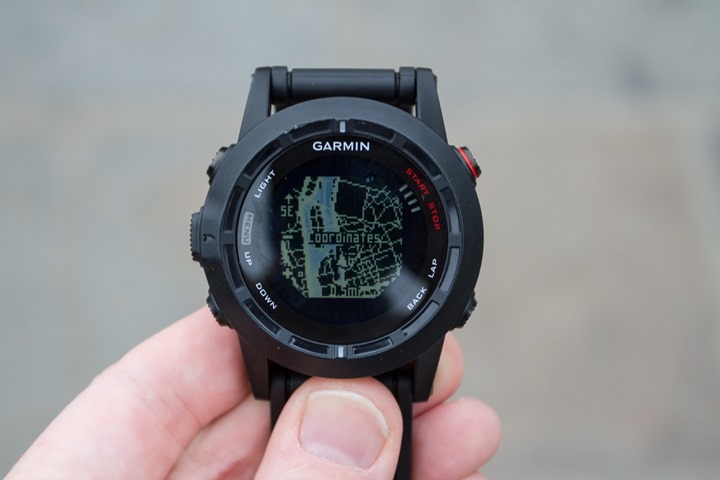
You can zoom in by briefly holding down the Menu button, which activates Zoom/Pan options. In cases where you’re navigating a track, or, if you want to see where a waypoint is, you can display those on the map.
Ultimately, given the black and white display, and more importantly, the low-resolution of it, I find little usefulness in how it’s implemented today. That said, down the road in a future generation I suspect they’ll eventually transition to a color display, which would ultimately provide more value.
Day to Day Watch Functionality:
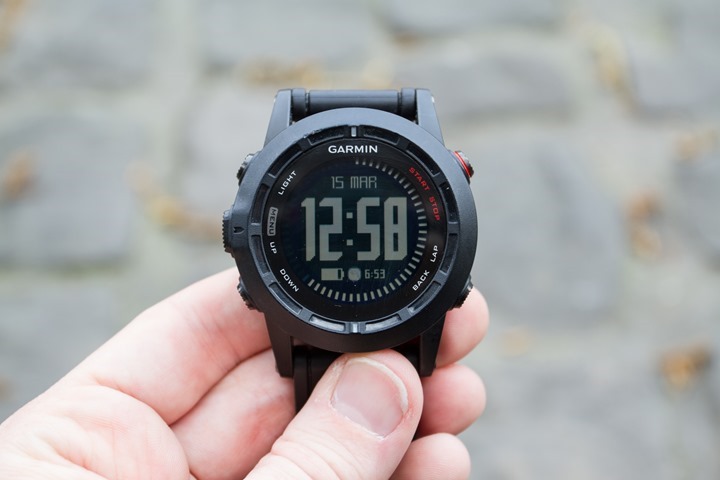
The Fenix2 can be used easily as a day to day watch. With Bluetooth disabled, the watch can go weeks in non-GPS mode.
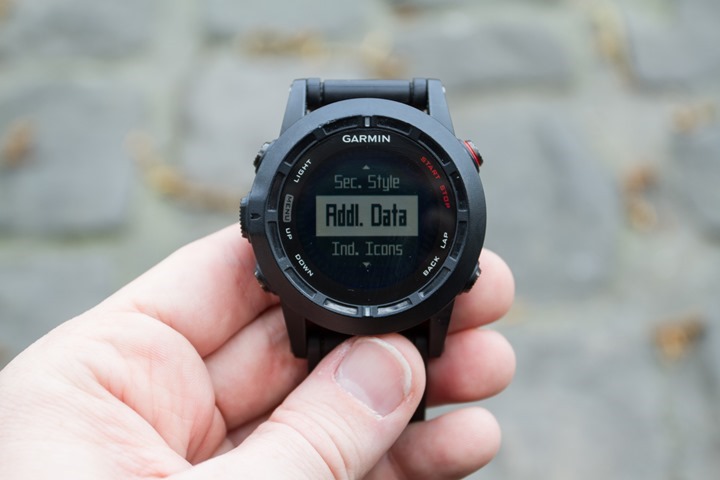
The unit’s home/default screen can be customized in a variety of styles to show different information, from the sunrise to moonrise, and from the day of week to the time of day in multiple formats.
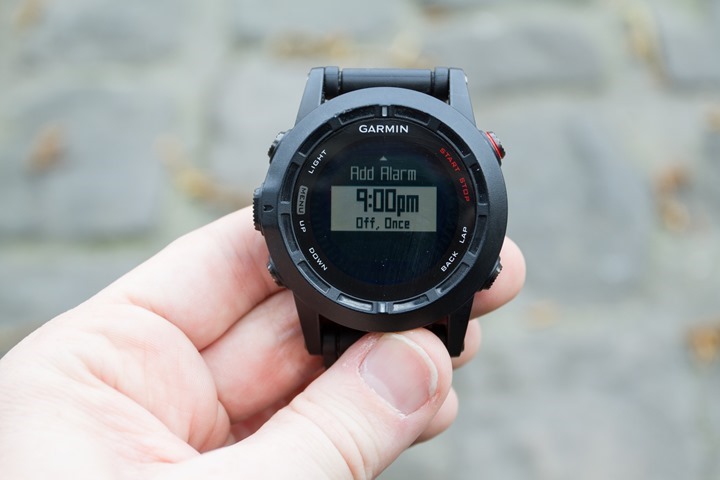
In addition, you can create multiple alarms. Alarms can be one-time affairs, or recurring alarms. In the case of recurring, you can configure it for daily or weekday alarms.
When an alarm triggers, you can specify whether you want it to be ‘Tone only’, ‘Vibration only’, both, or message display only.
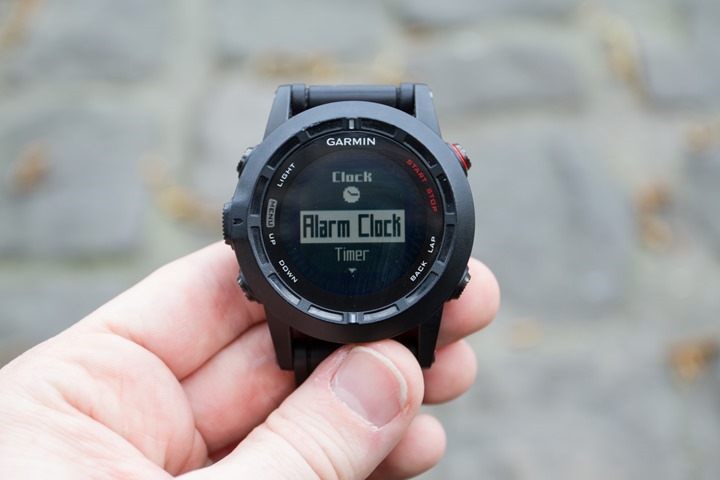
Finally, the unit also supports the timer function (simple start/stop, as well as reset, notification, and auto restart), a simple stopwatch function (including lap support). Also in this menu area of the watch is the ability to configure alternate time zones.
Fenix2 Sensor Supportability:
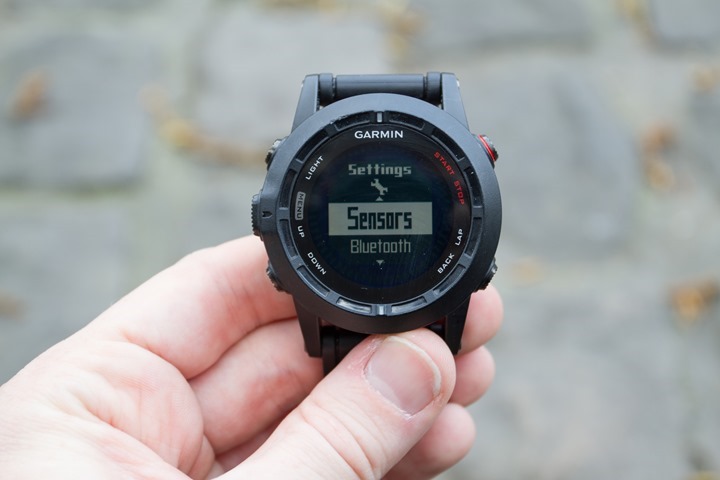
Below is a consolidated list of the different sensor types that the Fenix2 supports today. I’ve covered virtually all of these sensor types in this first chunk elsewhere in the review. But this just consolidates them a bit:
– Running Footpod (ANT+)
– Heart Rate strap & HRM-RUN strap (ANT+)
– Cycling Power Meter (ANT+)
– Speed/Cadence Combo, Speed-Only, Cadence-Only (all ANT+)
– Chirp Geocache Sensor (ANT+)
– Tempe Temperature Sensor (ANT+)
Now, while it does support all the above ANT+ accessories, there are a few things it doesn’t support on the sensors side. The first is it doesn’t support Bluetooth Smart sensors (i.e. a Bluetooth Smart heart rate strap). It also won’t support any non-ANT+ HR straps, such as ones from Polar or Nike. And then there’s a few things on the ANT+ side it doesn’t support either, including both weight scales and gym equipment. Given Garmin has moved away from supporting either of those in recent products, that’s probably not too much of a surprise.
To sum it up, the following are NOT supported on the Fenix2:
– Any Bluetooth Smart sensors (BLE)
– Weight Scales (ANT+)
– Gym Equipment (ANT+)
– Polar straps of any sort
– Nike/Nike+ straps of any sort
I don’t anticipate to see any of those sensors not currently supported, being supported in the future. The one potential exception could be weight scale – merely because there’s still a small but vocal number of folks who have previously invested in ANT+ weight scales that request it often.
Data Fields, Pages, and Customization:
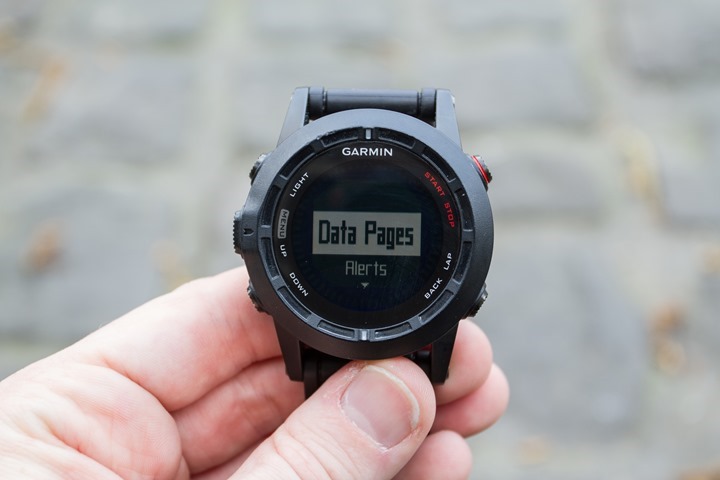
The Fenix2 offers a multitude of ways you can customize it, dependent primarily on which sport profiles you’re using. Within the unit it contains a set of default sport profiles. These profiles are as follows:
Profiles: XC Ski, Ski-Board, Mountaineer, Hike, Navigate, Trail Run, Run, Bike, Swim Open Water, Swim Pool, Workout (Interval or Custom), Indoor Run, Indoor Bike, Indoor Custom, Indoor Workout, Multisport
In addition to these profiles, you can create up to three custom profiles with a name of your choosing. It could be called “Kayaking” or “Cowtipping”, totally up to you.
Each of these profiles in turn contains data pages. These data pages contain data fields. Each data page contains up to four pieces of information (fields). You can have almost limitless data pages (no specific number was given, but the Fenix team has tested into the dozens of pages).
Here’s an example of a four-field page:
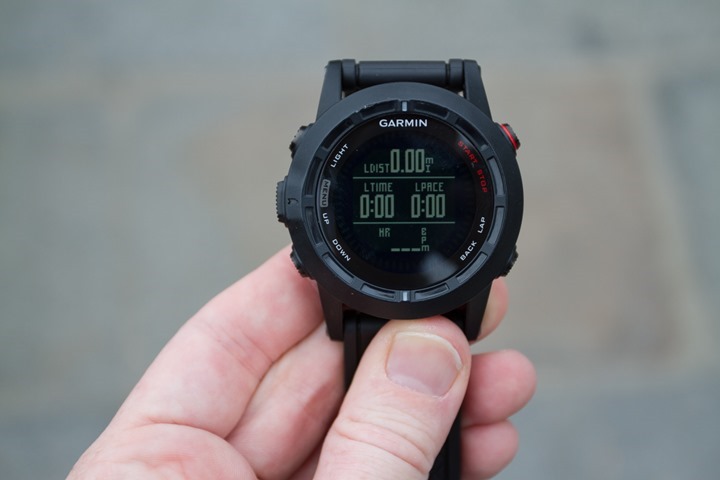
A three field page:
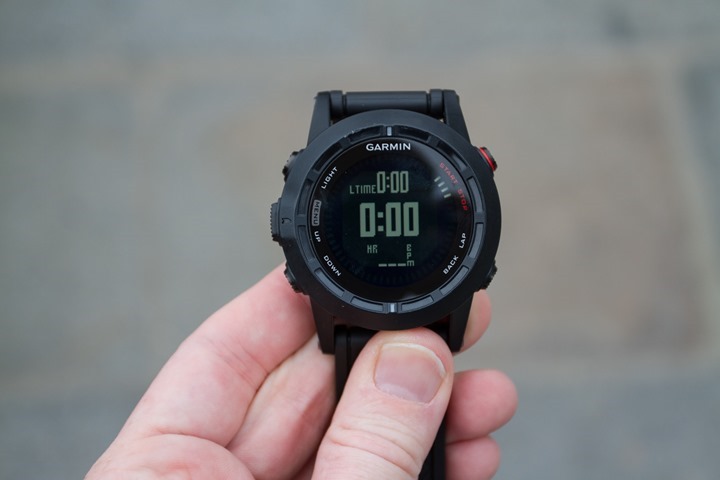
And a two and one field page:
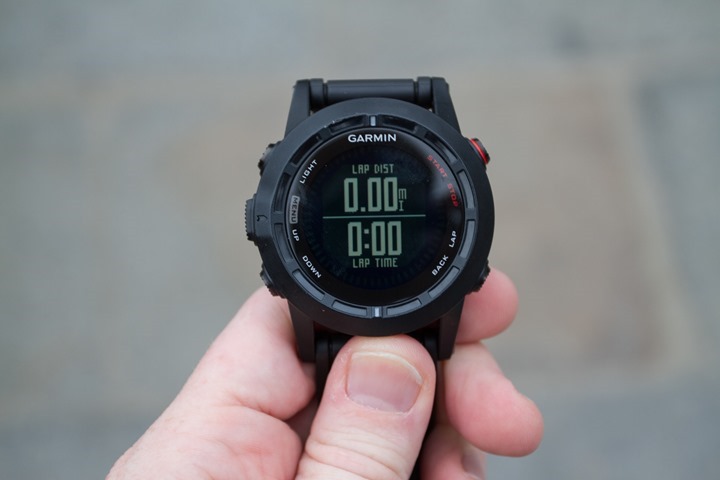
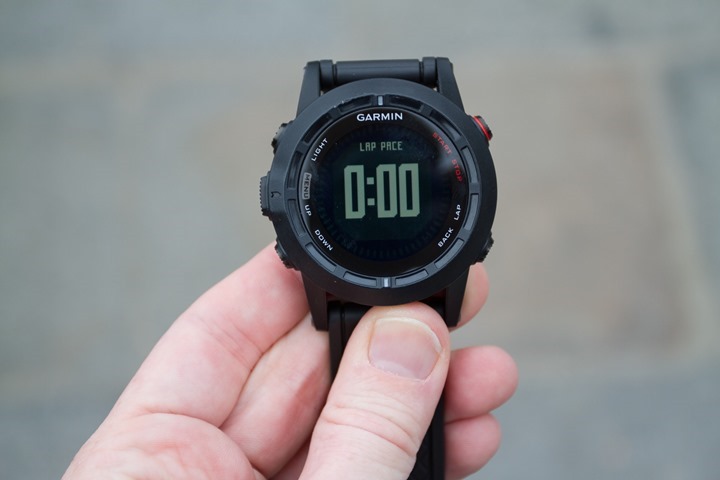
Some pages can also have graphs, such as this:
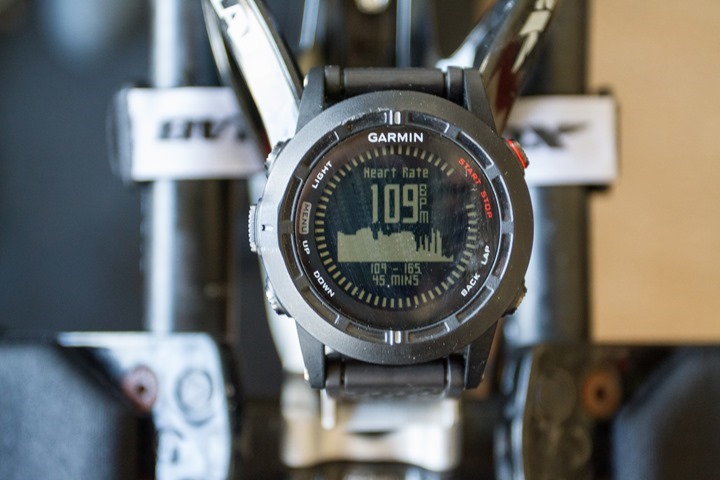
You can customize any of the sport profiles (in-box or custom) with any pages you’d like. And in turn, any fields you’d like. The following fields are available for you to select from (click to zoom):

Finally, there are a number of other areas that you can customize in the watch. To cover all of them all would take pages upon pages. But, here’s the most commonly requested items:
Sounds/Vibrations: Whether there are beeps/buzzes for everything from pressing buttons to notifications to alerts to the alarm clock.
Display: You can tweak how long the backlight stays on (and how bright it is), as well as the contrast.
Time Related: You can change how the default time page on the unit looks, as well as which format (i.e. 12hr or 24hr), as well as the date, or even if seconds are displayed on the default page. Or whether sunrise/sunset times are displayed, or the date. Tons of flexibility. Finally, you can either go with automatic time zone, or override it to stay in a specific time zone.
Language: You can change the language to a slew of different languages.
Units: You can separately specify each how Distance, Pace/Speed, Elevation, Weight, Height, Depth, Temperature, Pressure, and Vertical Speed are displayed, with respect to metric or statute formats for each one. For example, you could show distance in kilometers, but elevation in feet.
There’s many more little settings in there, from the GPS update mode, to alerts to data recording rate and whether distance and elevation is recorded in standard mode or 3D mode, to the method the compass displays degrees. But the above covers the common requests.
Updating the Firmware:
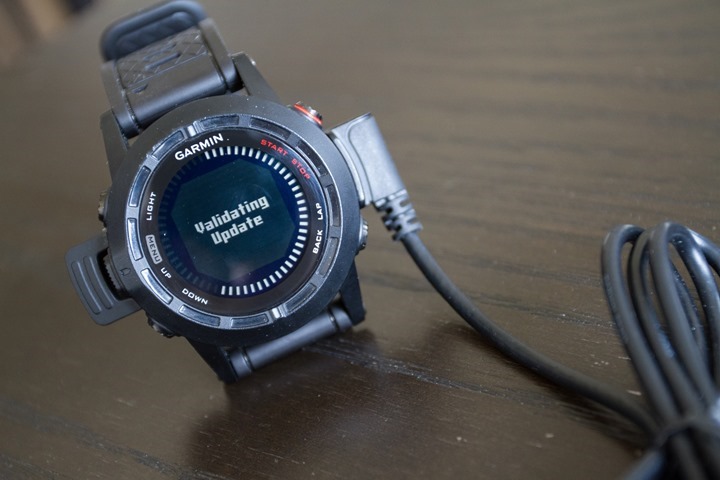
The Fenix2 supports the ability to have its firmware updated. This allows Garmin to both fix/address bugs, as well as introduce new features.
The Fenix team falls under the Outdoor division at Garmin, not the traditional Fitness division that devices like the Garmin Forerunner and Edge units come from. Historically speaking looking at the first generation Fenix unit, the Fenix team has introduced a stunning number of updates and feature enhancements. Even as recently as a week ago it was still getting new feature updates – for a product released nearly 2 years ago. Hopefully that trend will continue with the Fenix2 and expansion of new features and bug fixes over time.
Updating the firmware can be done via Garmin Express, or Garmin Web Updater – both on a computer. Additionally, the Garmin Connect Mobile app will also notify you of firmware updates to be installed.
Generally speaking the update process only takes 1-3 minutes, and is painless. I haven’t seen a scenario yet in the last 4-5 weeks where I had to re-setup my settings or configuration. All of that has been kept.
Bugs and Miscellaneous:
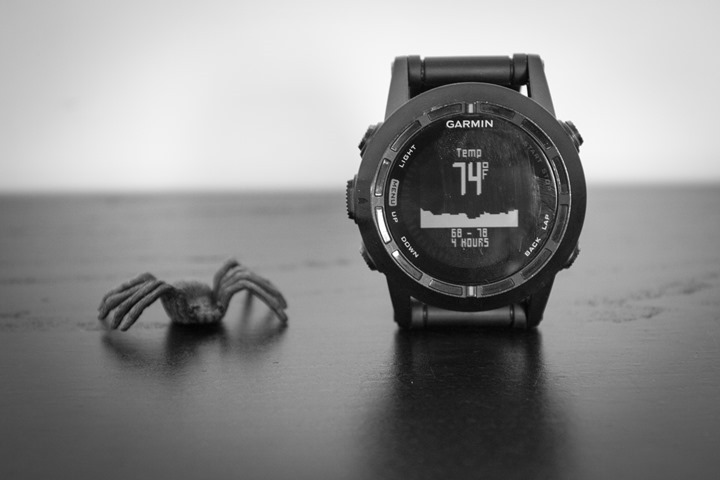
As I’ve been doing on all reviews over the past year or so, I’ve been including a section on bugs and/or issues that I’ve seen within my timeframe using the unit. Do remember that a ‘bug’ is different than ‘by design’. For example, the lack of a feature is something I highlight within a given section is considered ‘by design’, whereas something not really working right is considered a bug. In the case of the Fenix2, such bugs fall into one of two categories: The device, and the platform (app/site).
Looking at the device side of things, the Fenix team continues to be mind-bogglingly efficient at resolving anything and everything I see bug-wise. Thus, after having the unit for well over a month now, any bug I’ve raised they’ve fixed. They’ve also added many (almost every) feature/tweak that I’ve requested. The vast majority of these feature requests were really requests coming from you (readers).
Now, there are a few areas that are potential grey-area bugs, where it’s likely a situation that they can’t do much about:
1) Phone upload times: This just takes a month of Sunday’s to transfer the file via Bluetooth to the phone. I don’t think this is so much a bug, as just a case of ‘it is what it is’. Update: This has been improved dramatically in the months since my initial review.
2) Saving a workout: Same thing here as well, this takes forever. In the grand scheme of life it’s not a big deal, but to wait a few minutes (or more) to simply save a workout can be a touch bit annoying. Update: This has been improved dramatically in the months since my initial review.
3) Swim does not show rest periods on Garmin Connect: This is part Fenix dependent, and part Garmin Connect dependent. Either way, it’s not showing the rest time (Added post-review).
Beyond that though, the device is really solid from what I’ve tested. Note that it’s slightly challenging however in that the Fenix team has been iterating versions quite quickly – so re-checking every single item on firmware released as often as yesterday is impossible for me.
Next, we’ve got the app. On the mobile app side, I’m just not seeing any issues functionality-wise there with respect to the Fenix2. It simply works, from my use of the iOS app. There’s the slowness piece on transfer I noted above, but beyond that – it all works.
Lastly, we’ve got Garmin Connect (the site). I talked about this a fair bit last week in my Vivofit review. As it stands right now, things are a bit of a mess in Garmin Connect. They launched a new Garmin Connect interface about a month ago, and it’s still pretty rough. In general, if you stay within the ‘classic’ mode, you’ll largely be fine. And in due time this will sort itself out. But for now, they need one of those 1990’s style ‘Under Construction’ blinky icons that web pages used to display.
Again, this doesn’t mean this is all the bugs out there. These are just the ones I saw during my use. As a single person I can’t possible test every possible feature in every possible combination to reproduce every possible scenario. Sure, I’d love to – but companies have entire teams of testers and they still miss things. So I do the best I can to note what I’ve seen above. If you have bugs, please post them to the Garmin Forums, or report them to Garmin. That’s the correct channel to get them fixed.
Comparison Tables:
Before we wrap things up I’ve put together the comparison charts of all the features of the Fenix2 and original Fenix, compared to the Garmin FR910XT, and Suunto Ambit 2 (closest competitors). You can of course create your own comparison tables using this link with any of the products I’ve previously reviewed/looked at, such as adding in the new Polar V800, which is Polar’s upcoming tri watch.
| Function/Feature | Garmin Fenix2/Fenix2 SE | Garmin Fenix | Suunto Ambit2 | Garmin Forerunner 910XT |
|---|
| Copyright DC Rainmaker - Updated April 29th, 2021 @ 5:06 am New Window |
| Price | $399 | $299 (on sale) | $319 | $399 |
| Product Announcement Date | Feb 20, 2014 | JUL 10, 2012 | APR 29, 2013 | OCT 4, 2011 |
| Actual Availability/Shipping Date | March 2014 | AUG 2012 | May 2013 | JAN-APR 2012 |
| GPS Recording Functionality | Yes | Yes | Yes | Yes |
| Data Transfer | USB/Bluetooth Smart | USB & Bluetooth Smart | USB | ANT+ Wireless |
| Waterproofing | Yes - 50m | Yes - 50m | Yes - 100m | Yes - 50m |
| Battery Life (GPS) | 50 Hours | 50 hours | 50 hours | 20 Hours |
| Recording Interval | 1S to Variable | 1s to variable | Variable | 1s or Smart |
| Alerts | Vibrate/Sound/Visual | Vibrate/Sound/Visual | Sound/Visual | Vibrate/Sound/Visual |
| Backlight Greatness | Great | Great | Great | Great |
| Ability to download custom apps to unit/device | No | No | Yes | No |
| Acts as daily activity monitor (steps, etc...) | No | No | No | No |
Connectivity | Garmin Fenix2/Fenix2 SE | Garmin Fenix | Suunto Ambit2 | Garmin Forerunner 910XT | | Bluetooth Smart to Phone Uploading | Yes | Yes | No | Via Wahoo Fitness Adapter |
| Phone Notifications to unit (i.e. texts/calls/etc...) | Yes | Yes | No | No |
| Live Tracking (streaming location to website) | Yes | Yes (as of Feb 2014) | No | No |
| Emergency/SOS Message Notification (from watch to contacts) | No | No | No | No |
| Built-in cellular chip (no phone required) | No | No | No | No |
Cycling | Garmin Fenix2/Fenix2 SE | Garmin Fenix | Suunto Ambit2 | Garmin Forerunner 910XT | | Designed for cycling | Yes | Yes | Yes | Yes |
| Power Meter Capable | Yes | No | Yes | Yes |
| Power Meter Configuration/Calibration Options | Yes | N/A | Yes | Yes |
| Power Meter TSS/NP/IF | Yes | N/A | No | Yes |
| Speed/Cadence Sensor Capable | Yes | Yes (full support added Sept 2013) | Yes | Yes |
Running | Garmin Fenix2/Fenix2 SE | Garmin Fenix | Suunto Ambit2 | Garmin Forerunner 910XT | | Designed for running | Yes | Yes | Yes | Yes |
| Footpod Capable (For treadmills) | Yes | Yes | Yes (internal accelerometer) | Yes |
| Running Dynamics (vertical oscillation, ground contact time, etc...) | Yes | No | No | No |
| VO2Max Estimation | Yes | No | Yes | No |
| Race Predictor | Yes | No | No | No |
| Recovery Advisor | Yes | No | Yes | No |
| Run/Walk Mode | Yes (Added June 13th, 2014) | No | No | Yes |
Swimming | Garmin Fenix2/Fenix2 SE | Garmin Fenix | Suunto Ambit2 | Garmin Forerunner 910XT | | Designed for swimming | Yes | No | Yes | Yes |
| Openwater swimming mode | Yes | N/A | Yes | Yes |
| Lap/Indoor Distance Tracking | Yes | N/A | Yes | Yes |
| Record HR underwater | No | No | No | No |
| Openwater Metrics (Stroke/etc.) | Yes | N/A | Yes | Yes |
| Indoor Metrics (Stroke/etc.) | Yes | N/A | Yes | Yes |
| Indoor Drill Mode | Yes | N/A | Yes | No |
| Indoor auto-pause feature | No | N/A | No | No |
| Change pool size | Yes | N/A | Yes | Yes |
| Indoor Min/Max Pool Lengths | 18m/20y to 150y/m | N/A | 15m/y to 1,200m/y | 20m/22y to 100y/m |
| Ability to customize data fields | Yes | N/A | Yes | Yes |
| Captures per length data - indoors | Yes | N/A | Yes | Yes |
| Indoor Alerts | Yes | N/A | No | Yes |
Triathlon | Garmin Fenix2/Fenix2 SE | Garmin Fenix | Suunto Ambit2 | Garmin Forerunner 910XT | | Designed for triathlon | Yes | No | Yes | Yes |
| Multisport mode | Yes | N/A | Yes | Yes |
Workouts | Garmin Fenix2/Fenix2 SE | Garmin Fenix | Suunto Ambit2 | Garmin Forerunner 910XT | | Create/Follow custom workouts | Yes | Yes (As of Dec 6, 2013) | No | Yes |
| On-unit interval Feature | Yes | Yes (As of Dec 6, 2013) | Barely | Yes |
| Training Calendar Functionality | Yes (Added June 13th, 2014) | No | No | Yes |
Functions | Garmin Fenix2/Fenix2 SE | Garmin Fenix | Suunto Ambit2 | Garmin Forerunner 910XT | | Auto Start/Stop | Yes | Yes | Yes | Yes |
| Virtual Partner Feature | Yes | Yes | No | Yes |
| Virtual Racer Feature | No | No | No | Yes |
| Records PR's - Personal Records (diff than history) | No | No | No | No |
| Tidal Tables (Tide Information) | No | No | No | No |
| Weather Display (live data) | No | No | No | No |
Navigate | Garmin Fenix2/Fenix2 SE | Garmin Fenix | Suunto Ambit2 | Garmin Forerunner 910XT | | Follow GPS Track (Courses/Waypoints) | Yes | Yes | Yes | Yes |
| Markers/Waypoint Direction | Yes | Yes | Yes | No |
| Routable/Visual Maps (like car GPS) | No | No | No | No |
| Back to start | Yes | Yes | Yes (added Aug 30, 2013) | Yes |
| Impromptu Round Trip Route Creation | No | No | No | No |
| Download courses/routes from phone to unit | Yes | Yes | No | No |
Sensors | Garmin Fenix2/Fenix2 SE | Garmin Fenix | Suunto Ambit2 | Garmin Forerunner 910XT | | Altimeter Type | Barometric | Barometric | Barometric, GPS (FusedAlti) | Barometric |
| Compass Type | Magnetic | Magnetic | Magnetic | GPS |
| Heart Rate Strap Compatible | Yes | Yes | Yes | Yes |
| ANT+ Heart Rate Strap Capable | Yes | Yes | Yes | Yes |
| ANT+ Speed/Cadence Capable | Yes | Yes | Yes | Yes |
| ANT+ Footpod Capable | Yes | Yes | Yes | Yes |
| ANT+ Power Meter Capable | Yes | No | Yes | Yes |
| ANT+ Remote Control | No (can control VIRB though) | Yes | No | No |
| ANT+ eBike Compatibility | No | No | No | No |
| Shimano Di2 Shifting | No | | No | No |
| Bluetooth Smart HR Strap Capable | No | No | No | No |
| Bluetooth Smart Speed/Cadence Capable | No | No | No | No |
| Bluetooth Smart Footpod Capable | No | No | No | No |
| Bluetooth Smart Power Meter Capable | No | No | No | No |
| Temp Recording (internal sensor) | Yes | Yes | Yes | No |
| Temp Recording (external sensor) | Yes | Yes | No | No |
Software | Garmin Fenix2/Fenix2 SE | Garmin Fenix | Suunto Ambit2 | Garmin Forerunner 910XT | | PC Application | Garmin Express | Basecamp | Moveslink Agent | GTC/ANT Agent |
| Web Application | Garmin Connect | Garmin Connect | Movescount | Garmin Connect |
| Phone App | iOS/Android | Garmin Basecamp (iOS) | Suunto Movescount | iOS/Android |
| Ability to Export Settings | No | Yes (profiles XML) | Yes (online) | No |
Purchase | Garmin Fenix2/Fenix2 SE | Garmin Fenix | Suunto Ambit2 | Garmin Forerunner 910XT | | Amazon | Link | Link | Link | Link |
DCRainmaker | Garmin Fenix2/Fenix2 SE | Garmin Fenix | Suunto Ambit2 | Garmin Forerunner 910XT | | Review Link | Link | Link | Link | Link |
The tables are updated dynamically and thus if/when things change that’s represented automatically in this section. And again, remember you can create your own charts easily here with any product you’d like.
Which watch?
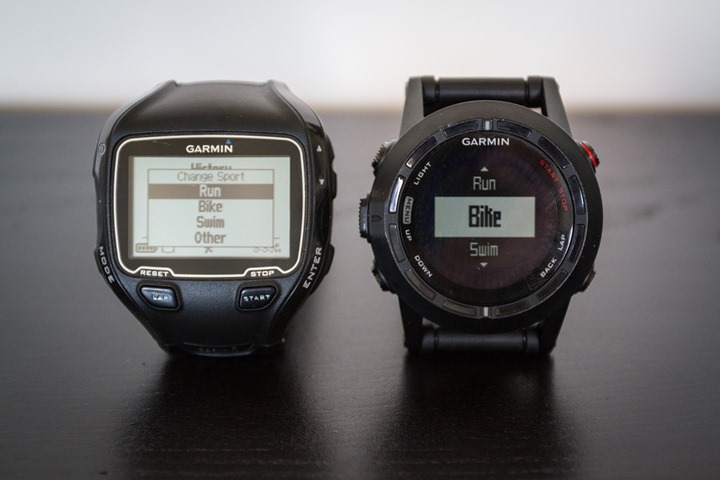
Trying to decide which watch makes the most sense? Well, there’s a lot of options on the market today, and almost all of them have a compromise in one way or another. There actually isn’t yet the ‘perfect’ device in terms of taking advantage of all the technology advancements we’ve seen in the last 6-12 months. Instead, the picture is still a bit fragmented. That said, let’s look at the options in the same general price range:
Garmin FR910XT: Up until the Fenix2, this has been the most powerful triathlon watch on the market. There’s no two ways about that. The Fenix2 coming along snuggles up next to the Garmin FR910XT, but doesn’t actually blow it out of the water. It adds areas like Bluetooth Connectivity – but at the cost of concurrent ANT+ and Bluetooth Smart (like the FR220/FR620). It also adds/has integration with a slew of devices that the FR910XT doesn’t support (i.e. VIRB, Tempe, Chirp), as well as Ski-Board mode and navigation capabilities that far exceed the 910XT. However, it does lack some smaller features currently, such as ANT+ weight scale integration. For those with a FR910XT already, who are primarily using it just for swim/bike/run, I’d probably stick with the FR910XT. However, if you wanted greater navigational features, Running Dynamics, or Bluetooth upload support – then I’d look more closely at the Fenix2. Ultimately, there won’t be a direct FR910XT successor this triathlon season, so the options you see on the table now in this price range – are the options that are available for the season.
Polar V800: Polar launched the V800 back in January, with the unit set to hit retailers later this spring (looks like May at the moment). The V800 is purely Bluetooth Smart only, so there’s no ANT+ support for folks with existing accessories/sensors. The exact specifications of the unit in a triathlon configuration remain somewhat murky though. Initial plans around swim functionality (lap tracking, etc…) have been pushed to “later in 2014”, and many of the planned phone and navigation features have suffered a similar fate. The unit’s built-in 24/7 activity tracker is a huge market differentiator to other devices on the market, however, the implementation of the device remains to be seen. At this point, I really can’t make a recommendation one way or another on the V800, simply because I don’t know yet what’s going to be included within the unit upon initial availability this spring (and my recent repeated asks have gone unanswered). And ultimately, that makes a huge difference in determining whether it’s basically just a waterproof Polar RC3 with Bluetooth Support/Activity Tracker, or if it’s a major new competitor in the market.
Suunto Ambit 2/2S: Suunto makes what is today the most direct competitor to the Fenix/Fenix2. Like the Fenix, the Ambit started off in the hiking/navigation realm, and like the Fenix2, it wandered into the triathlon scene with the Ambit 2/2s. From a swim/bike/run standpoint, the Ambit 2/2S is a very capable unit for racing and training. It contains the ability to load small ‘apps’ onto it, developed for the Ambit. Though, it lacks any of the Bluetooth capabilities, thus mobile connectivity is out. From a hiking standpoint, it contains many of the same core features as the Fenix2, though most would argue that the Fenix lineup has a greater breadth of features. Whether or not you (or most) need some of those features like ‘Man Overboard’ or ‘Area Calculation’ is likely a valid question to ask.
Garmin FR620: Let’s be clear up front, the FR620 is not a triathlon watch, and it never will be. It’s a runner’s watch – and that’s it. A really darn good one, but, still, not a device aimed at either triathletes or a hikers. It doesn’t contain a barometric altimeter, or any of the navigational capabilities of the Fenix2 (or FR910XT). it does however allow you to concurrently utilize Bluetooth Smart and ANT+, which means you can do Live Tracking while still using ANT+ sensors. And that in and of itself is a huge thing. While the unit will gain a cycling mode with ANT+ speed/cadence sensor support later this spring as part of a firmware update, however, Garmin has confirmed the FR620 won’t be getting any navigation related features this spring.
TomTom Multisport: The TomTom unit is a good option, but it’s also not really in the same price range as what we’re talking about. It also lacks all of the advanced features. If you were to put together a detailed feature matrix (even beyond what I have in the comparison tables), you’d find that the TomTom unit has about 5-10% of the total features of the Fenix2. Now, that doesn’t mean it’s not a good triathlon unit – as it is. Rather, the TomTom unit isn’t a good navigational/hiking/ultra type unit – it simply isn’t targeted there. And that’s perfectly fine.
Summary:
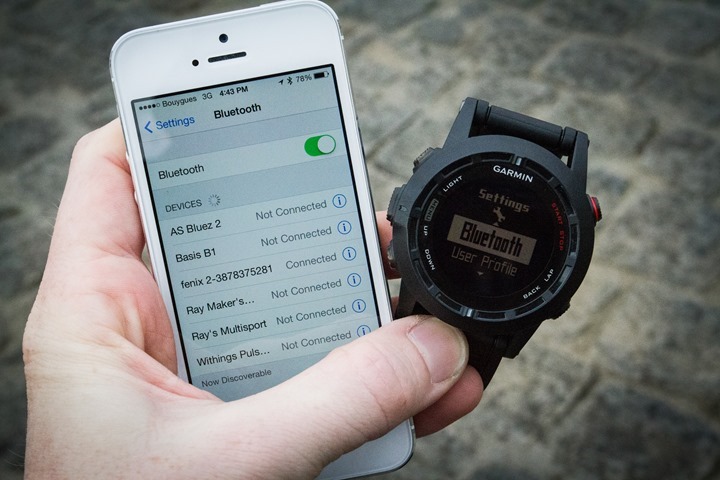
Make no doubt about it, I’m impressed with where the Garmin Fenix team has brought the Fenix over the last 2 years, culminating in the Fenix2. Many triathletes have asked Garmin to make a watch that doesn’t look like a bulky computer on their wrist, but still does all the swim/bike/run goodness. Now they (mostly) have that. By the same token, understand that there are tradeoffs right now in what the Fenix2 offers, especially around Bluetooth Connectivity.
The industry is simply in a slightly awkward phase where there’s a lot of new technology integration partly implemented and coming, but getting it all in one single killer device seems to be a bit elusive. When I look at ‘new technology integration’, I’m talking about integrated Bluetooth & ANT+ support (concurrently), integrated activity monitor/tracker (24×7), optical heart rate, and phone apps that not only simply pair to the device – but extend the functionality. In many ways, for any device on the market today you’re going to have to make some sacrifices.
But at the end of the day, I feel it’s better to pick a device that fits 90% of the bill today, rather than wait a season or two for a device that does it all (or, does it all until you learn about some new ‘must-have’ feature). After all, if the theory is that the device improves your training and thus your results (or simply brings joy), then waiting simply delays those training benefits. Which isn’t to say you should or shouldn’t pick the Fenix2. As the previous section outlined, there’s a lot of great devices on the market – all of them will help you train quite well. It’s the details that differentiate them. Hopefully, this post and its few thousand words on details helped illuminate those key device differences.
Found This Post Useful? Support The Site!
Hopefully you found this review/post useful. At the end of the day, I’m an athlete just like you looking for the most detail possible on a new purchase – so my review is written from the standpoint of how I used the device. The reviews generally take a lot of hours to put together, so it’s a fair bit of work (and labor of love). As you probably noticed by looking below, I also take time to answer all the questions posted in the comments – and there’s quite a bit of detail in there as well.
If you're shopping for the Garmin Fenix or any other accessory items, please consider using the affiliate links below! As an Amazon Associate I earn from qualifying purchases. It doesn’t cost you anything extra, but your purchases help support this website a lot.
Since the Garmin Fenix is no longer sold, I recommend looking at
Garmin Fenix 6 Series:
Here's a few other variants or sibling products that are worth considering:
And finally, here’s a handy list of accessories that work well with this unit (and some that I showed in the review). Given the unit pairs with ANT+ & Bluetooth Smart sensors, you can use just about anything though.
This wifi-connected scale will track your weight and related metrics both on the scale display and in Garmin Connect (plus 3rd party apps like TrainingPeaks). It'll also then sync your weight to your watch/bike computer, to ensure accurate calorie data.
This is a dual ANT+/Bluetooth Smart cycling cadence sensor that you strap to your crank arm, but also does dual Bluetooth Smart, so you can pair it both to Zwift and another Bluetooth Smart app at once if you want.
Seriously, this will change your life. $9 for a two-pack of these puck Garmin chargers that stay put and stay connected. One for the office, one for your bedside, another for your bag, and one for your dog's house. Just in case.
These are one of my favorite power meters, due to both cost and accuracy. These have mostly become my defacto gravel pedals, and also get used on a lot of other comparison testing.
The Garmin Rally series is effectively 3 power meters in one, for three pedal types. I use these often in accuracy testing. While they're a bit more expensive than the Favero pedals, they offer the ability to swap pedal types easily.
The HRM-PRO Plus is Garmin's top-end chest strap. It transmits dual ANT+/Bluetooth Smart, but also transmits Running Dynamics & Running Pace/Distance metrics, stores HR data during a swim, and can be used without a watch for other sports. Also, it can transmit XC Skiing Dynamics as well.
And of course – you can always sign-up to be a DCR Supporter! That gets you an ad-free DCR, access to the DCR Quarantine Corner video series packed with behind the scenes tidbits...and it also makes you awesome. And being awesome is what it’s all about!
Thanks for reading! And as always, feel free to post comments or questions in the comments section below, I’ll be happy to try and answer them as quickly as possible. And lastly, if you felt this review was useful – I always appreciate feedback in the comments below. Thanks!


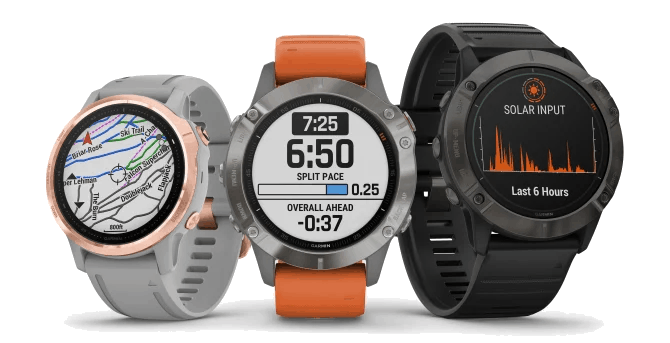
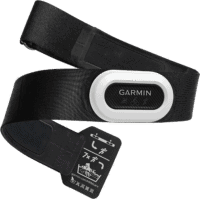


I have recently picked up a fenix 2.. so far I have done 5 runs with it and I love it! Can’t wait to get the hrm run for more data info..
Ray, you mentioned the F2 has sleep tracking in the podcast, no hits here in the page for ‘sleep’ – I don’t think it does, are you sure it does?
Hi Ray,
|I just heard that on the podcast too. I am not sure it works as an activity tracker (including sleep) either. I certainly haven’t found the functionality on my Fenix2 watch yet but it would be great if it did.
thanks,
Sorry guys – just a total brainfart on my part. Indeed, no activity tracking on the Fenix2 series (and thus no sleep tracking). Forgot that was just the Fenix1 rebranded and thus it didn’t get the activity tracking portion.
Has anyone worked out how to turn off recovery notifications on the Fenix 2. e.g when your 1km into your run it beeps and tells you your “good” – how do you turn this annoying feature off please anyone?
Recovery / Status / Off?
Hi there, I have noticed with my fenix 2 there does not appear to be any way to show the hundreths when you do a lap or in the stopwatch mode, ie it only show to the closest second. Is there any way to do this?
Can Garmin Connect display the heart rate zones and time spent in it for an activity with the Fenix 2? Ive set up the zones on the device and in Connect, but it doesnt show in the activity summary, although i can see the heart rate zone im in during the activity.
It displays the Zone, but you have to set them on the unit manually. I’m not sure about the time spend on each one.
Unreliable piece of crap, final insult is that it is dead after just over a year of corrupted files flaky bluetooth and slow and inaccurate GPS fix.
So I presume you contacted support?
Awaiting reply re the dead watch. Contacted support re the software issues previously. Had quality issues with another Garmin watch too.
I never really used Bluetooth, didn’t have much trouble with file corruption or GPS fixes (now and then it’d take 5+ minutes to grab it, most of the time it was pretty instant), but my watch’s battery has aged really, really badly. It loses around 10% of its charge an hour just sitting on my wrist (no activity, no Bluetooth, no backlight).
Hopefully support does a little better than it has so far (telling me to update to the latest software and to try a reset when I indicated what firmware version and the multiple reset methods I’d attempted in my initial case report). The prospect of spending $110 to get it factory serviced maybe 2 years into ownership doesn’t fill me with warm fuzzies.
Hi
I’ve been looking at the Fenix 2. It’s only 189 right now vs. 550 for the 3. Question is is it worth it to get the older watch? I bike about 5 days a week and run about 15-20 miles a week. I’m also looking at the Forerunner 235 which has some cycling features as well.
any help would be appreciated.
Brian
I’d honestly go with the FR235, unless there is something very specific you want (such as certain advanced hiking capabilities). See with the FR235, you get Connect IQ – so you’d have the ability to get more apps to fill in any gaps. Whereas the Fenix2 doesn’t do Connect IQ.
How is the 235 for primarily cycling? I run a little but cycle a lot. There’d also be a little hiking.
It’s good for cycling. Not bad, but not as good as a dedicated head unit from a visibility standpoint.
Personally, for cycling I prefer something mounted on my handlebars – but that’s just a personal preference.
Agree with Ray on this one. If you need a back up watch to a bike computer and a running gps watch then the fenix 2 is excellent value but i would opt for an edge device as a primary bike computer.
I am in the same quandary as you. I am trying to find a replacement for my current Forerunner 305. I saw the deal for the older Fenix 2 but really don’t need all its features and its size, so the FR230 is smaller, lighter and as the same features as my current setup.
I just can’t decide if the $60 delta is really worth it.
I replaced my 305 with the fenix 2 a few years ago but if you just use it for running then suggest going for the 230. I’ve been using the 235 and it’s a step change up in terms of things like gps lock time compared to the fenix 2.
OK Now things just got interesting. With the Fenix 3 drop it’s now between the Forerunner 235 ($329) and the Fenix 3 ($375).
I bike mainly, and lately I have started jogging. My fr305 is great for the bike as I have the quick mount kit, but it is huge when jogging, and would be ridiculous as an everyday watch. I am also thinking when Midwest winter hits I will substitute the biking for swimming, which is why the Fenix 2 became an option. I probably wont care to track swimming as the goal for me wont be lap times it would realistically be not drowning after 5 minutes. So that lead me to the fr230. If I was looking when the fr230 was on sale for $199 I would have bought that without debate. For me I had a vivosmart for the step tracking and weightlifting workouts with hr strap, but realized I don’t care for the step tracking or the smart notifications. So I gave the vivosmart to my wife.
I ride around NYC a lot, and would be afraid it would be stolen, so I don’t really want a dedicated cyclometer. Barring the Edge I was looking at the Forerunner 235 or even possibly the Vivoactive HR with the Garmin speed sensor on the rear hub. I was only looking at the Fenix because it’s on sale at a good price.
In that case go for the fenix 2 as it does everything you need it to do and links to a multitude of sensors for a good price. I use mine a couple of times a week for running too.
Hi All,
I currently have a Forerunner 15 and use it primarily use it for running and hiking. However, on longer hikes the battery doesn’t last the length of the hike. How easy is it to create waypoints for a local hike and simple to upload?
Thanks for your input.
Forgive me for being so late (and if you’ve answered this…). Would this watch pair with a Polar H7 HRM? I’ve got one that’s fully functional and just purchased the Fenix 2 on Amazon but NOBODY has been able to answer that question, that I’ve found.
Thanks in advance!
Nope. The H7 uses Bluetooth Smart, whereas the Garmin devices require ANT+ connectivity. Sorry!
Dear DC Rainmaker,
Will Fenix 2 be a good buy even if its now 2 years old after its release and does it support Virtual partner for cycling and also Strava live segment does it support ? Thanks for your observation.
Is there a way to record your resting heart rate without starting an activity?
No method.
Do you know if the fenix 2 does golf in the same way the vivoative does. I really like the fenix form but golf would be a deal breaker for me and was hoping to get away with a cheaper Fenix 2 rather than the fenix 3
what settings you use to put Fenix 2 automatically to standby (Watch only) mode after a data sync? I noticed, if you don’t press “back” button after data sync completed, the watch battery drains out in no time.
Owned Fenix 2 for a year, but having technical issues (charging, reboot in run, battery life). Looking to switch to Fenix 3.
Thanks for your work Ray.
Regards.
Hello guys, i am registering my watch.. how can you identify if it is fenix2 or fenix2J
I’ve just had a new fenix 2. After some days of using, I love it very much. But your review helps me a lot to understand how to use its functions fully. Many thanks.
Is it possible to display the GPS coordinates in a data field continuously so as to read grid coordinates from a map
Hi all,
My 310XT get old and I want to purchased a fenix2. There is always available stock of Fenix2 somewhere.
Could someone tell me if this watch can store several custom workouts ? On 310xt I can set, store and choose many custom workouts.
I checked some videos on internet but any of them can tell me. Same thing for online manuals.
And how about routes ? just one route or many ?
Thank you