January 2019 Warning: WatTeam as a company is no longer operating. Even worse, the app is no longer supported, and it’s required that you use the app in order to install the power meter. Do NOT buy this unit at this time. If you do, you’ll likely have little more than a paperweight.
Today WatTeam announced their 3rd generation power meter, introducing mostly hardware tweaks and durability improvements, along with the ability to swap the pods between bikes quickly. Most importantly though, their pricing otherwise stays the same – save the new multi-bike packages of course.
WatTeam has been known for driving the price of power meters lower by effectively moving the manufacturing facility into your garage. You complete the installation on your crank arm using a process that may look intimidating, but is relatively simple. The 3rd generation units have continued to tweak that process, reducing ways you can screw it up.
I’ve been riding with the units about a week, though, definitely not long enough for a full in-depth review. Expect that later this summer when they start shipping the units and I’ve had a chance to try everything from scratch again on final production units. In this case, I did actually install this set from scratch on a crankset I own. I then layered in a pair of PowerTap P1 pedals and a G3 hub in the back to compare power numbers against.
In any case, let’s get into the details.
What’s new:
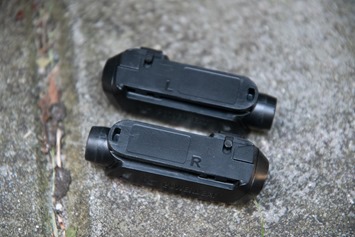
The vast majority of the new unit’s changes are around making it more durable, which in turn makes it more plausible to easily move between bikes. That, in turn, gives them a ‘new product’ – the “PowerBeat 2×2”. That refers to a dual-sided unit that’s in a kit for two bikes (hence the ‘2 by 2’ part). There is no single-sided bundle for two bikes.
Specifically, here’s how the new pods are different:
A) They have quick-release buttons on them for easy removal
B) They’re bigger than before (and thus more durable in this case)
C) They’re lower profile to the crank arm (meaning, they hug it more closely, so they don’t stick out as much)
D) The cable is shorter, reducing likelihood of getting caught
E) The cable has a locking screw on it, reduces chance of it popping out
F) There’s new ‘travel pods’ that are fake placeholders
G) You charge the new pods off-bike, rather than on-bike (reduces cable breakage)
H) They’ll soon enable dual ANT+/Bluetooth Smart concurrently (previously you could only enable one or the other)
In addition, some of the G3 changes are focused on the installation process. In fact, a lot of the pieces are. If you look at all of the comments of my past WatTeam PowerBeat reviews, when things go wrong, it’s usually during the installation. Either you start off on the right foot…or you don’t. Once things have gone wrong during installation, it’s hard to get back on the right path.
A) They’ve gotten rid of the cool but slightly confusing molded plastic installation tool
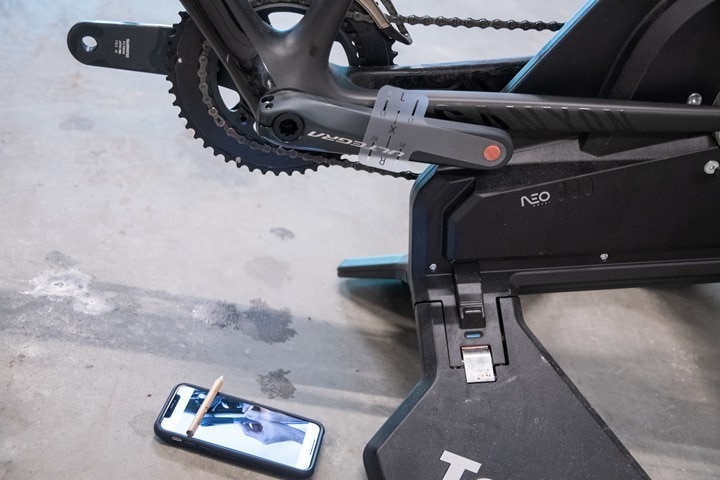
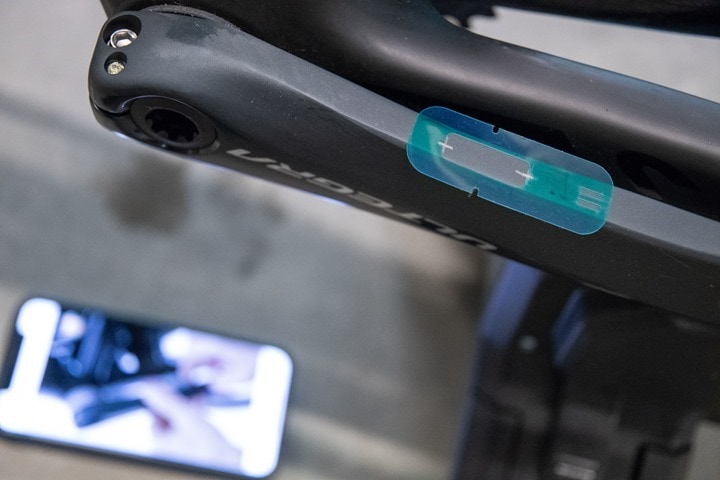
B) Instead, there’s a new thin plastic ‘wrapper’ that shows the correct marking spots for installation
C) They’ve created a shield for sanding, to keep you more focused on a specific area and protecting rest of crank arm
D) They’ve introduced more validation checks in the app during calibration
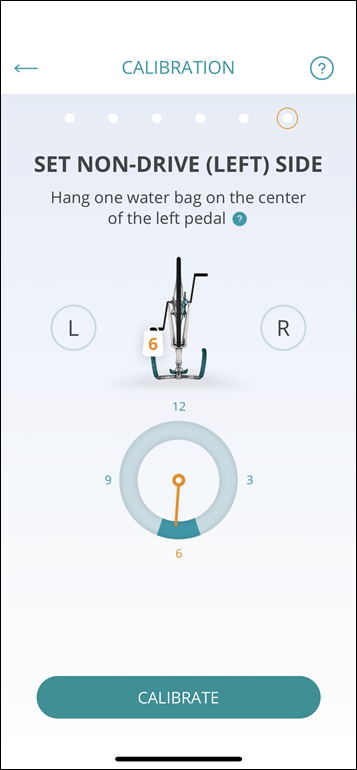
The water-bag calibration process remains the same, as does the majority of the app. What differs in the app though is that you can select specific bikes now, so you can swap the pods between bikes.
Now, one thing hasn’t yet changed unfortunately – and that’s the inability to properly track hard sprints under 5-seconds long. It’s long been an issue for the power meter, and it continues here. The company says they’re looking to resolve that via a firmware update, but that’s been on the list an awfully long time and I think they’re underestimating the importance of that in people’s recommendations (like mine).
If you’re a triathlete, then the sprint issue isn’t going to impact you. You’re not likely throwing down 1,000w efforts in training, and certainly not mid-race (unless you’re ‘doing it wrong’). But for road cyclists, it’s far more likely, and unless that sprint lasts 5 seconds or longer, it’ll ‘clip’ it, undercutting it a chunk (I demonstrate that in the accuracy section).
Still, the changes they have made are welcome. It’s clear this feels like a much cleaner product than years past, and they’ve switched to manufacturing with Flextronics as well, a well-respected manufacturing entity that has made products for numerous others in the space and beyond. That should help them as well, not only in terms of producing a higher quality product but also being more consistent in availability as well.
Oh, and for lack of anywhere else to put it, here’s the giant pricing matrix of versions:
In any case, let’s dig into the install process.
Installation:
WatTeam has long noted that the key to their lower pricing strategy is effectively moving the production of the power meter from a manufacturing facility to your garage. In doing so you spend a bit of time (perhaps 45-60 minutes), but save a few hundred bucks. A fair trade-off for most. With the first two generations of units, installation was technically easy, but certainly had gaps were people could go awry on steps.
With this 3rd generation line, you’re seeing the bulk of WatTeam’s tweaks have been spent on minimizing such failure points. Obviously, with tons of customer support data it’s relatively easy to know where those points are.
In any event, I installed an entire set from scratch on a new crankset I bought. Typically I like to install secondary power meters on a known power meter equipped crankset (i.e. Quarq, Power2Max, etc…). But WatTeam didn’t really want that, due to concerns that such secondary units on the crankset or crankarms would interfere with their power meter. While I get that for crank-arm based units (i.e. Stages), I don’t entirely buy that for spider based options (like Quarq). In any event, I went out and bought a new Shimano Ultegra unit to use for this test. I’d still have two other power meters to compare against, a pedal based unit and a hub based unit – which WatTeam was fine with.
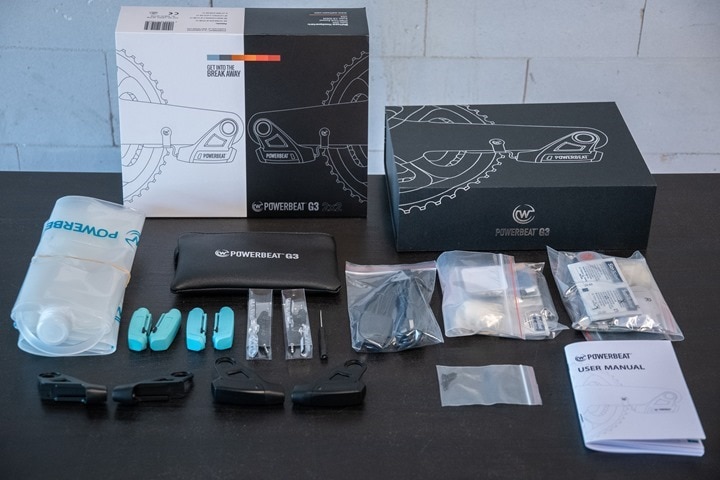
Oh, here’s the box of goods:
Essentially, each of the two bigger bags on the right is for one bike each (plus the two plastic sensor pod boxes and brackets mid-photo). And then everything else is shared within the install/setup.
In my case, I technically installed from a 2×2 kit, though I only installed it on a single bike thus far as the beta app wasn’t quite ready to handle secondary bikes fully (close, but not quite finished). Most of the pieces worked for the secondary bike, and in fact we created secondary bikes in the app and all, but for this initial test I was mostly just interested in how well it worked on a bike. The transition to secondary bikes is merely moving the computer pod between bikes and changing the bike name (which behind the scenes changes the calibration values).
While I’ll save crazy-detailed installation nuances for the final review, the gist of it is pretty simple and you follow an app with super-clear videos throughout. First, you mark off on your crank arm where the pods will align to. This uses a new tool that’s easier (and cheaper), and has virtually no room for screwing it up.
Then you apply some temporary stickers that let you focus on the precise area to sand off, which is a bit more deep than previous. The purpose of the sanding is 100% to get off the paint on the crank arm in that spot so the glue sticks better. The new sticker keeps this area ‘contained’, tidying it up.
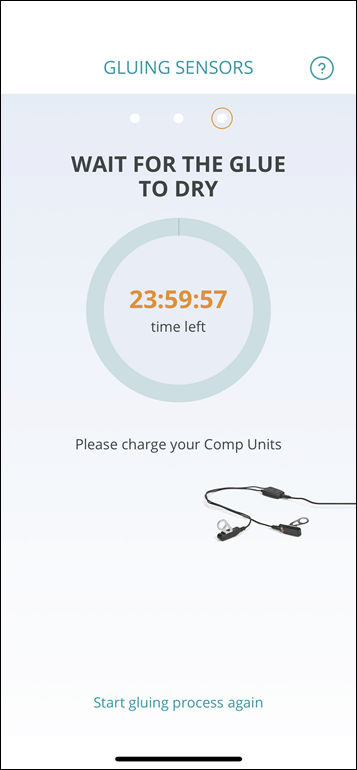
After that process, you’ll end up gluing on the sensor using a new glue compound. At which point you’ll need to wait 24 hours for the glue to set. Note you’ll do this process for crank arms in a dual configuration.
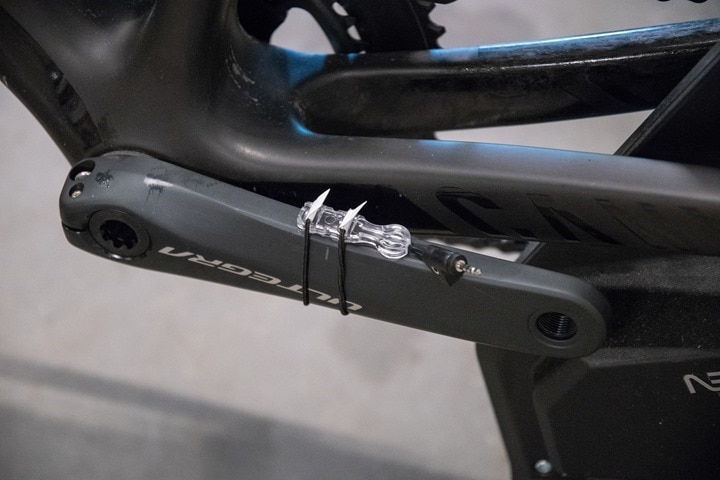
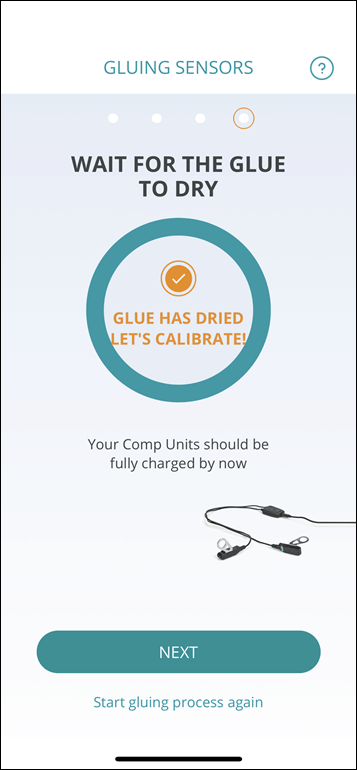
A day later (the app prohibits you from moving forward till the 24hr timer has elapsed), you’ll install the pod brackets.
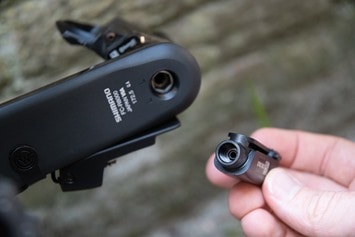
These are technically known as the ‘comp pods’ (computer pods), and are where the batteries are, the communications, and other smarts. It’s these pods that are transferred from bike to bike. Whereas the pod brackets stay permanently on the bike.
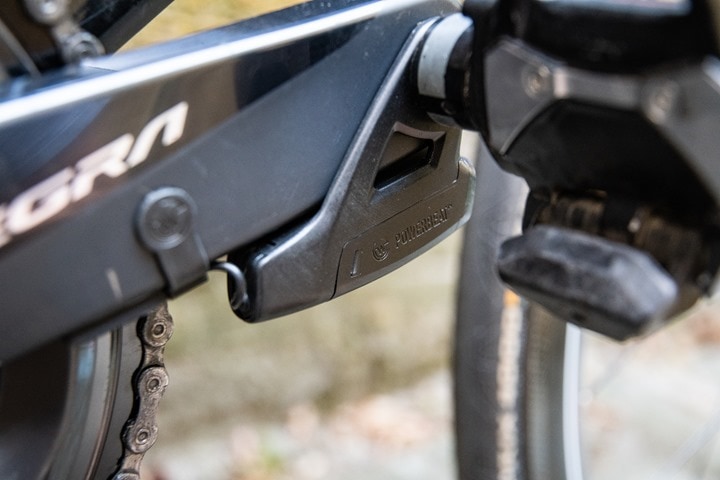
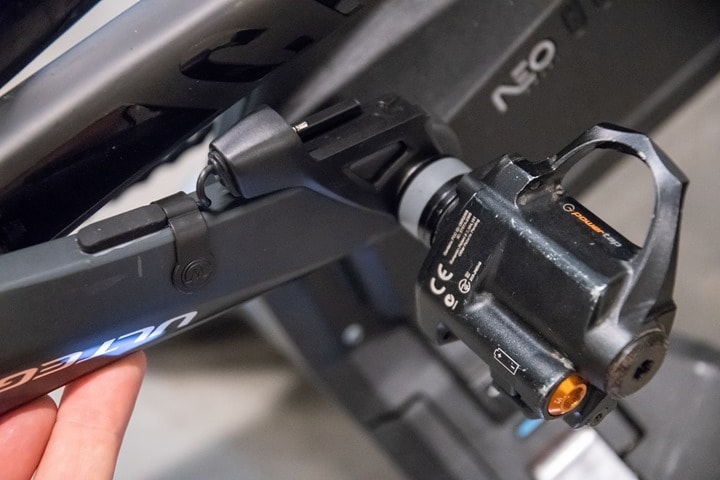
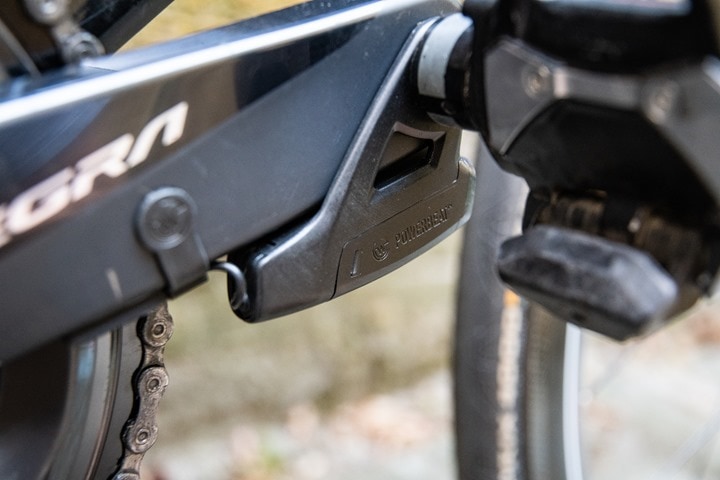
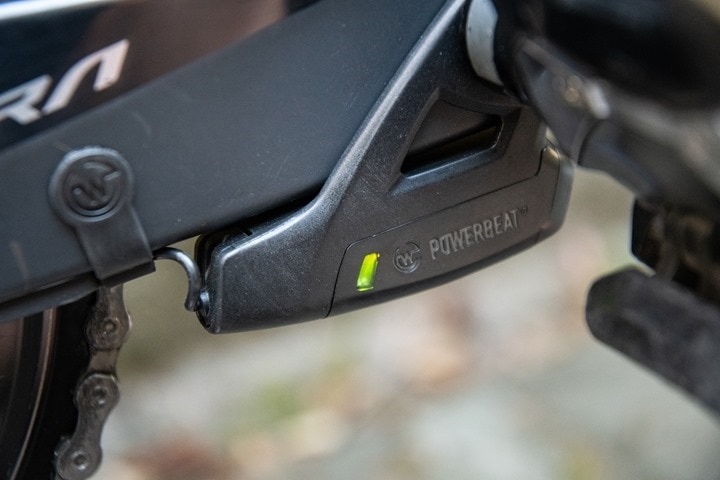
Users familiar with WatTeam’s previous units may notice that the pods are indeed bigger, but they’re also tighter to the crank arm, so they aren’t as vulnerable. Also, the wire is now screwed into the pod, making that more secure. All in all definitely a better design.
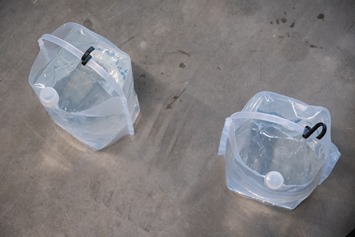
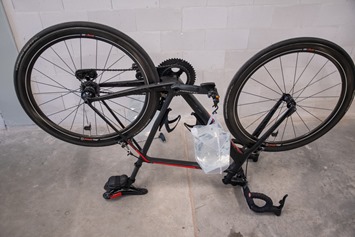
Finally, you’ll pull out the old water bag weight trick to get things calibrated. A lot of people laugh at this (I’d call them elitist), mostly because they don’t understand it. What they don’t get is the water bags are just an ingenious way to get everyone access to what is effectively a known weight to test. Rather than including 10-pound weights in the box, you fill up the water bags to precisely the top and the weight is known. By knowing the weight and applying these bags in varying positions, WatTeam can figure out exactly how your specific crank arm is responding, and thus can replace what fancy factory machines normally do.
Stages, 4iiii’s, PowerTap and others do precisely the same thing in their factories. Except instead of water bags they use hard weights, merely because their assembly lines are using the same thing day in and day out for years.
In any case, WatTeam has increased (made more strict) the tolerances for this step, now adding in detection of swinging of the bags in the app, so it knows when the bags aren’t quite right yet. It’s impressive.
All of which culminates with a system that’s ready to ride. The question is – is it accurate? Well that…that I set to find out. But before that, a few quick and simple practical things on the new pods.
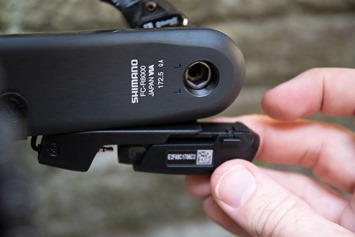
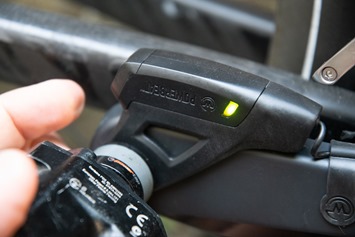
First, they pop in/out via a little button on the side (a locking button essentially). Press the button to slide the pods out, and when slid back in, the green light illuminates and you hear a reassuring click that they’re latched/locked in place.
Second, they now charge off the bike. Remove the pods, charge them up. I actually like this, as it’s a heck of a lot more logical than stringing two giant-ass USB cables to your bike through/around your crankset from the outlet somewhere nearby. Instead, take the pods and plug them in. Quick and easy.
Third, the pods don’t yet support dual (concurrent) broadcasting of ANT+ & Bluetooth Smart. That’s coming by launch the company says, but it’s not there yet. This really only matters if you want to capture data on your ANT+ head unit (like a Garmin watch/device) at the same time as broadcasting to Zwift or similar app on iOS via Bluetooth Smart. Personally, there’s no excuse for companies not having this inbox these days, but as long as they have it by the time they ship I’m happy.
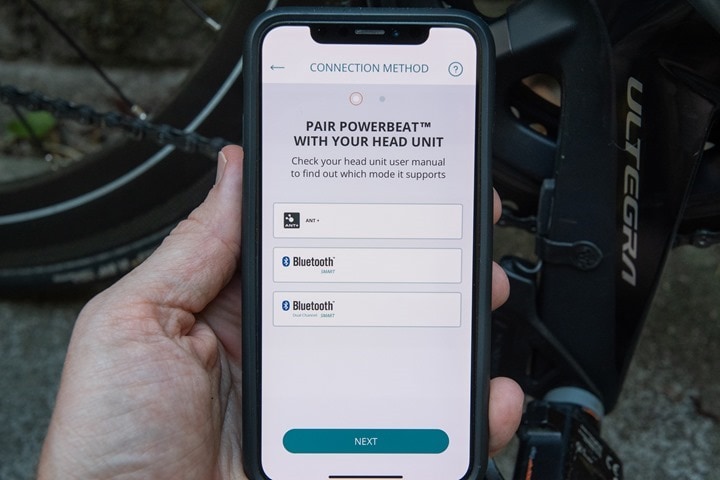
Otherwise, you’ll just pair it up to your head unit like any other power meter. Scan via ANT+ or Bluetooth Smart (depending on which mode you have it in), and head out and ride. You can zero off-set like any other power meter from the head unit, and you’ll receive back calibration values to watch over. All of which are useful to track accuracy-related items.
Riding with it – Accuracy Data:
I’ve done a surprising number of rides with this unit for only having it on my bike a bit over a week. Things got off to a bit of a rocky start due to some bugs in the beta app that kept pushing the wrong bike values to my pods (a simple app bug now fixed). But WatTeam got that all sorted and then it was a light switch and power instantly was happy.
I’ve done trainer rides, outdoor rides, and longer outdoor rides with varying temperatures and road conditions. A good blend. For this preview post I’ll just focus on one indoor ride and one longer outdoor (temp shifting) ride. Let’s first dive into the indoor ride, this one on Zwift:
Compared above we’ve got the WatTeam Gen3 units, the PowerTap P1 pedals, and the Wahoo KICKR. It’s pretty obvious above that things are virtually identical.
Interestingly, even the sprints are actually very very close. The above graphs are smoothed at 5-seconds to make them easier to read, but check out this ~700w sprint, it tracks well across it:
Same goes for this little set of surges here:
I note this because historically the WatTeam units have had issues with sprints under 5-seconds in duration, but it handles these fairly well (including the ramp up/down). No concerns here on that piece.
And for fun if we look at cadence, again, it’s virtually identical to the PowerTap P1:
Ok, so that’s all good and well. But frankly, indoors is easy (well, easy for most brands anyway). Let’s head outdoors.
Now, I’ll save you all the test loops I did, and just focus on Sunday night’s ride (I also rode today for a few hours too, but haven’t had a chance to download the four head units’ data yet…Update: Data here for those that want it). That ride started just before dark and then went till it was dark out, so a nice shift in temperature over the course of it. I did not zero offset at all, except at the start and about 10-minutes into the ride (my normal procedure). Beyond that, it was up to the units to handle themselves properly.
That little gap in the middle had a few purposes. One, I needed it to get darker for some other stuff I was testing. Two, I was distracted by the sunset and took some photos. And three, I was curious how the units would handle post-break from an accuracy standpoint (just like a café stop). The temp would have shifted during that timeframe, so I wanted to see what it did exactly.
The temp swing was 15°F over that time period. Interestingly, you can see the temp rise ever so slightly at the end as I come back into the city from the farmlands. Kinda neat.
In any case, let’s look at some sections of accuracy that are worthy of note. First is the two sprints mid-file. These ones (if I go to 3-second averaging) are about 900w. You can see that while close, the PowerBeat is definitely the lowest of the three, considerably below the PowerTap P1 units. You’ll notice on the longer first sprint there it’s much closer, whereas on the shorter sprint it’s a bit of a gap:
This is because WatTeam over-smooths sprint data under 5-seconds in duration. As you can see above for that longer duration it gets very close, but the shorter duration not quite as much. WatTeam says they can address this via software, and perhaps that’s true. But as I noted earlier on…then address it. It’s been years this has been going on.
Still, for most efforts under about 750-800w, you’ll never notice this. It’s really only for sub-5 second efforts above that range that I see it occur. These sprints, all below 750w, don’t show that occurring:
Overall, beta or not, things are actually pretty good here. There’s a handful of brief blips here and there on some rougher roads where I see a very slight drop in power (perhaps 20w on 250w) momentarily. But I’ve gotta do a bit more digging on that with a few other power meters to narrow down who precisely is at fault. It’s certainly far better than I used to see with rough roads, but they noted they fixed that a year or so ago.
I haven’t yet found a nice solid nasty strip of cobbles in Amsterdam to easily test these sorts of things on (all ears if someone knows of a nasty street). But still, there’s plenty of brick roads that are rough enough for now…and I’ll continue to search for ones for my in-depth review later this summer.
In the meantime though, things are looking good.
(Note: All of the charts in these accuracy portions were created using the DCR Analyzer tool. It allows you to compare power meters/trainers, heart rate, cadence, speed/pace, GPS tracks and plenty more. You can use it as well for your own gadget comparisons, more details here.)
Summary:
The WatTeam PowerBeat G3 is effectively an evolutionary upgrade. It’s not revolutionary, and it’s unlikely that existing WatTeam owners would ‘upgrade’ to this version. But for those considering a power meter, especially if you own two bikes – the appeal of quickly moving pods in a matter of seconds between bikes is super appealing. It’s effectively giving you what pedal-based power meters promised (in hype), without the reality that moving pedals between bikes daily isn’t realistic or sustainable. Moving pods though is easy and trivial…and still accurate.
Of course, the pods are a bit beefier than before. Someone ate too many cookies. But like bulking up for winter, that extra weight comes with the benefit of more resiliency against the elements (read: rough handling), as well as the flexibility to move between bikes. All in all, I think it’s actually a good trade-off. I just hope to see the concurrent ANT+/BLE part done by the time they launch.
You’ll, of course, have to expend some time on installation, but the steps aren’t hard to follow. The video prompts and app-guided process make it easy enough that almost anyone could do it, even if your bike mechanic skills are non-existent.
I’ll aim to do a full in-depth review later this summer once they start shipping. But for now I’m liking what I’m seeing and I think they’re on the right track as a company and with what they’re doing, and the price point is hard to beat.
With that – thanks for reading, and feel free to drop any questions down below!
(Note: You can currently pre-order the WatTeam Gen3 PowerBeat units in an array of configurations (use the drop-down to change variant). Shipping is currently set for late August. Don’t forget that using the above Clever Training link supports the site, and if you use DCR Reader Coupon Code DCR10BTF, you get 10% off. Plus, you already get free shipping. Enjoy!)







Same crank compatibility as the last gen?
Yup.
Why would they not work with Ultegra 6700 if 6800 and 6700 are both Hollowtech II cranks….
Would you recommend this on a cx bike? Would love a cheaper pm so on days I ride the trails don’t have to estimate tss and that important training data collection stuff.
That’s tough, mainly because I haven’t tested the off-road capabilities. I wouldn’t be super-concerned with the new pod style and brushes with cx terrain (old style, for sure concerns).
But having not tested the off-road accuracy, I wouldn’t be able to give much opinion there that holds any water.
@Jody According to WatTeams copy… “now also supports CX, gravel, and any harsh outdoor conditions”
Crank support includes Shimano road models, but not MTB models. Sounds about right to me. The pod location is certainly not amenable to technical mtb riding where you run the risk of bashing the crank arm on logs/rocks.
Pricing? Or no change from Gen2 units?
Oops. My eyes glided right over the graphic, and a text search couldn’t find it. D’uh.
How about battery life? How long do they last for a single charge?
From the website: LiPo 3.7V; 60 hours of usage; 2 hours to recharge
If they’d sort the sprint issues out (I’m primarily a crit racer), and could get around to carbon crank compatibility, I’d be buying multiple sets of these. As it is, just can’t justify the compromises. Sigh…
Will these work with Rotor Cranksets like the 3D24 or 3D Plus which has the grooves?
Does this power meter provide analysis on your pedaling? Some power meters like pioneer provide advanced matrix analysis. Does this have one?
Hi, I have SRAM (apex) cranks that are not on the compatibility list. I tried earlier to get an answer from Watteam about the possibility to install this power meter “on my own” risk, but didn’t get an insights from them on why this crank is not supported.
Does somebody know why this powermeter does not work on certain cranks ? Can it simply not be installed, does it not work at all, or is it a matter of (lack of) precision ?
@Peter
don’t go down this route
I installed on non-supported cranks and it didn’t work
once it’s on the cranks…that’s it.
IIRC it depeds on the material+construction/casting of the crank
I also installed on other supported cranks and all was good.
I have Rival OCT cranks, again – not compatible – I think it has something to do with the way they are made – they are hollow vs solid.
so for me that means new cranks, which means I may as well look at a different meter with cranks included
Powerbeat G3 Single $259 = 222,54EUR (299EUR) -> 76,46EUR/89$ (34%) EU Tax
Powerbeat G3 Dual $399 = 342,83EUR (419EUR) -> 76,17EUR/88.65$ (22%)
Powerbeat G3 2×2 $599 = 514,67EUR (599EUR) -> 84,33EUR/98.15$ (17%)
Slap on the average sales tax of 21.5% in the EU on it (19% to 27% depending on country) and you end up with a 63.24% increase for the single.
Sorry, but this alone kills all my interest.
That’s likely to be the RRP, so inclusive of tax I would have thought.
GBP/EUR prices will be inclusive of taxes – as they have to be displayed. US prices will not include sales taxes as that is how they are displayed.
Take off the VAT from the EUR/GBP prices to compare to the USD prices.
What kills it for me is the inappropriate apostrophe use in “let our pro’s install…” Come on!
Just to play devil’s advocate for a moment- the apostrophe can be used to indicate that something has been shortened. So, perhaps they just shortened the word professionals as pro’s and therefor it is an appropriate, although unlikely use of an apostrophe.
Do you know if they plan to sell “podless” kits? e.g. for those who start with the Dual and want to go to 2×2, or even from 2×2 to 3×2?
They wont. I asked them via email and reply was negative.
Shame. Seems like a missed opportunity to me.
On their website it currently lists the G3 Sensor, Comp Unit and the “Bracket” that holds the comp unit for individual sale.
You don’t really save much money over the “kit” versions if you are buying it all at once but it opens up the possibility of buying the dual sided kit now to put it on one bike and then just buying 2 additional sensors and brackets to let you transfer the Comp Units between the first bike and the second bike.
Sensors $72 each
Comp Units $135 each
Brackets $20 each
All in US dollars. That means only $184 to set up a second bike if you already have a dual sided setup.
They also appear to be saying that the older G2 sensors can be used with the new G3 pods. That means someone with the old stuff installed on a bike might be able to use the new G3 Comp pods (with brackets) on their old bike and then install the new G3 sensors on a second bike and have a 2×2 set up for only $40 over the cost of the dual-sided set up…. of course you have to have already spent the money on the older G2s but might be worth it to not have to deal with charging the pods on the bike……
I don’t think anything is cross-compatible (but happy to be wrong).
The sensors platform portion (the metal bit) is identical between the two, but the actual plug portion is different. In the case of the G3, it’s got a secondary screw that keeps it nice and snug. That wasn’t there in the G2 model.
Again, perhaps there’s some nuance I’m forgetting (it was over a month ago now), but I’m about 97% sure they aren’t cross compatible.
Ray,
You’re right, I sent a second email to them and the response said they misspoke in the previous email. You can not use G2 sensors with the new G3 pods. The pieces of the G3 setup are still listed on the website as being available for individual purchase so you could still piece together a second set of G3 sensors and hangers if you don’t/can’t afford the 2×2 option at the start. But when you run the numbers you aren’t really saving much over the 2×2, just spacing the purchase out.
At least knowing the individual pieces are available means you can repair/replace parts that get damaged, at least until the G4 comes out……..
Put my order in today. Been waiting for them to cycle a few iterations :)
This seems like such a good option for me since I have 2 bikes that I alternate pretty frequently on. But the big caveat for me is that neither has compatible cranks which takes the cost from great to, well, not so great. Unfortunately the crank arms on my bikes is not where I want to make an investment since they are just fine.
But as Ray alluded to in the write up, the thought of constantly swapping pedals is actually not very realistic if I’m riding both bikes constantly. A hub based power meter might work ok since they both have the same groupset but even constantly switching wheels is a little annoying.
The only option that continues to work for me is the Power Pod but that isn’t perfect either. What is the difficulty of crank arm compatibility?
Great, just ordered the previous generation :( (where just = 2 months ago; still waiting for delivery, getting the watteam in UK is a pain).
Ray, from what you observed, will this work with a Stages crank arm?
Officially they say no. They say that the added components of the Stages pod/glueing on the arm might cause differences compared to what they understand is a baseline response for that particular crank arm model.
Unofficially, I asked Stages (not WatTeam) about that thinking, and they say that given the waterbags are supposed to account for any variances crank arm to crank arm (which is true), that it should be fine.
Good to know. I was actually more concerned about space issues, fitting both components on the small space of a crank arm…
Any update on if they have addressed the <5 second bug?
No change to my knowledge.
watteam has the POWERBEAT G3 2×2 for sale on their website. You mentioned a re-evaluation once it was GA.
We await your feedback with baited breath :)
Are they actively shipping it though?
oh. sram cranks are not among the options. We are not quite as excited….
My mistake. Not shipping till Aug 31
Does anybody know if I own a G2 left-hand side only can I upgrade with a right-handed G3? I would imagine that this would be fairly easy to accommodate in the app but I’m not sure. I love my left-handed G2 but I am thinking of upgrading and it would be great to upgrade with a right-handed G3.
For a few cobbles around Amsterdam try out the Kanaaldijk, not a long stretch, but it has some nasty bumps
link to goo.gl
Is it absolutely necessary to install this while the cranks are on the bike? I have a set of ultegra 6800’s that i’m waiting on some BB shims to install in my bb30 (thanks specialised), so they’re just sitting on my desk, next to my powerbeats….just taunting me…
Hi, Ray. Based on your recommendations, I have preordered the dual sided version from Clever Training. However, I noticed something unusual in the outdoor ride data. For most of the ride, especially towards the second half, the left watteam unit tracks power noticeably lower than the left powertap P1 pedal (~30W at 150W). The result is that the average power of the ride is 10W lower for the watteam than for the other two power meters.
GPLama, in a youtube video where he previewed the same power meter, showed an identical result but with his right unit tracking lower. Have you found a cause for this discrepancy?
WatTeams facebook timeline says they’ve started shipping the G3 version now, with an impressive picture of a huge lot of stacked boxes. I’m hoping for your in-depth review of the final product soon :-)
Sadly, their timeline is also full of negative comments about the older G2 version, especially when it comes to the “life” of the sensors. Many seem to have problems after a few weeks with dropouts or erratic readings.
I don’t have it on the near-term list to be honest. Mostly just because I haven’t received a final unit yet.
I received my gen 3 dual unit yesterday and finished installation and setup today. The gluing process was pretty straightforward on my R8000 crankset. Calibration was easier still. However, the power output is weird. It is almost half of what my trainer shows, even after multiple rests of the zero offset. Both sides are outputting data. No idea how to fix this. This power meter is a very risky buy if you don’t already have a reliable reference point to test it against.
That’s no good. How did you get on with their support? I just received my g3 single today and will be attempting the install over the weekend. I’ve got a Tacx neo which I know is accurate toncomofe against.
Hi Brett. The powerbeat turned out to be a complete disaster. I went on a ride with the power meter. Halfway through the ride, it started dropping power readout to 0 on flats (during sustained efforts) even when cadence was 90-100. At the end of the ride, the average power balance was 60-40 (r-l) which seemed for too off.
Watteam support had me send them pictures of the sensors in order to confirm that they were installed correctly, after which they suggested redoing the calibration. In the meantime, I went on another ride. This time, not only did power readout drop to 0, cadence kept going down as well. The average power balance came out to 99.6-0.4 (r-l), which means that something was clearly wrong. Batteries were charged to 80% so that wasn’t an issue.
I’ve decided to return the power meter to clever training for a refund. Sadly, my cranks will now have two patches of missing paint, ruining their aesthetic and their resale value. I would personally stay away from powerbeat.
When can I look forward to the in-depth review? Really tempted to try these out.
Received my G3 dual and unable to get good results on the Garmin. I have a vector Left pedal power and KICKR. First ride showed Powerbeat to be 100 watts less than Garmin. Recalibrated with water bags. I got better results when comparing the garmin with it running within its own app but when I switched it to Ant+ and compared to Kikr, whiich I had already confirmed was congruent with Vector, it was 30 watts less and more as you put more power down. Sent pictures to WatTeam of sensor placement. I was unable to get a successful calibration on garmin head unit with PowerBeat. Error 436, 437, 439. Obviously something not right here.
I have this sitting in my closet unopened. I also ordered a 9100 crankset and absoluteblack chainrings to go with this. Now I’m on the fence about installing it. Considering returning it and looking for something else. I need something compatible with the Dura ace cranks as pedals and hub are not an option on this bike, and I need 46/30 subcompact rings.
Ok so I received my Powerbeat G3 single from clevertraining (using the DCR discount) last week and completed the install on an Ultegra R8000 crank arm. First of all it took me a lot longer than the 45mins listed as I was double and triple checking each step in the manual and youtube videos. Install went fine, had a bit of trouble sanding inside the lines of the plastic sticker with the provided sandpaper, ended up oversanding but wanted to make sure the entire contact patch was a nice clean silver.
Had to borrow a heater as no one sells them here in sunny QLD, Australia as we approach summer. After waiting the 24hrs for the epoxy to dry in a toasty warm room, installed the pod, connected up to the app and everything seemed fine. Calibration with the water bags went as expected as well. Did a very quick test ride and visual comparison of the power output through my Tacx Neo trainer vs the G3 connected to Garmin edge – seemed to be in the quite close to each other for both power and cadence. The next day I rode a 6hr Gran Fondo and had no issues with dropouts at all. Power looked to be correct for what I know my thresholds are a given HR.
Will do a more extensive comparison testing this week vs the known accurate Tacx Neo, might even stump up for the DCR analysis tool and update my findings here. But so far I’m happy for the bargain price.
Here are the results of my first two comparison rides –
Ride 1 – TacxNeo vs PowerbeatG3 – 3x90sec efforts, 30mins steady
Avg Power 175.91w vs 174.94w
link to analyze.dcrainmaker.com
Very close!
Ride 2 – TacxNeo vs PowerbeatG3 – 2 x 20mins at sub threshold
Avg Power 209.21w vs 199.04w
link to analyze.dcrainmaker.com
Summary – G3 pretty constantly 10w under. Not sure if it was a leg imbalance coming through, I’ve never had it tested. Was quite tired after a big weekend of riding outside. Variance seemed to get bigger as the workout went.
Do the single sided units have the quick release button? I know they aren’t meant to be swapped, but if they could be you could have single sided power on multiples bikes for a very affordable price.
The single-sided unit does have a quick release button. However, throughout the use of my Powerbeat g3 I’ve had problems connecting to my Garmin 920xt as well as some dropouts when using it on Zwift. Also, comparing it to a few rides on a Wahoo Kickr, the power output seems to be much lower on Zwift with the g3. My FTP recorded on the Kickr was 272 but I struggle to maintain 200 for a minute when using a ‘dumb trainer’ with the Powerbeat g3 connected. The same bike used as well. Very frustrating! I have yet to try and use the Live Ride feature that displays power on my phone for an outside spin but my expectations are low. I do not believe that I can recommend this power meter
I received an email from Powerbeat and seem that they will don’t sell anymore the G3 nor other power meter, at the least until they will found someone interested to their technologies.
I couldn’t get the installation to work at home on my Potenza cranks, so Watteam offered to do it for me. It took them 8 weeks to do it, they didn’t know the difference between a crank and a bottom bracket, and when I got it all back, the power measurements were way off. Watteam is now out of business, but I’d say it was probably just a cash grab from the get go. This also points out the uselessness of one off product reviews. Sure, DC Rainmaker may have gotten a good install, but over a larger group of people, problems may have come to light. Powermeters are complicated, and it’s silly to think they’d ever be cheap.
What about installing it on a indoor bike crank?
Just got an email back that Watteam no longer sells or supports their Powerbeat power meters. Contacted them because their app wouldn’t launch in iOS 12. Too bad. Was a great alternative for an inexpensive double sided power meter while it lasted. Time to dig into this years power meter recommendation post and make a purchase.
Wow you are right. Only last week I used the app to calibrate my G3, and now it won’t get past thr launch screen… they must have stopped paying their hosting bills and the app relies on “phoning home” before launching.
Wow same with Android. You’re right about the call home as Calibration numbers got stored in a central database. What irks me is that in their media release they said they’d still support the app on going for existing customers.
I’m going to chisel my G3 off the crank and throw it in the bin. Sick of constantly trying to calibrate it, getting it close to my Tacx Neo, only to have it reading 100watts off the next day. Any tips on how I can hide the ugly silver oval on the crank arm, some type of paint from a hobby shop maybe?
I used a knife to scrape off the glue and then applied a piece of black electrical tape. Simple and clean.
Thanks, I’ll do the same. Cheap and quick.